Step-by-step guide to setting up your Adobe Illustrator files for spot UV or gold foil printing
Adding spot UV and foil elements to your design is a great way to make your print products more upscale and sophisticated. But in order to achieve the desired end-result and actually produce such print product, you need to know a thing or two about how to correctly set up your print files. Even though spot UV and foil printing had been around for decades, they are only required for certain types of products, so even experienced graphic designers may have troubles with setting up the print files simply because it’s something they are doing for the first time.
The rules for setting up spot UV and foil printing files are not complicated, but they are strict, and if you are a graphic designer, knowing this and setting up the files correctly is a crucial part of your job.
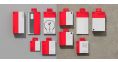
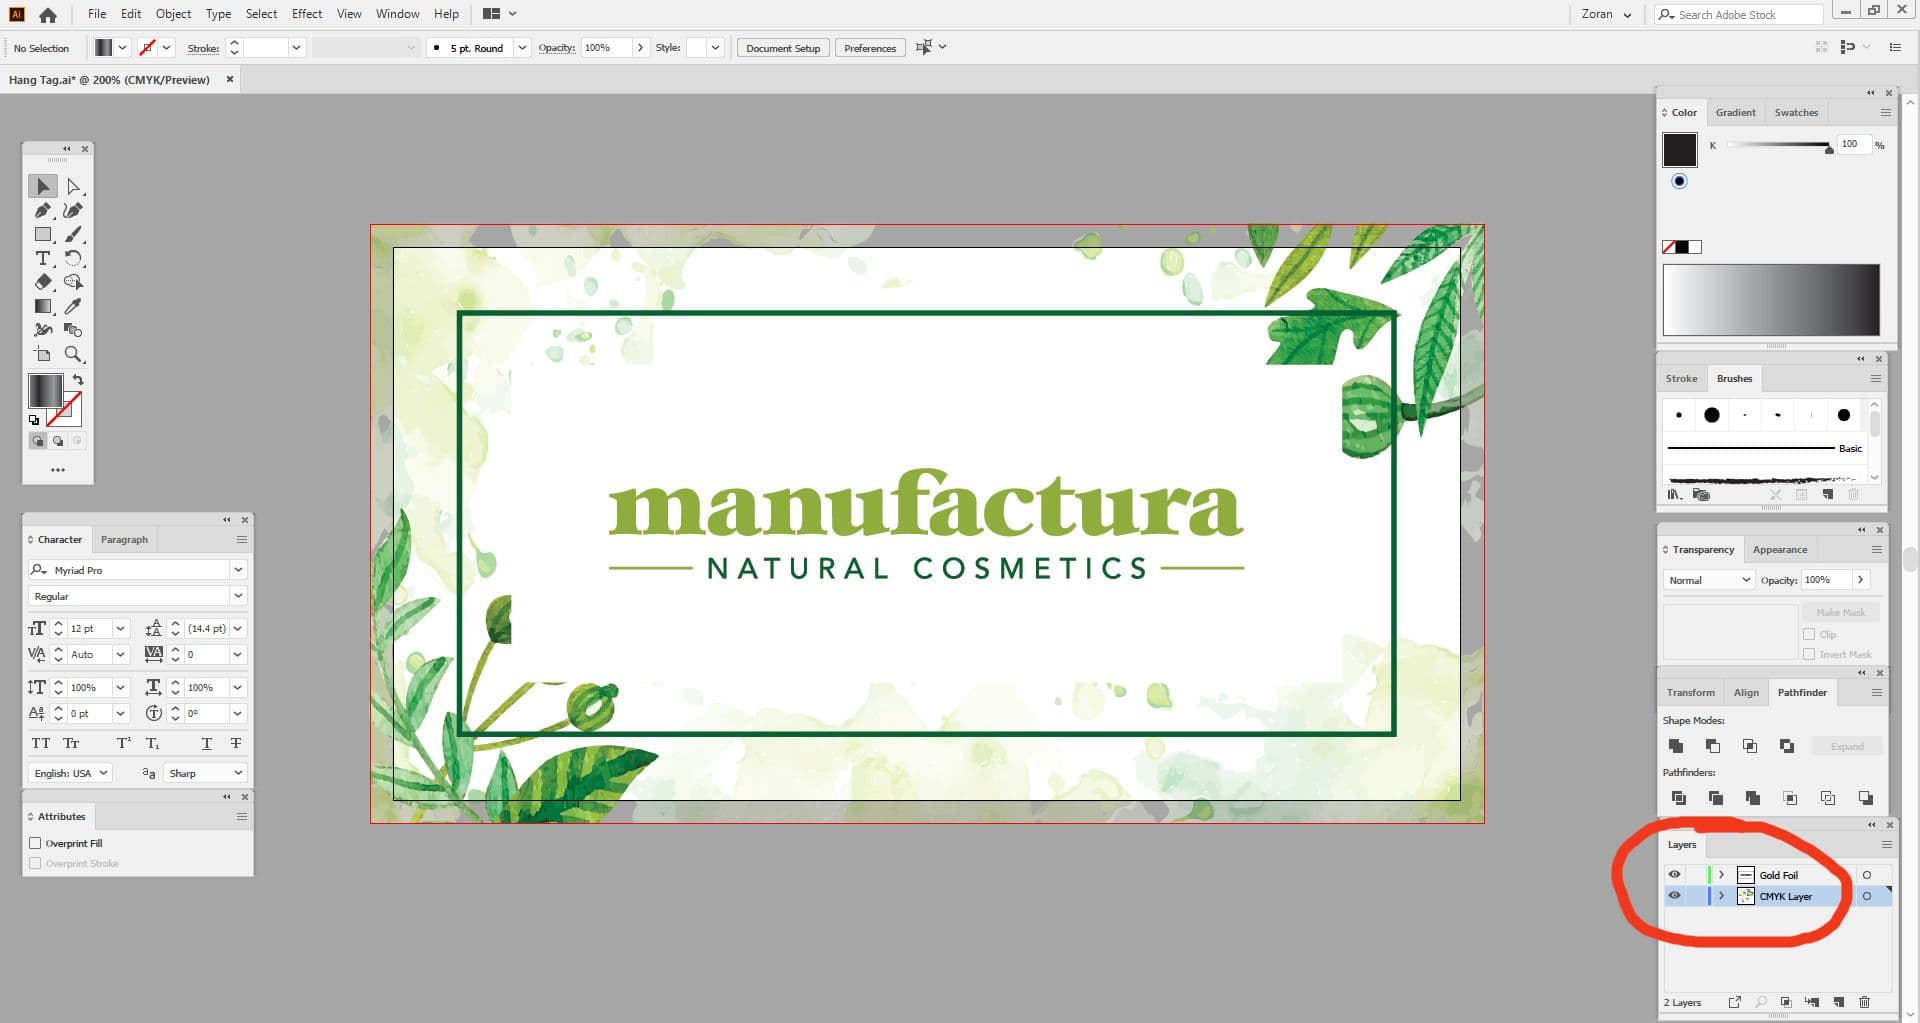
For demonstration purposes, let’s say we are designing a hangtag, and we want it to look like this:

In this case, our Abode Illustrator file will look something like this:
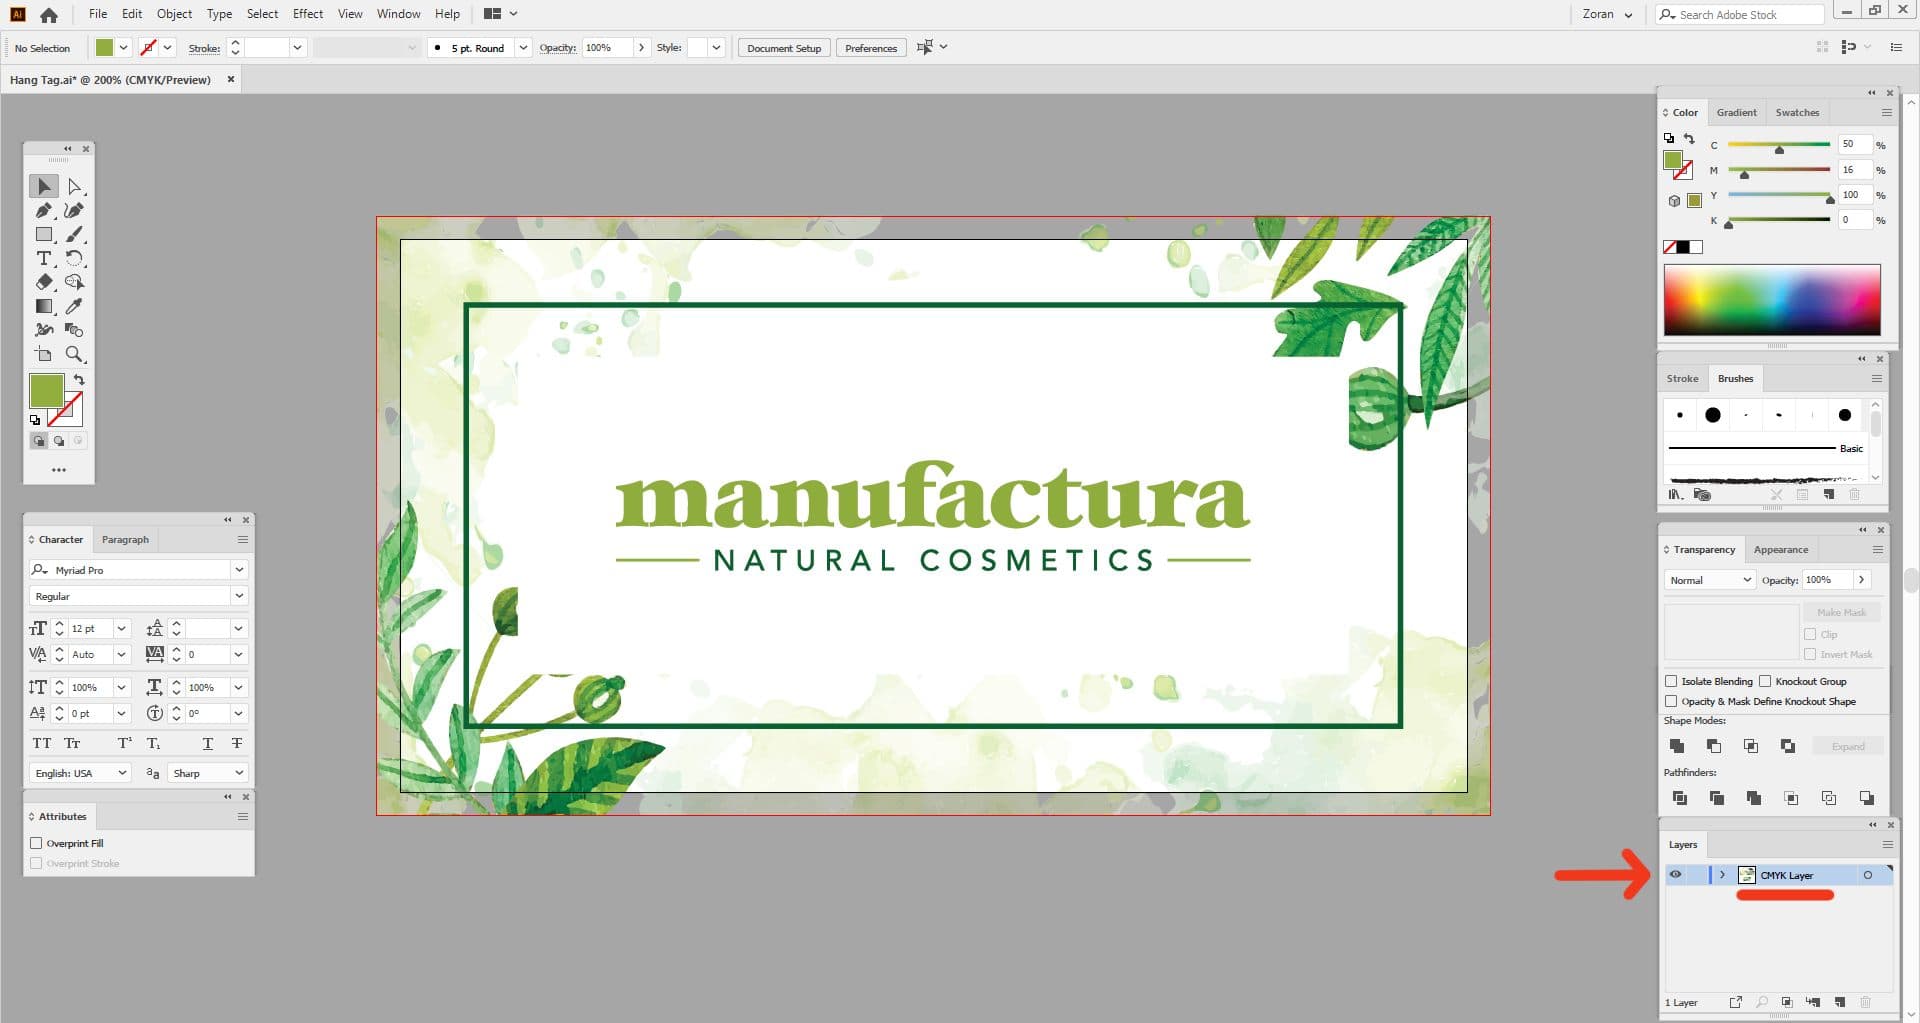
The important thing to note here is that all the design elements are on the same layer. And this is very important because the main file setup principle is: keep your CMYK/Pantone design elements on one layer, and your spot UV/foil objects on a separate layer.
Adding a Spot UV Layer
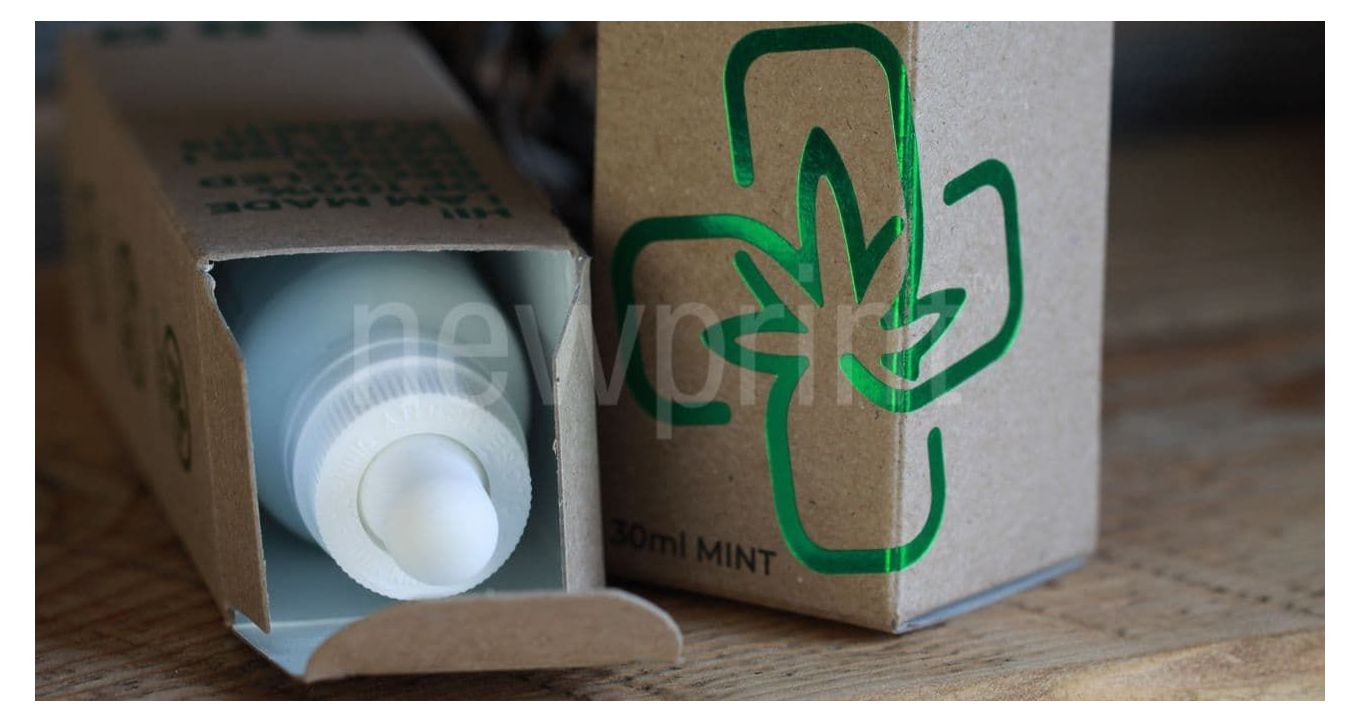
Spot UV basically means adding coating to a specific area of the design, rather than to the whole paper surface (hence the term ‘spot’).
Let’s say we want to add gloss coating over the logo and the frame on our hangtag. To do so, we need to create a new layer that will contain only the objects we want to be coated.
So the first step here is to create a new layer and name it ‘Spot UV’. Then, we need to select all objects that we want to have coating (in this case logo and the frame), copy those objects by pressing CTRL/COMMAND + C, then click on the new ‘Spot UV’ layer to make it active, and then go to EDIT/PASTE IN PLACE. This action will duplicate the logo and the frame and place them at the exact same position on the artboard, but the duplicate will be on a new, separate layer. The only thing left to do is to make the objects on the ‘Spot UV’ layer all black (100%K).

Making all objects 100%K is a crucial step because the pre-press operator needs to create a separate printing plate for coating, and this black layer will enable them to produce a plate with 100% solid coverage.
To recap, your entire design should be on the layer that contains your CMYK or Pantone objects, and your spot UV layer should contain a copy of the objects you want to have coating, made 100%K. During the print process, your CMYK/Pantone artwork will be printed first, and the spot UV will be applied on top of the printing ink.

Adding a Foil Layer
What if we want our logo and the frame to have gold foil instead of being printed with ink?

The principle remains the same - we’ll place all the colour elements on one layer, and the foil elements on a separate layer.
We start by creating a new layer, and let’s name it ‘Gold Foil’.
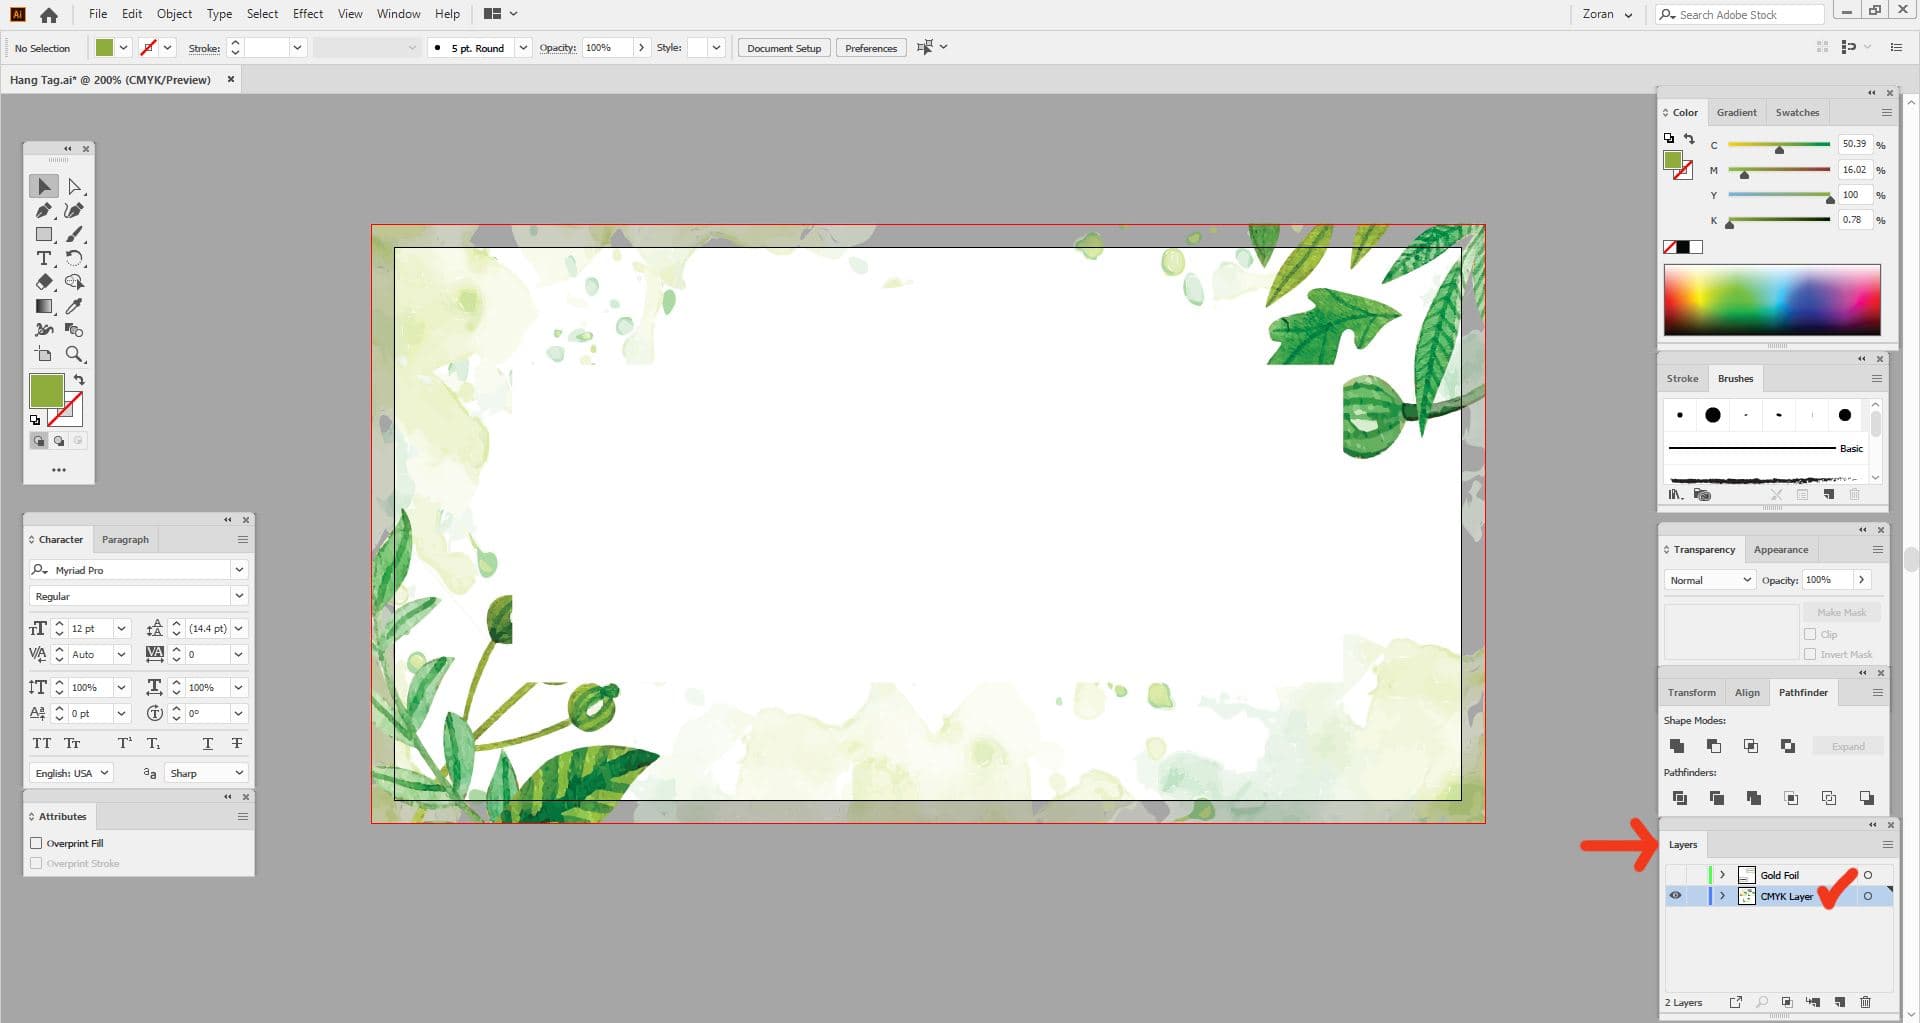
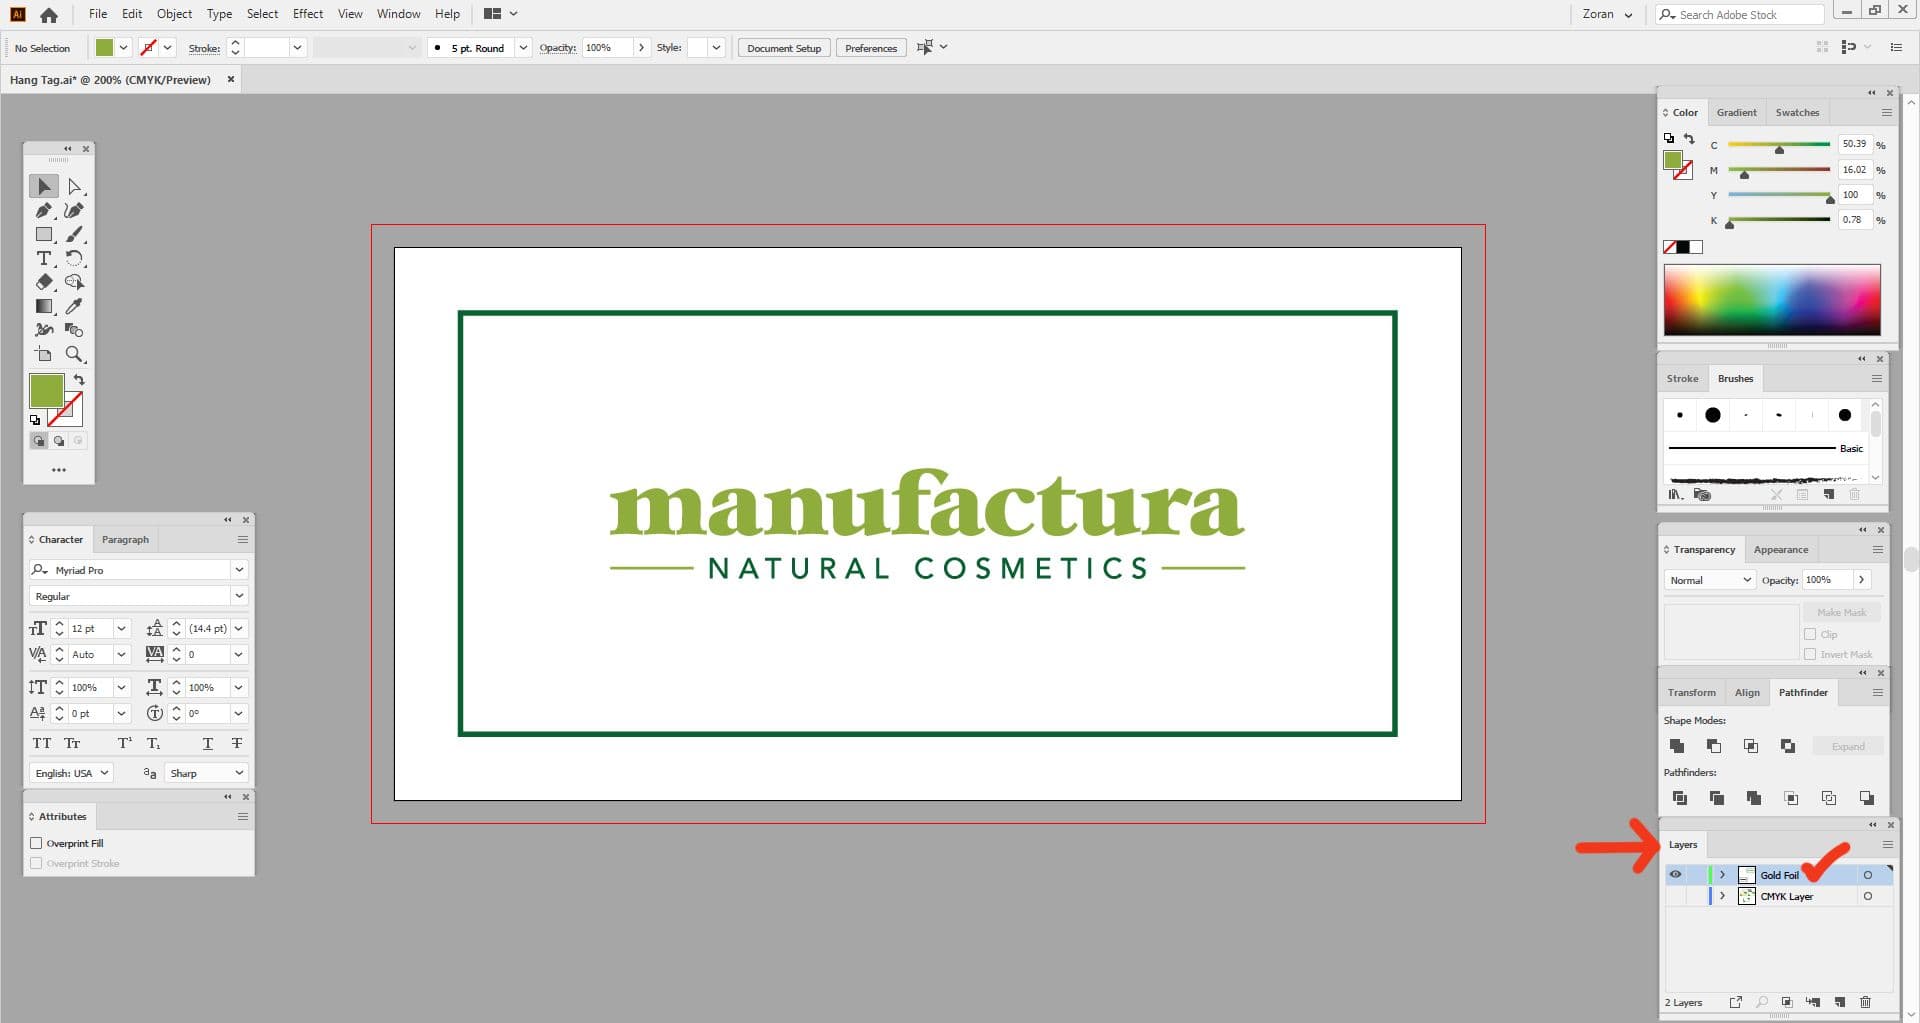
At this point, our new foil layer is empty. We now need to move the logo and the frame from the CMYK layer to the foil layer. Note that now, unlike with creating spot UV layers, we don’t want the CMYK version of the logo and the frame on the CMYK layer. We want them foil stamped, and whatever is under the gold foil will no longer be visible. This is why we don’t copy the logo and the frame, we move them from one layer to the other.
Select the objects you want to be foiled (in our example it’s the logo and the frame), press CTRL/COMMAND + X to cut these objects from the CMYK layer, click on the ‘Gold Foil’ layer and then go EDIT/PASTE IN PLACE.
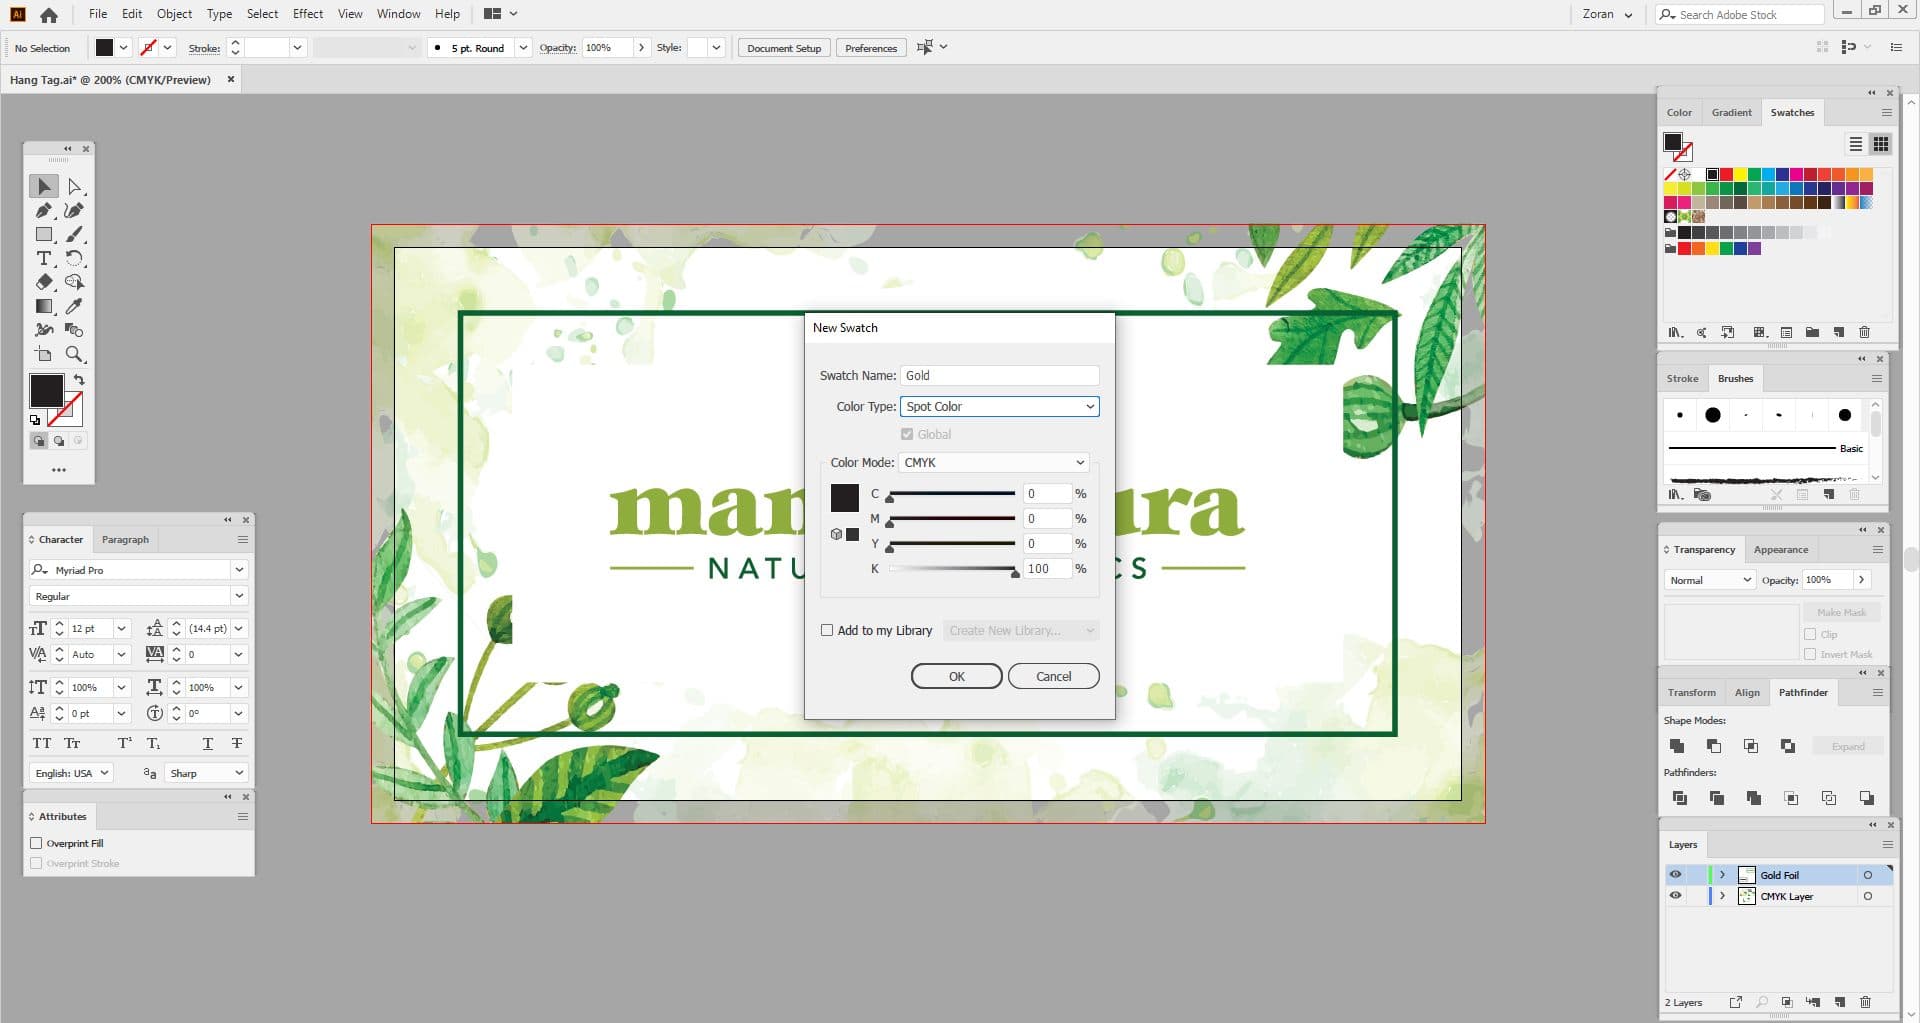
Same as with spot coating, we now need to make it clear that this is a foil layer and that this part of the artwork will not use printing ink, but a foil. To do so, we need to create a new spot colour swatch.
Go to WINDOW / SWATCHES in order to activate your ‘Swatches’ panel and make it visible. Create a new swatch:
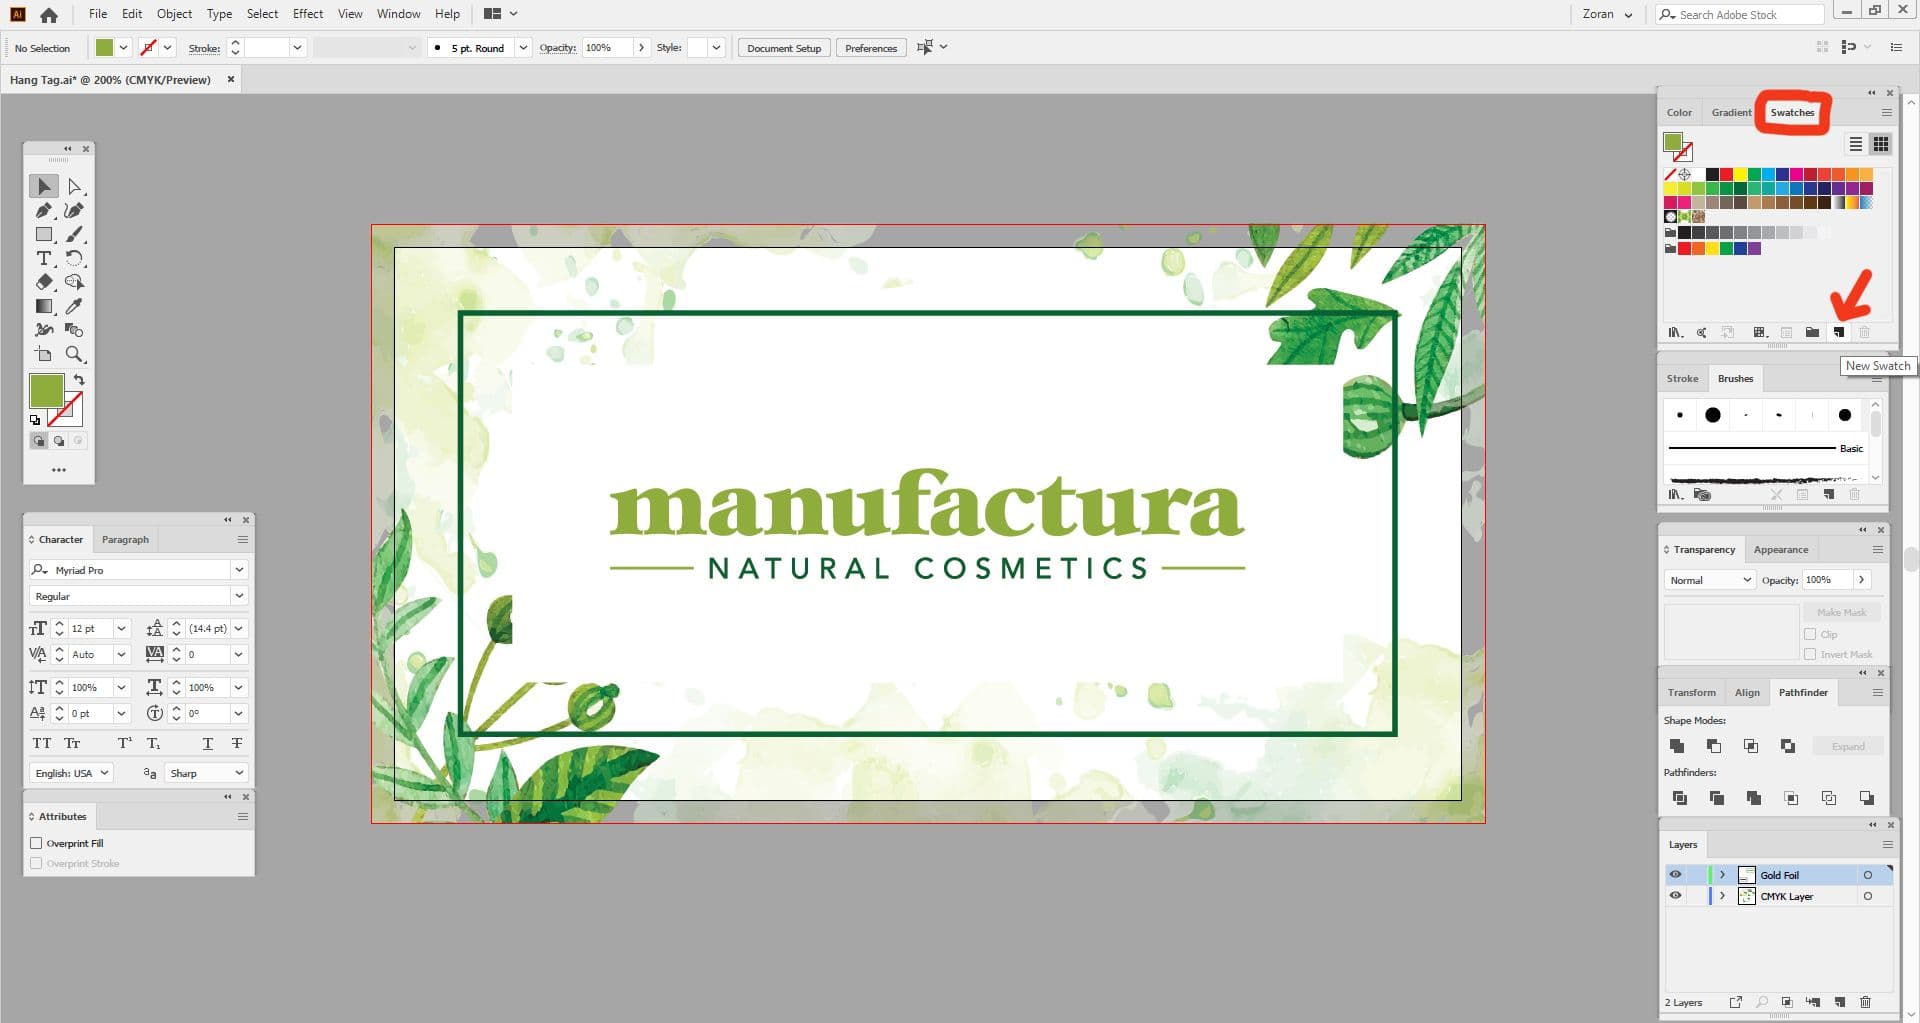
Name the swatch ‘Gold’. For ‘Color Type’ choose ‘Spot Color’, and for ‘Color Mode’ choose ‘CMYK’. Set the CMYK values to 100%K.
Select all the objects on the ‘Gold Foil’ layer and then click on the new colour swatch we’ve just created, to apply this swatch to selected objects.
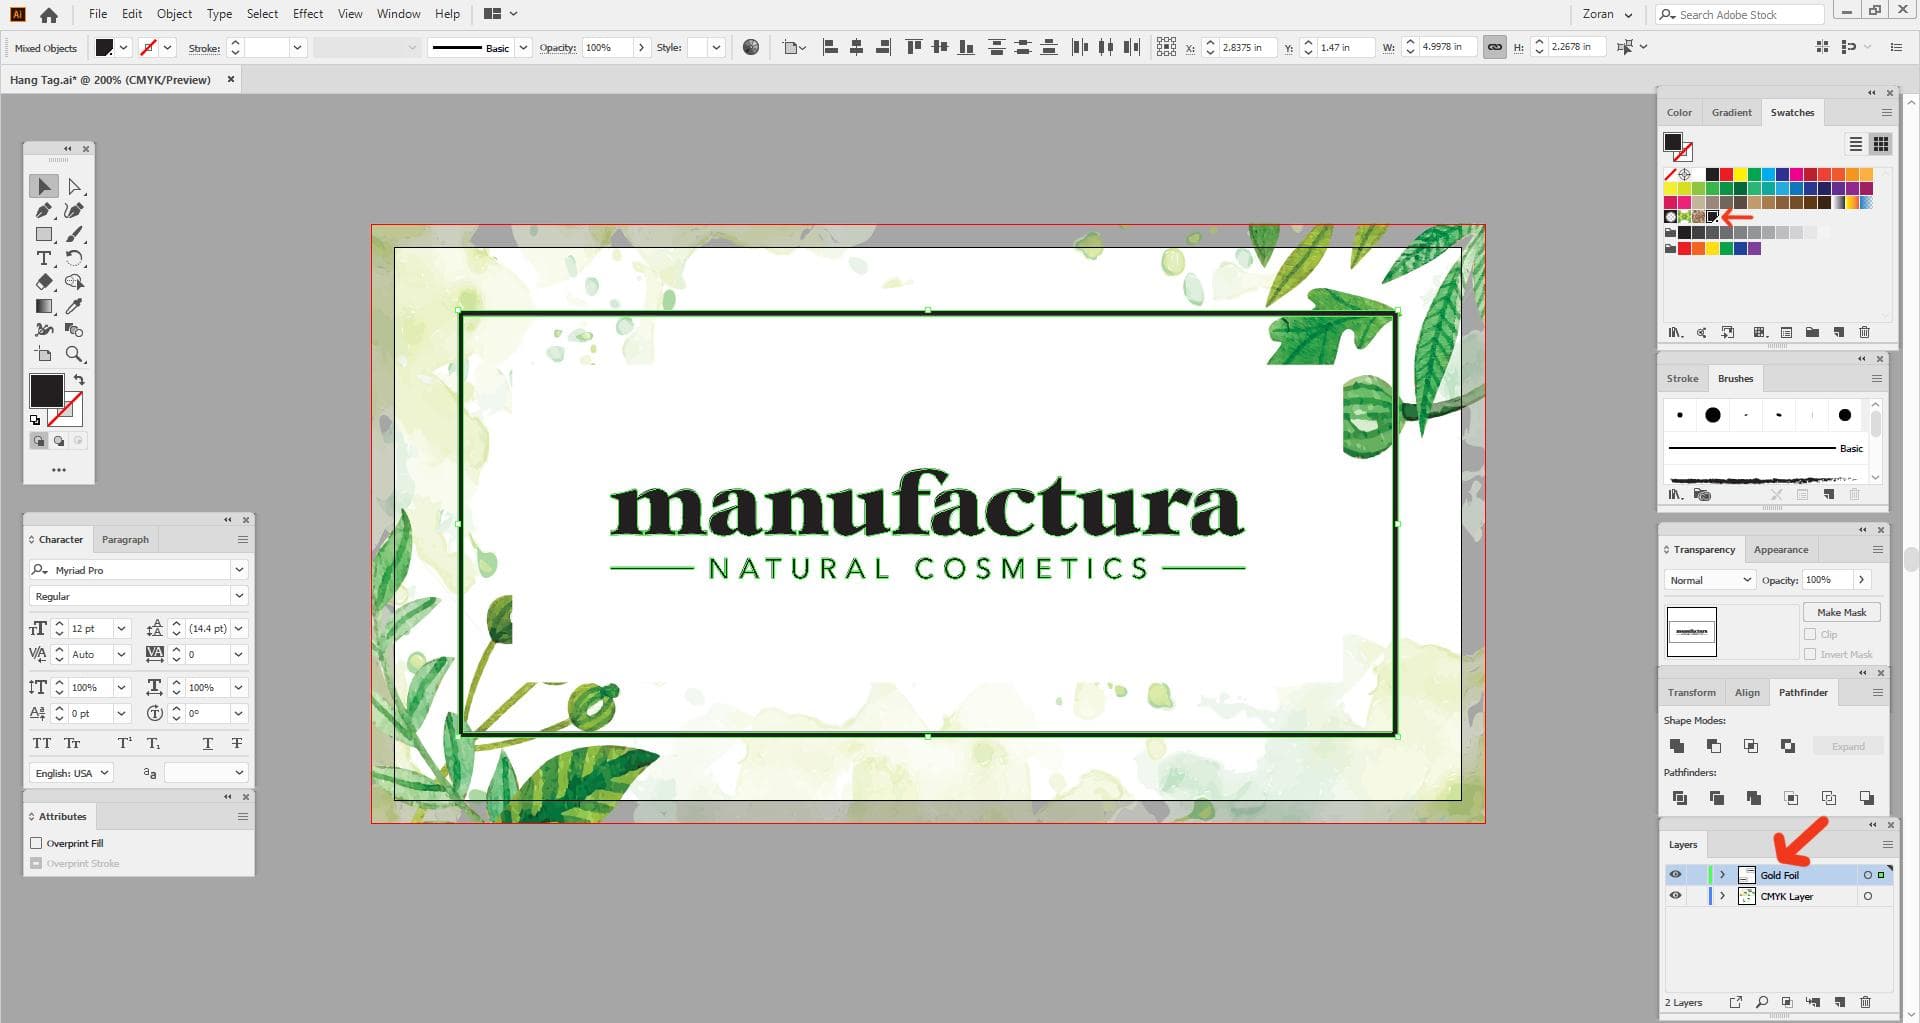
We now have colour and foil elements separated and set up properly, each on their individual layers and with the ‘Gold’ colour swatch applied.
Print PDF Export
The only thing left to do at this point is to export print-ready PDF files. The steps to create PDFs are the same whether you work with spot UV or foil layers.
- Turn off the visibility of spot/foil layer and only have the CMYK/Pantone layer visible
- Go to FILE / SAVE AS
- Choose PDF file type from the dropdown menu and select the destination folder, click SAVE
- In the new dialog box, for the Adobe PDF Preset choose ‘Press Quality’
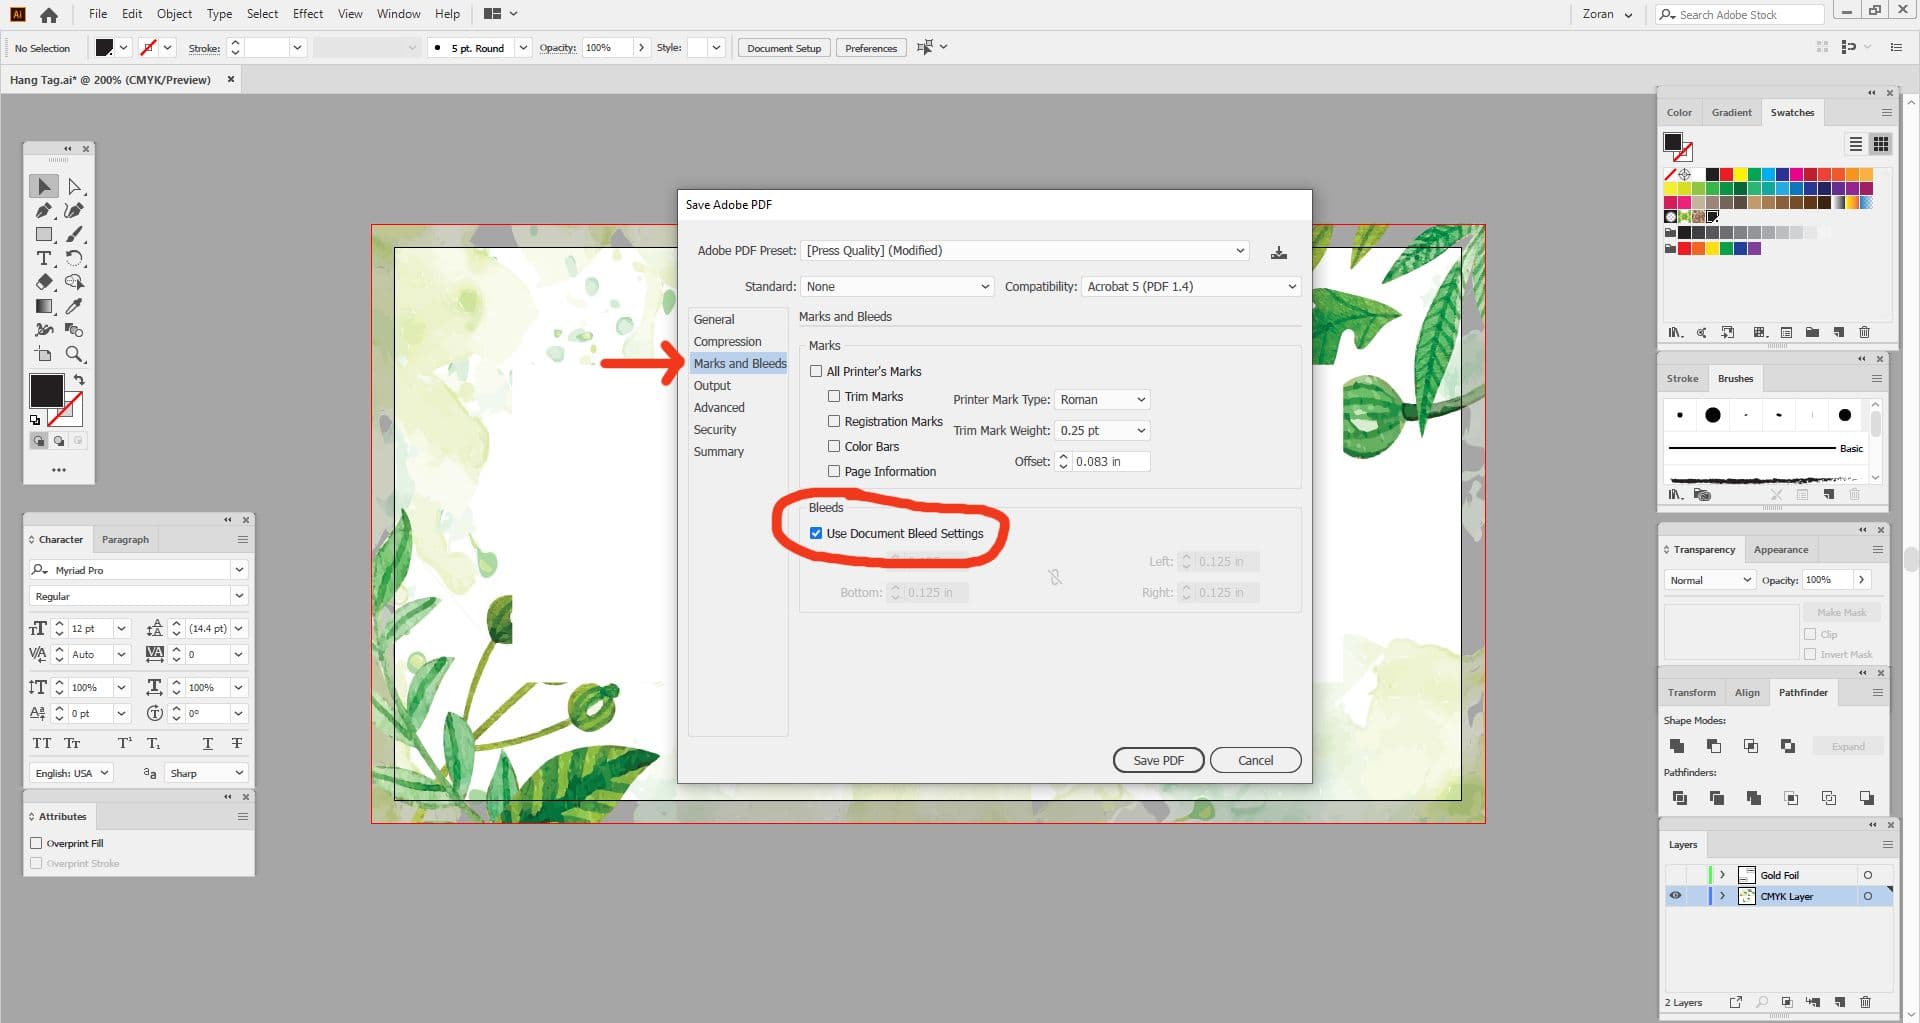
- On the ‘Marks and Bleeds’ tab check ‘Use document bleed settings’
- Click SAVE PDF
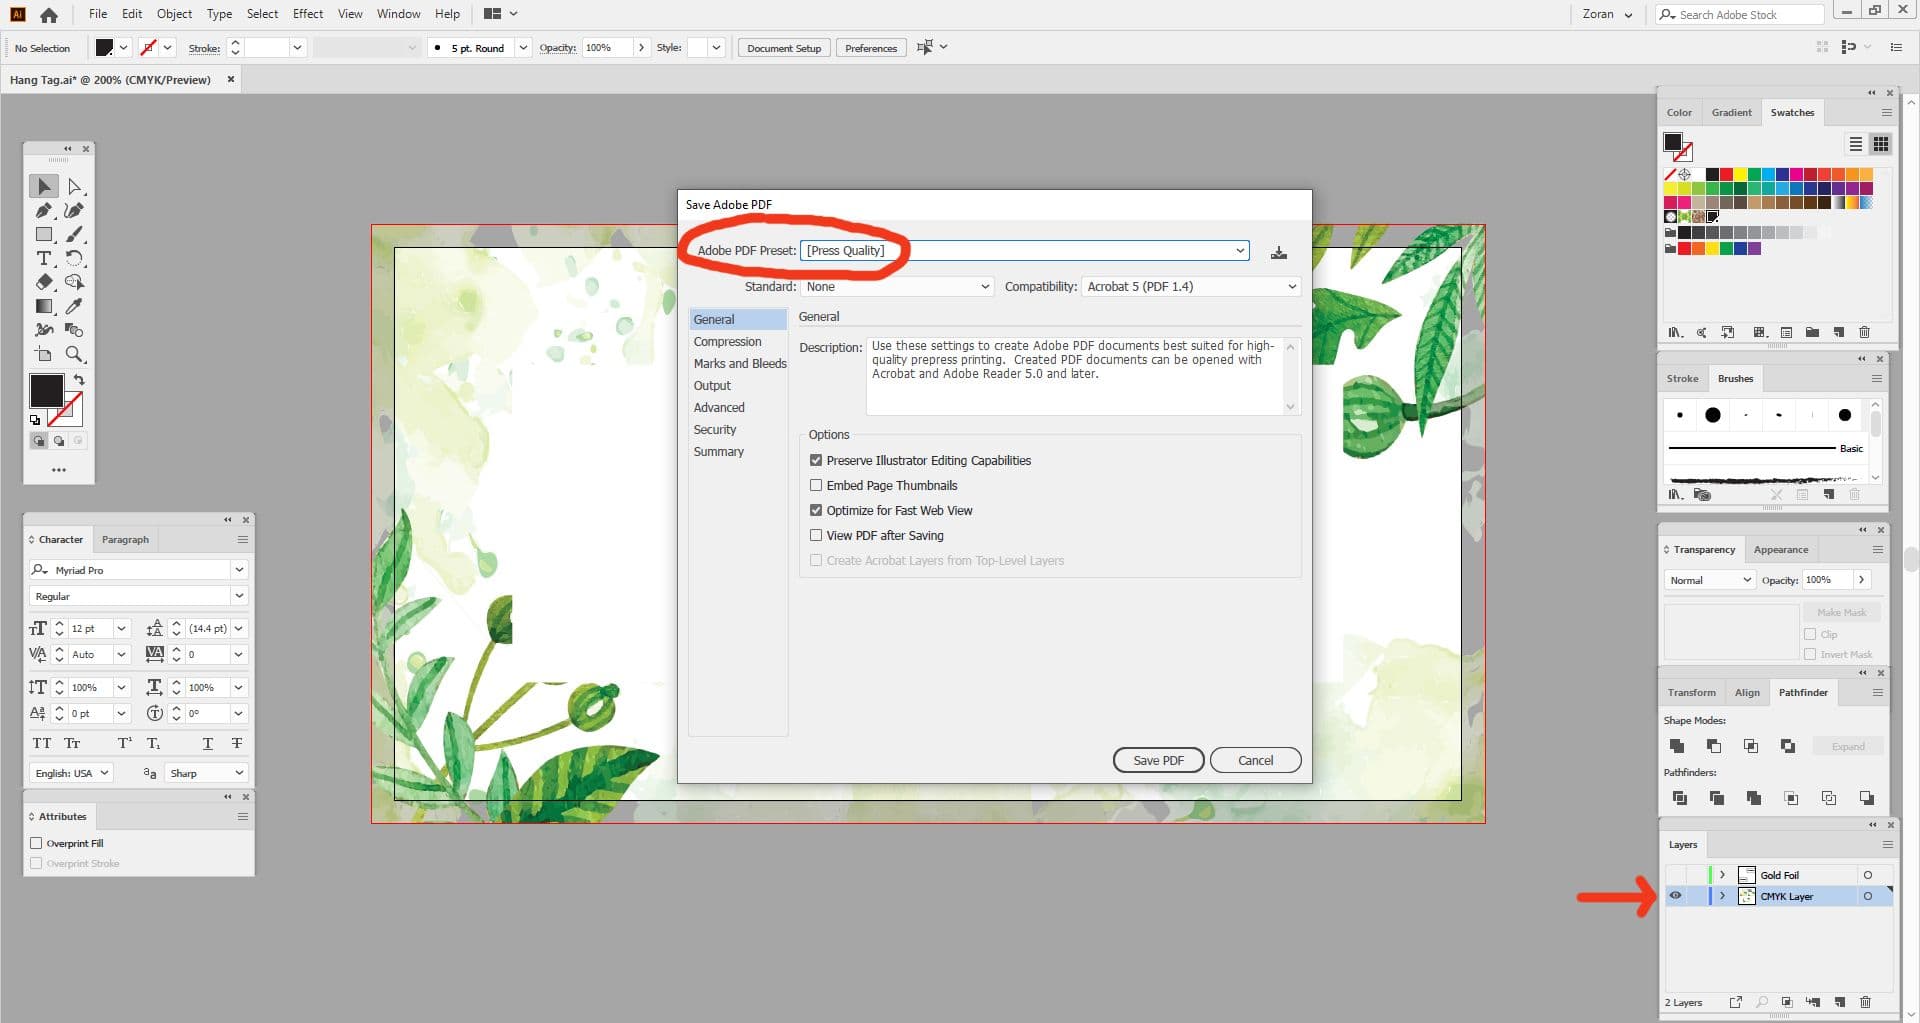
Your CMYK/Pantone layer is now saved as a print-ready PDF file. Next, turn the visibility of this layer off, turn on the spot UV/foil layer and repeat the same steps. You will end up with two PDF files, one containing your CMYK/Pantone artwork, and the other one with spot coating or foil elements.