Language
 United States
How to Set Up Pantone Spot Colors in Adobe InDesign (USA Printing Guide)
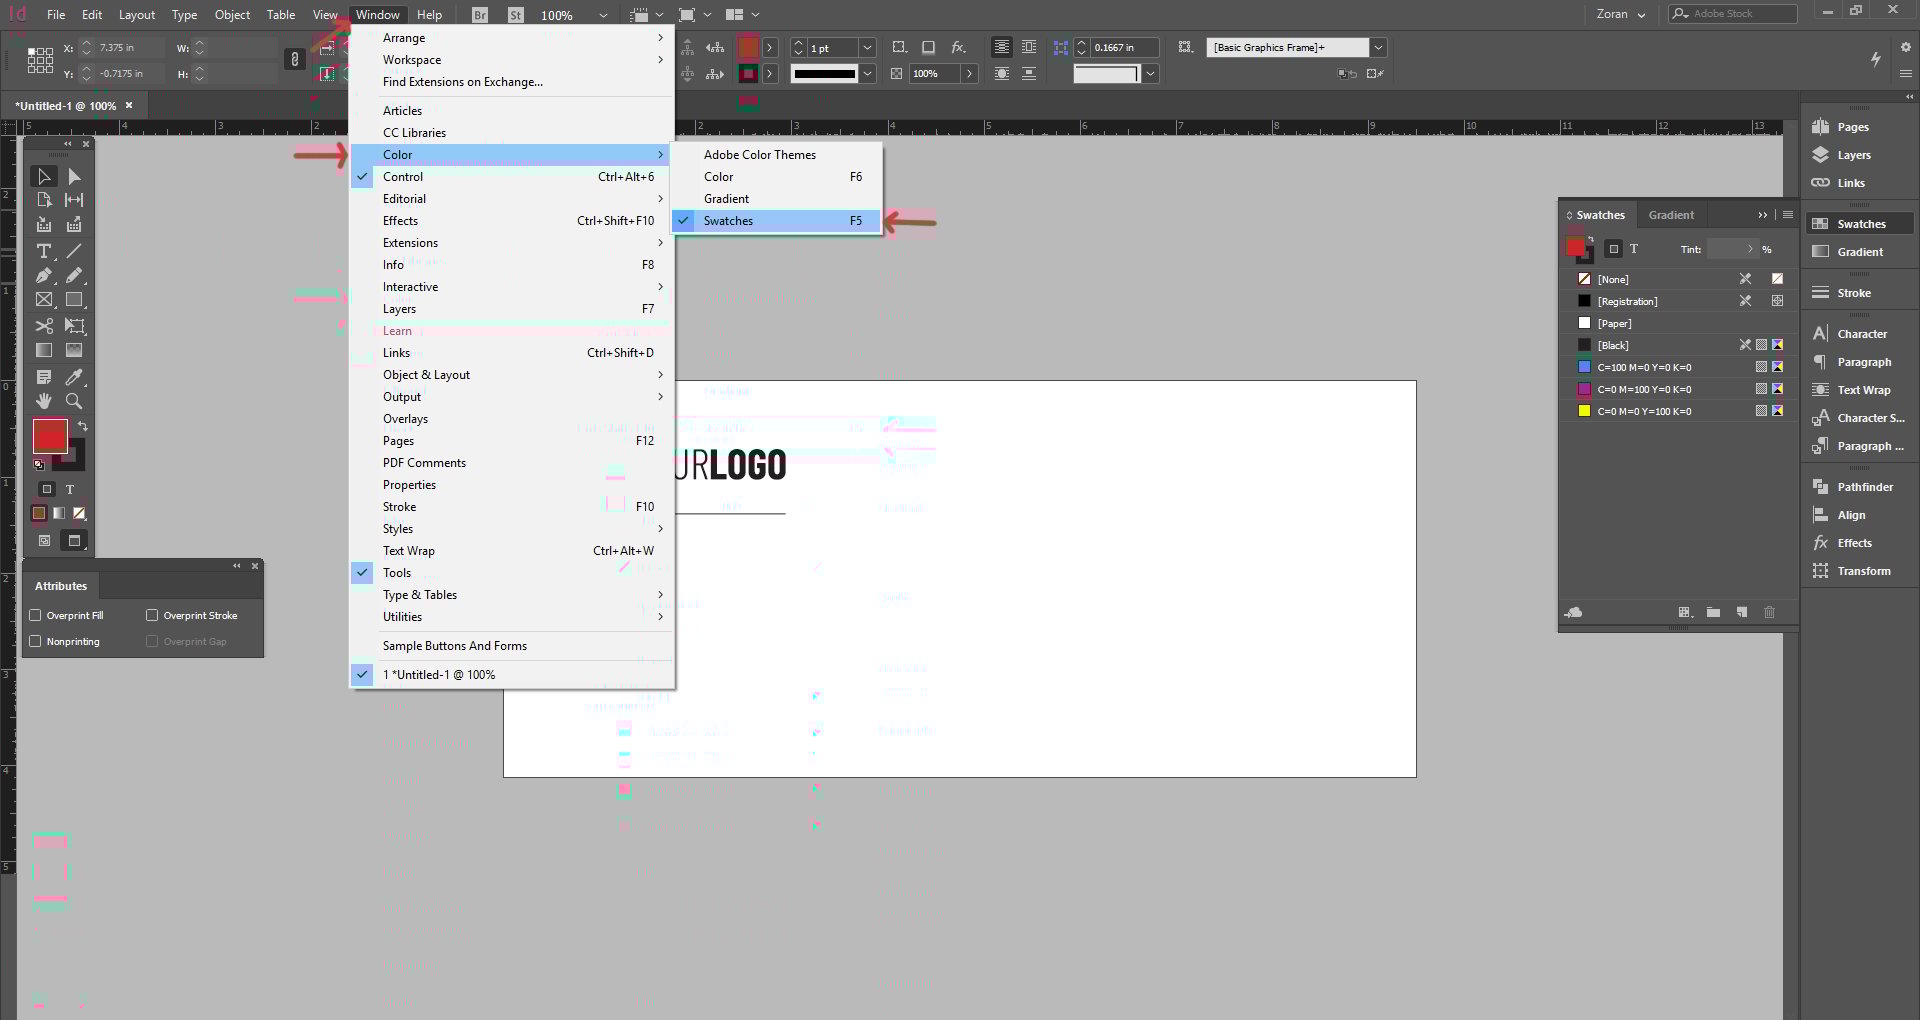
In order to apply Pantone colours to your design, you will need to use the Swatches palette. To make this palette visible, go to Window / Color / Swatches.
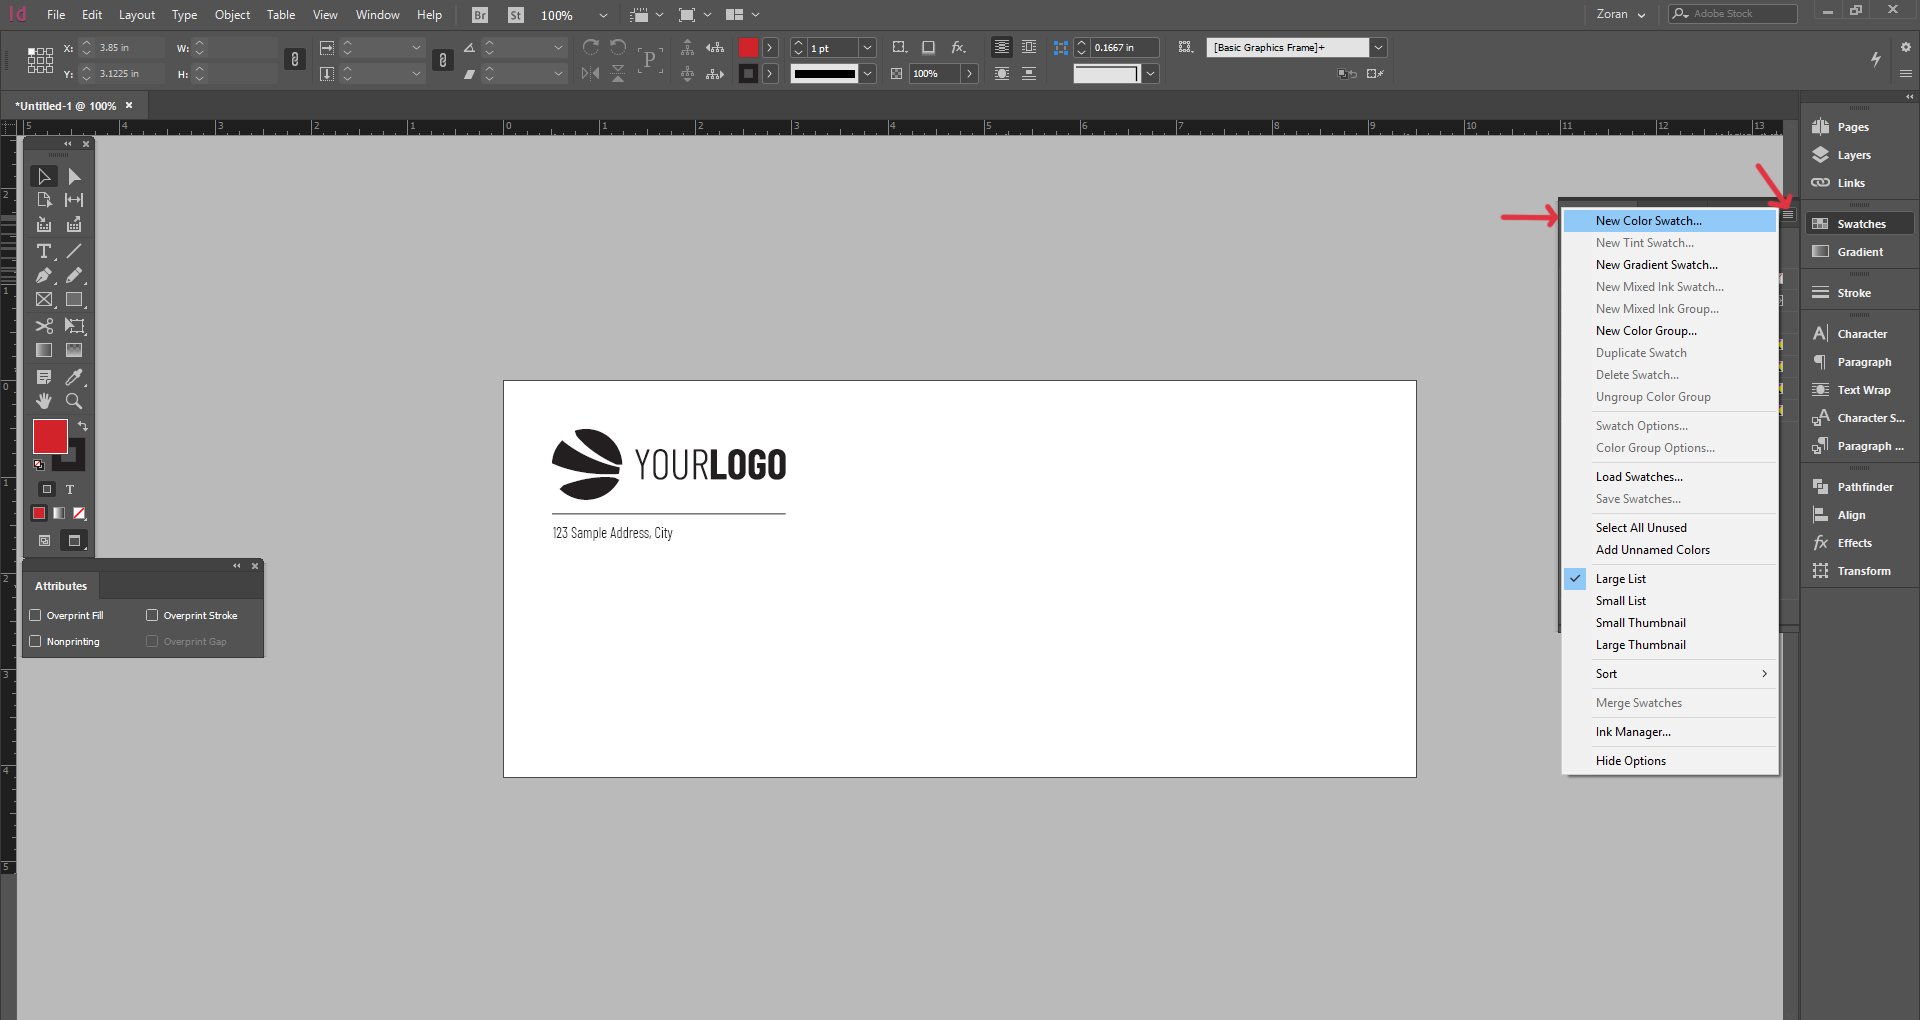
Click on the Swatches palette menu, and then choose New Color Swatch.
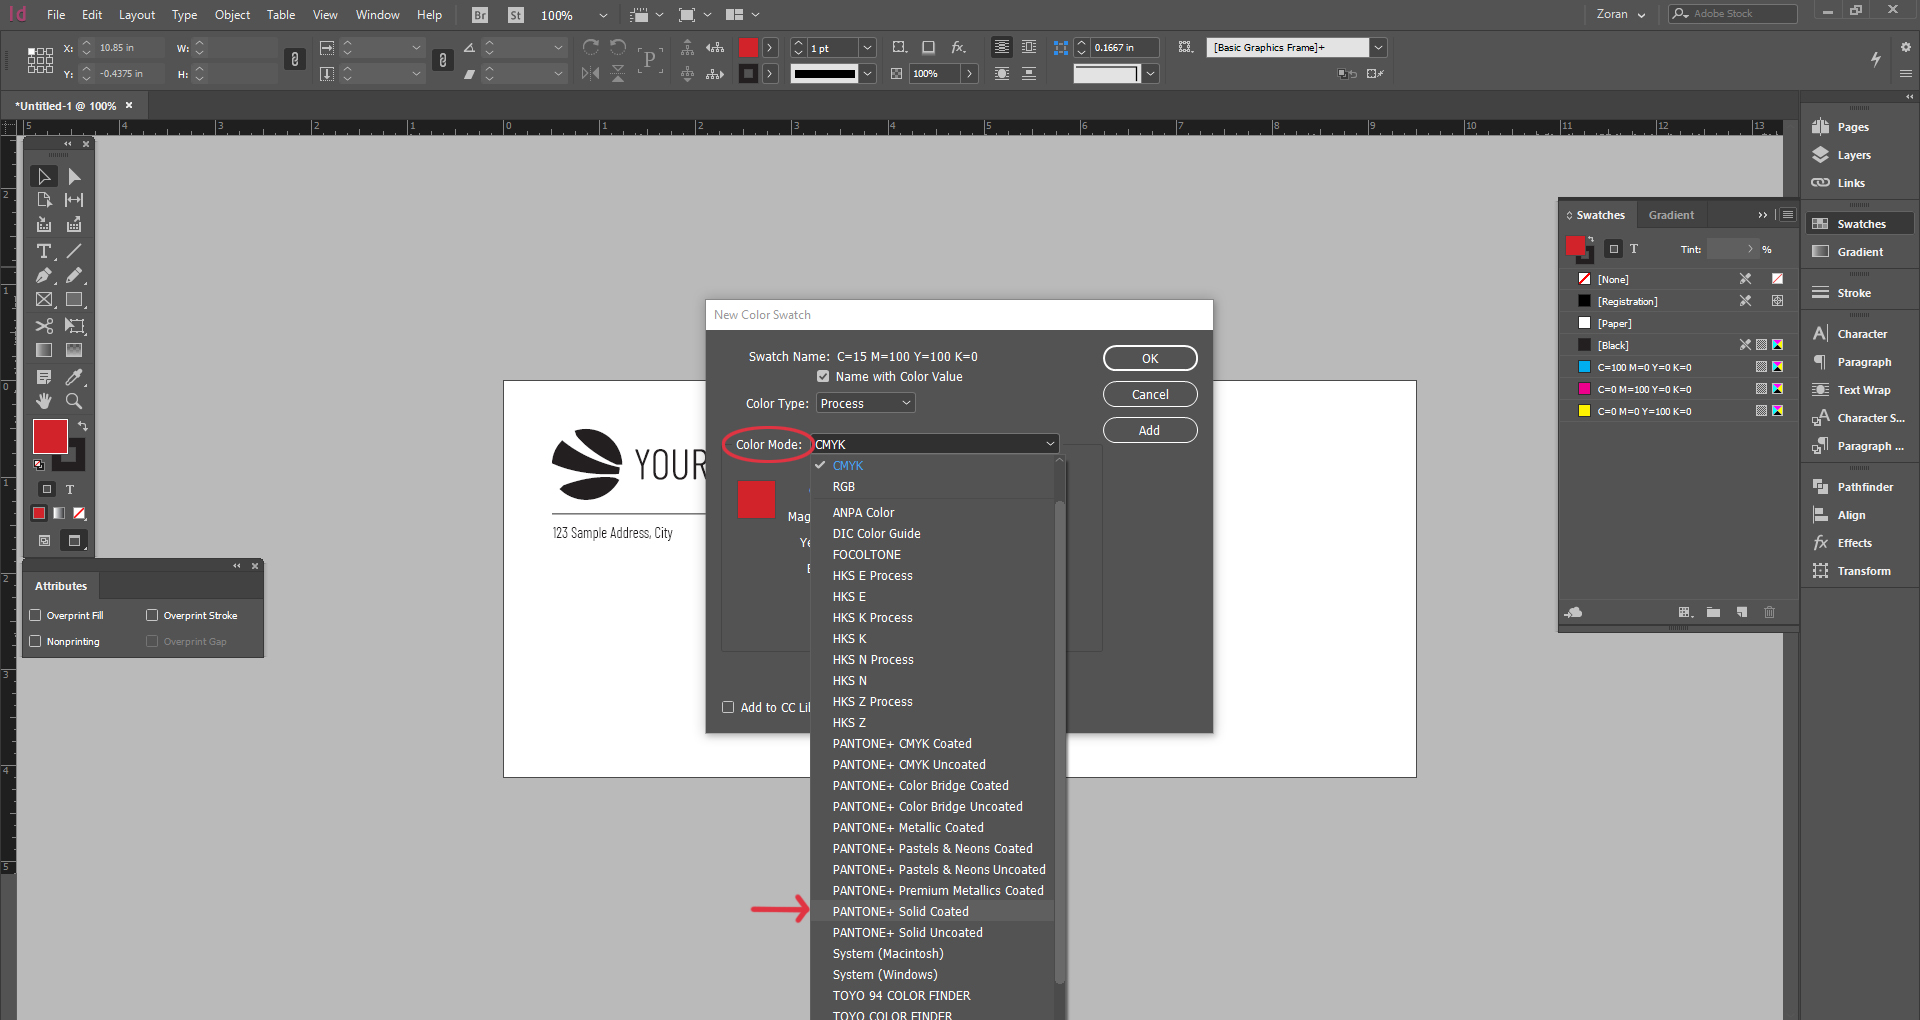
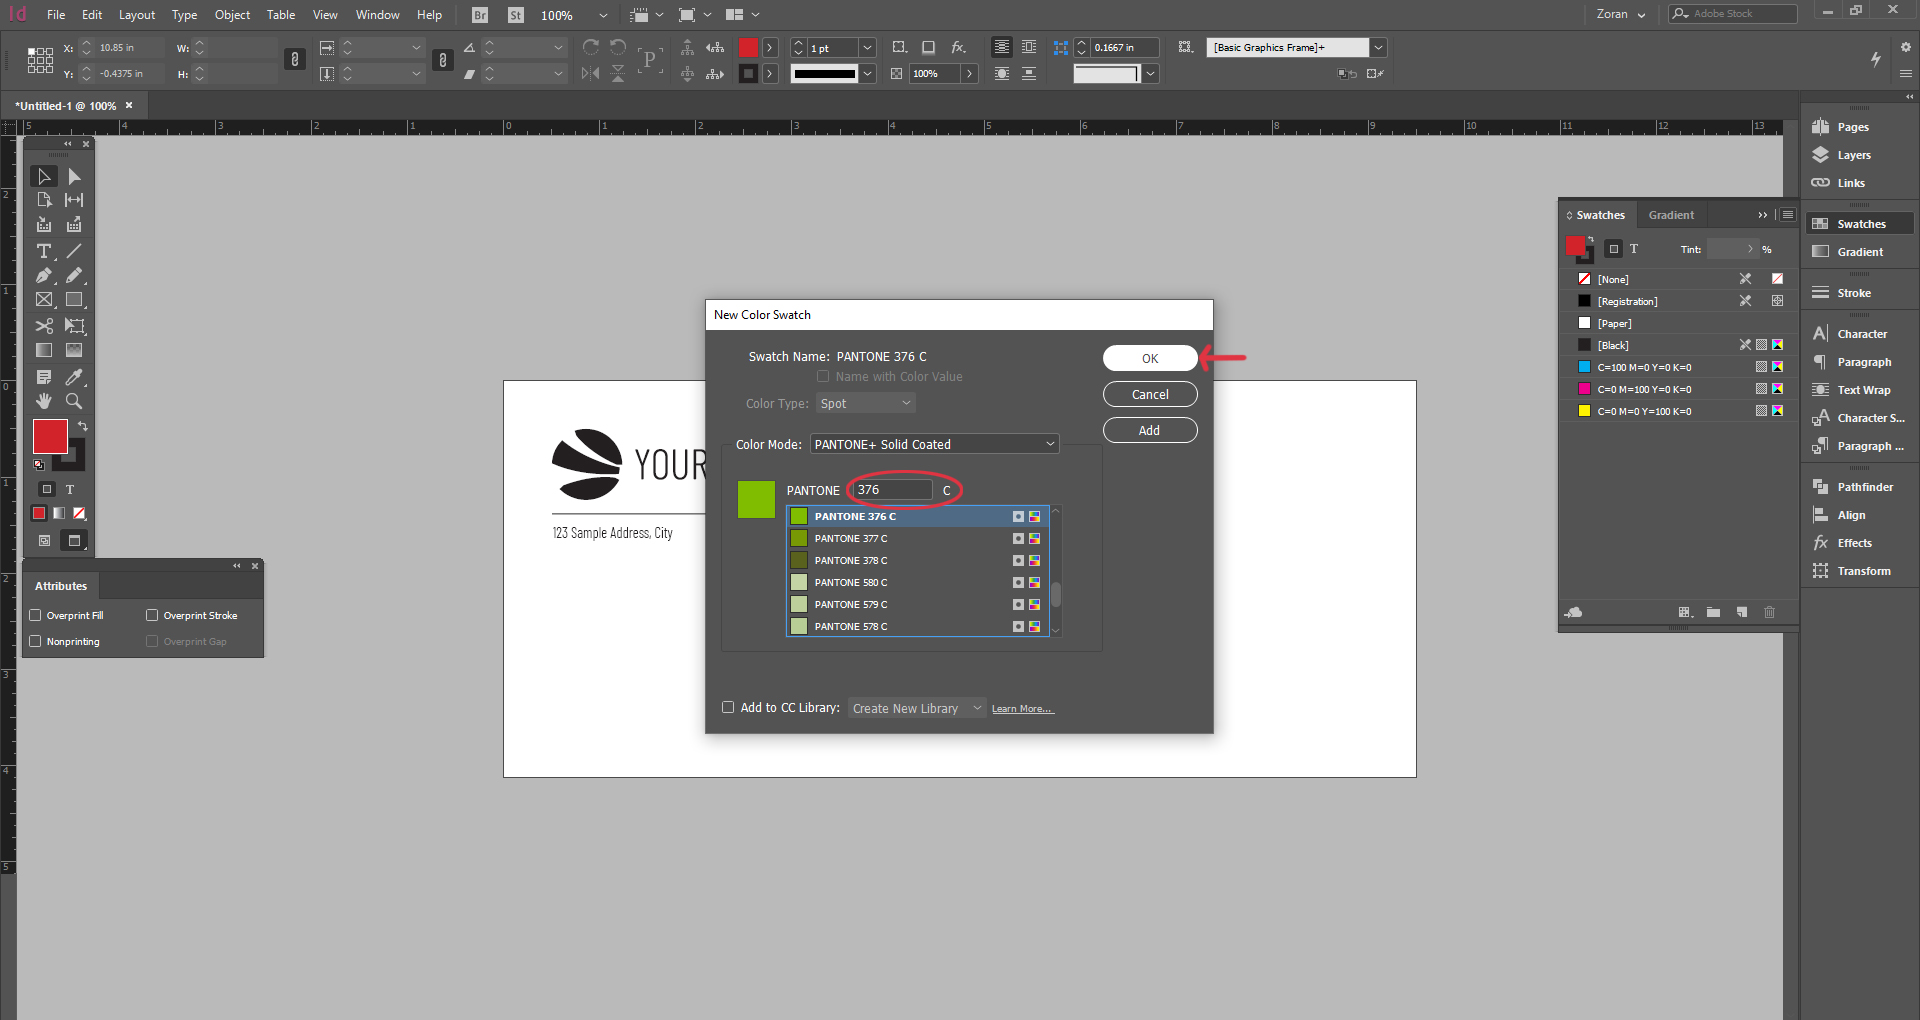
A New Color Swatch window will pop up. Once you click the Color Mode drop-down menu, you will be able to choose the Pantone colour book that you need. Most commonly used are Pantone+ Solid Coated and Pantone+ Solid Uncoated.
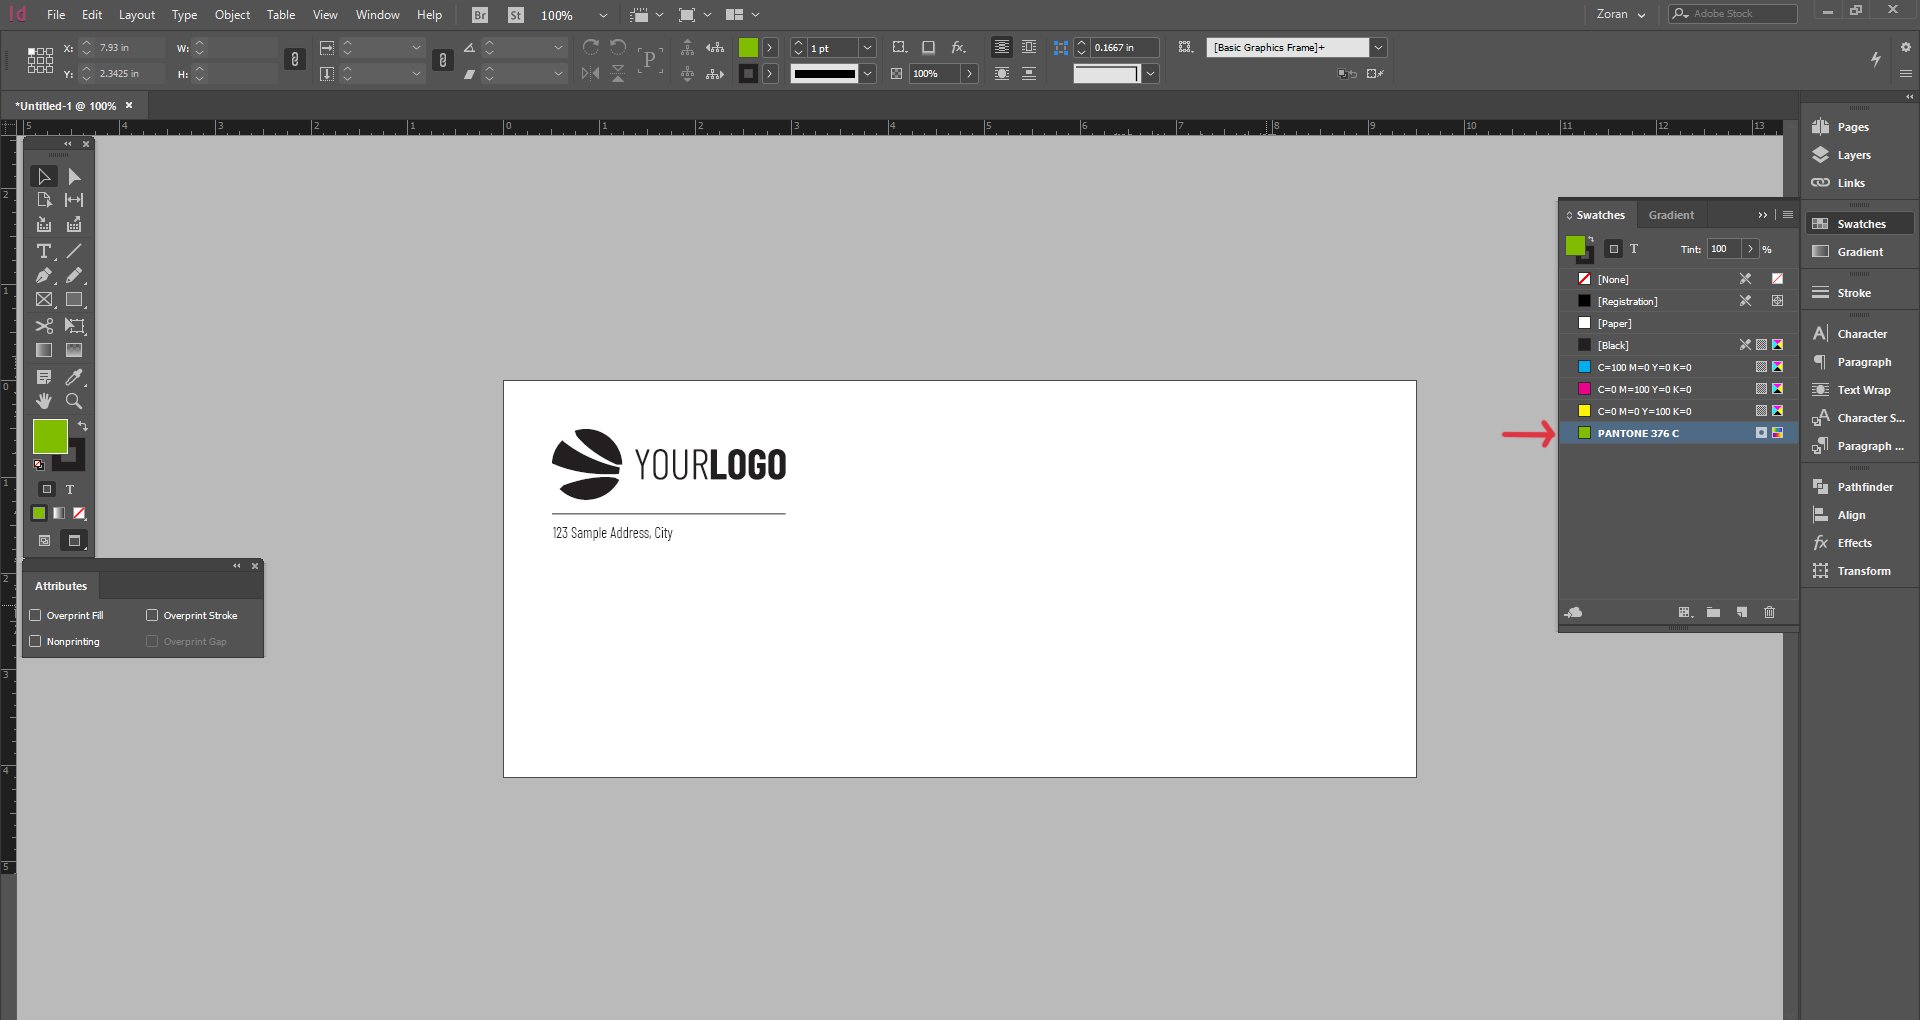
Pantone colour swatches are all defined by their unique numbers. If you already know the Pantone number you should be using, you can type that number in the type area, and then click on the colour swatch you want to use. Once you click on the colour swatch and hit OK, it will then appear in the Swatches palette.
Alternatively, if you haven't yet determined the Pantone swatch you want to use, you can scroll through all the swatches and click on the one you wish to use.
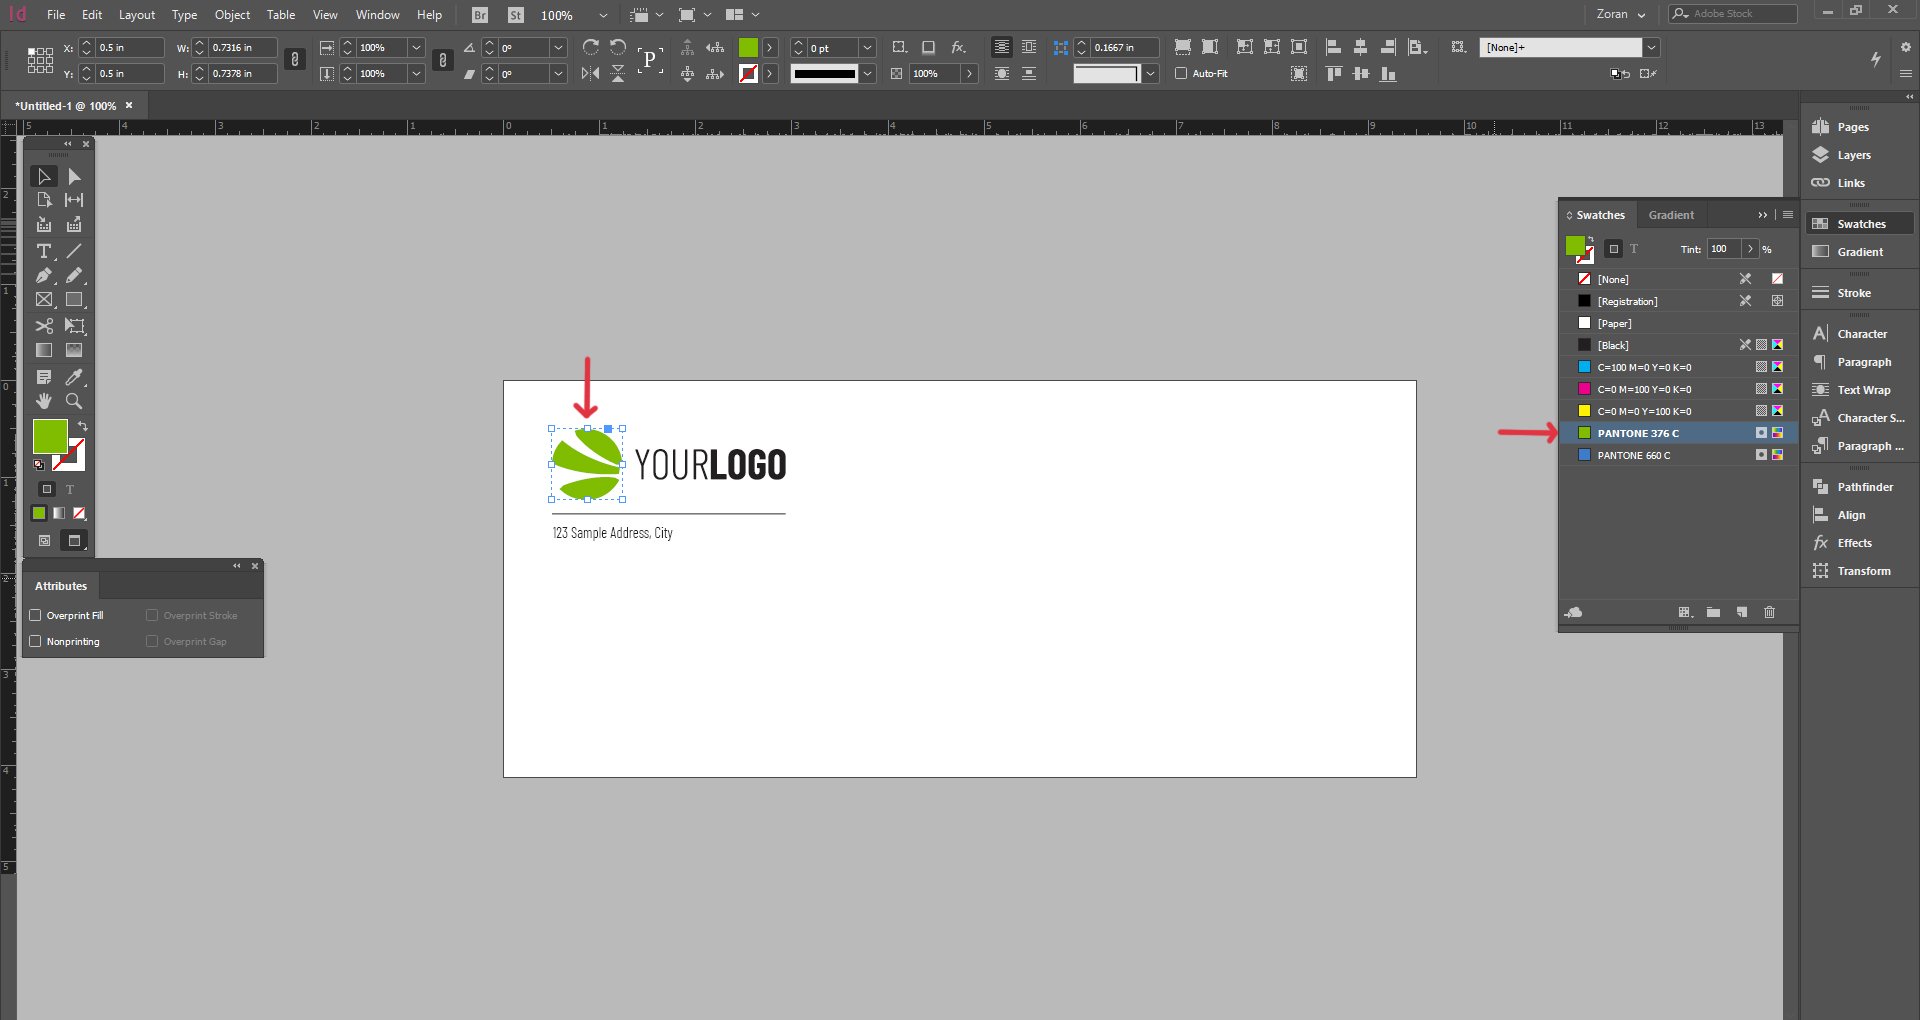
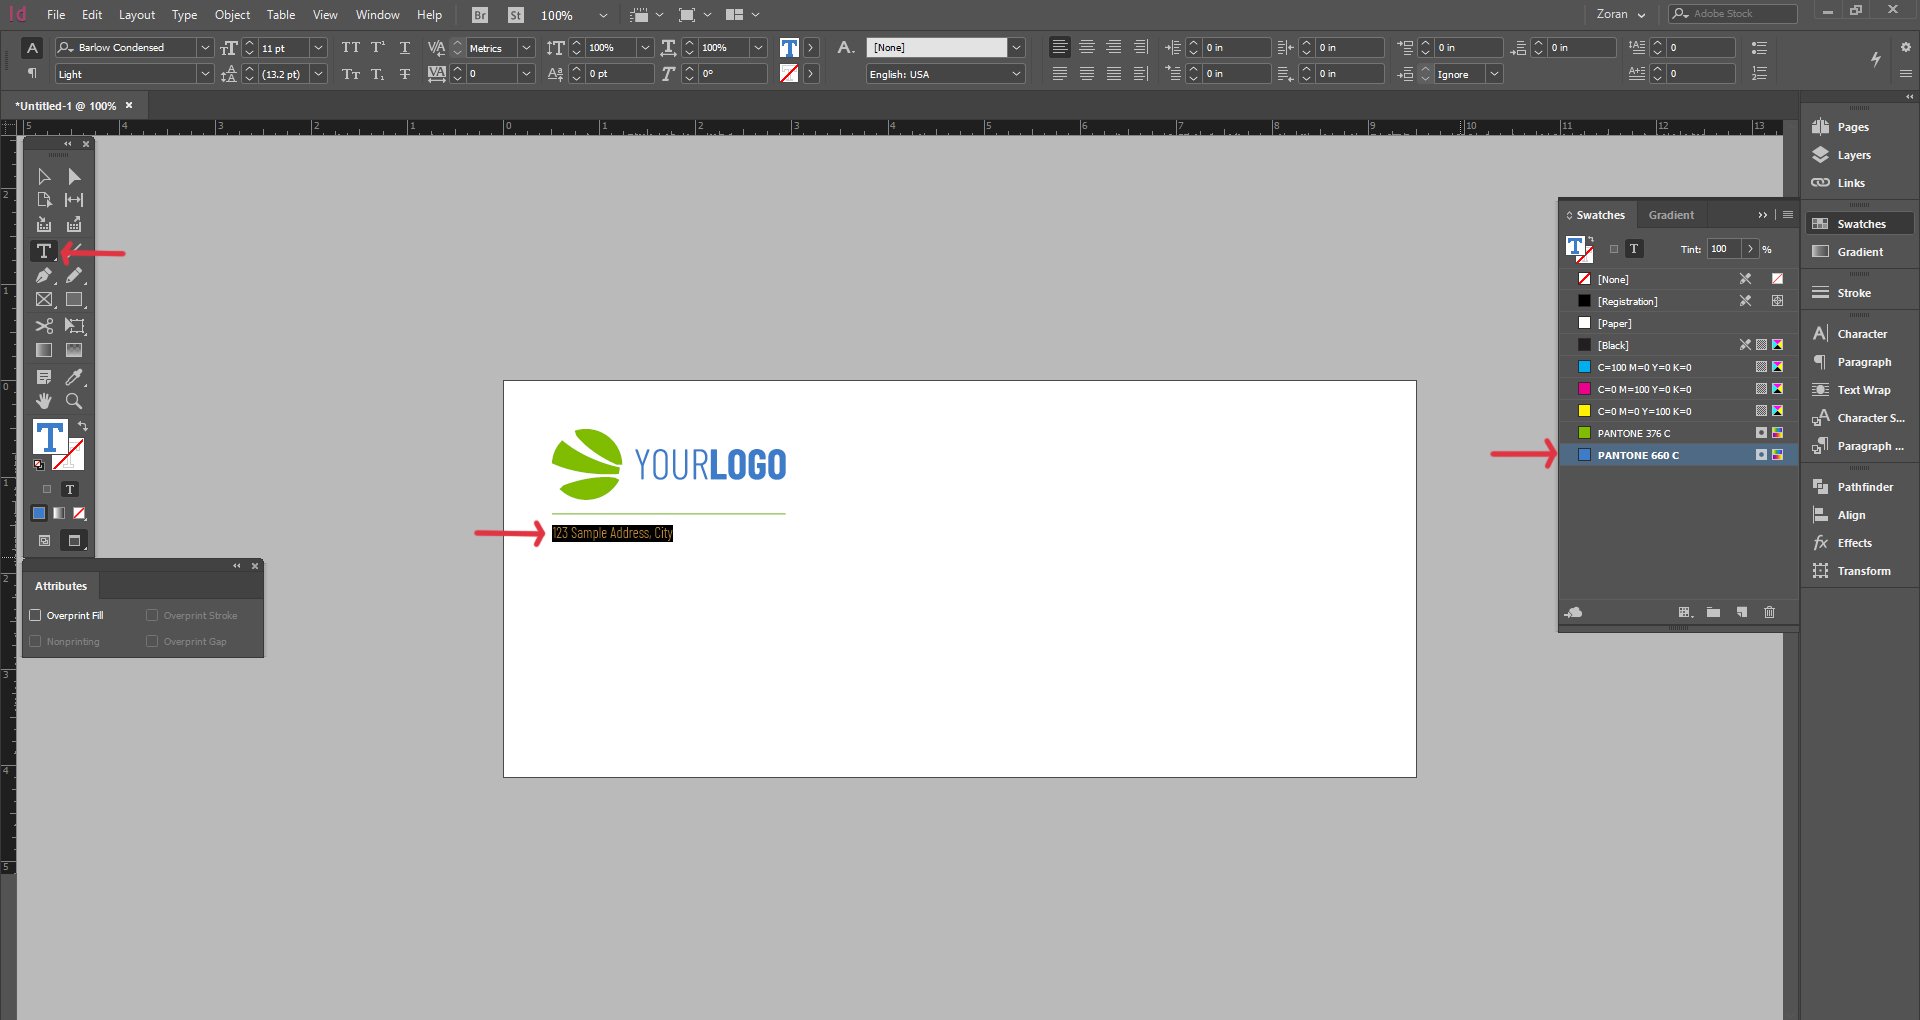
To apply a Pantone swatch to a vector object in Adobe InDesign, click on the object using the Selection tool, and then click on the desired Pantone colour swatch in the Swatches palette.
 Repeat the same step if you want to apply a Pantone colour to a stroke, only this time make sure that the selected object is set to stroke colour.
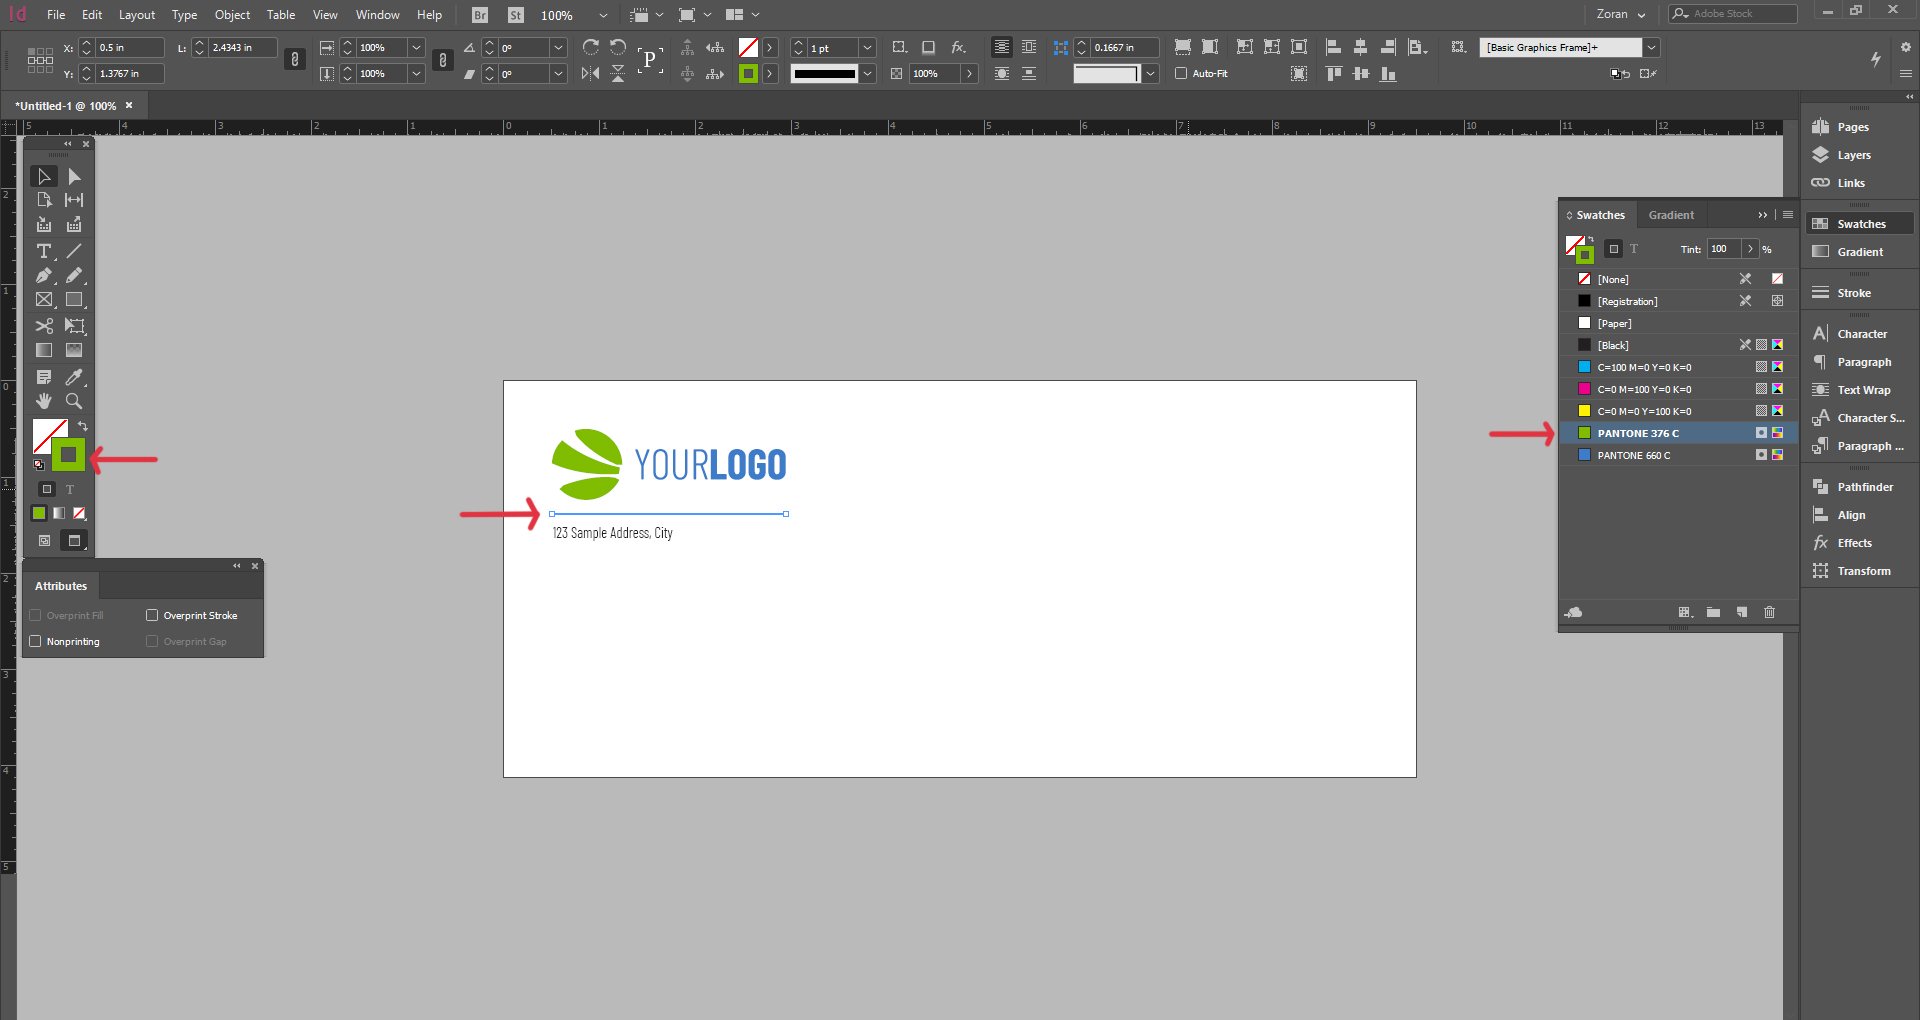
Repeat the same step if you want to add a Pantone colour to text, only this time make sure you highlight the text first using the Type Tool.
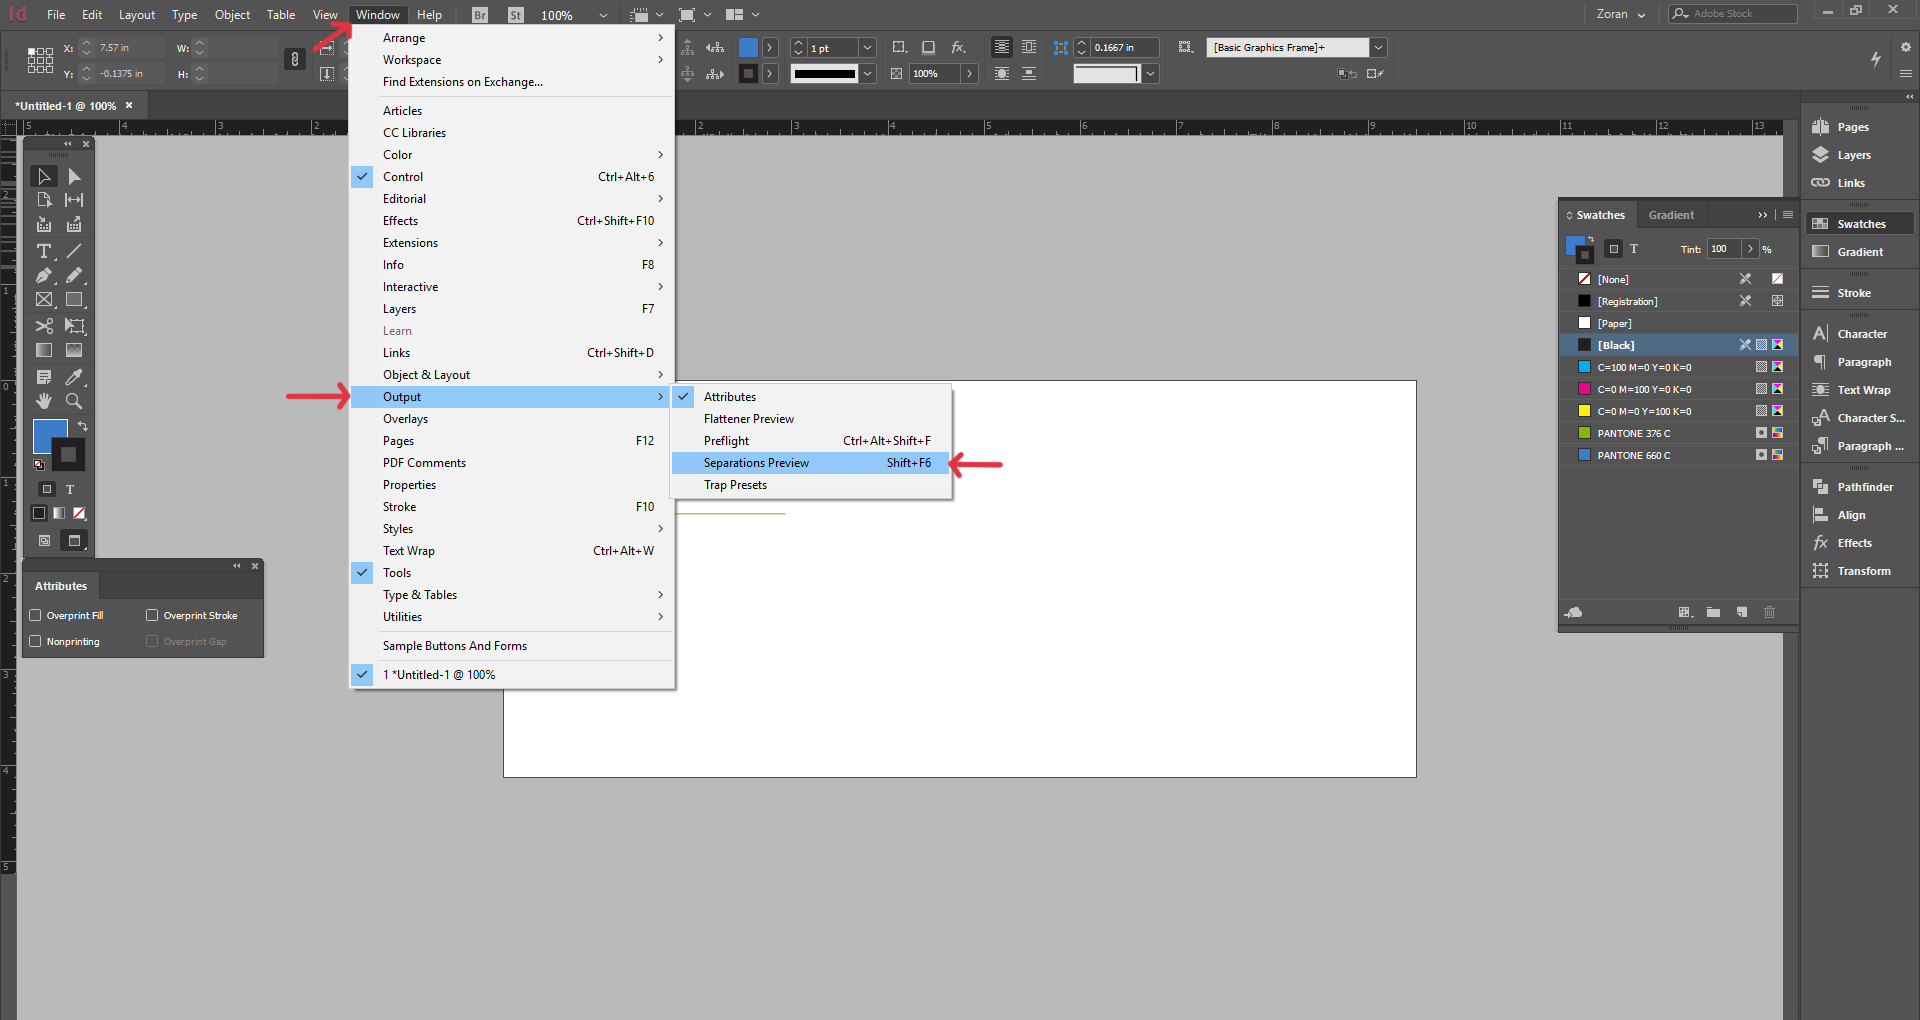
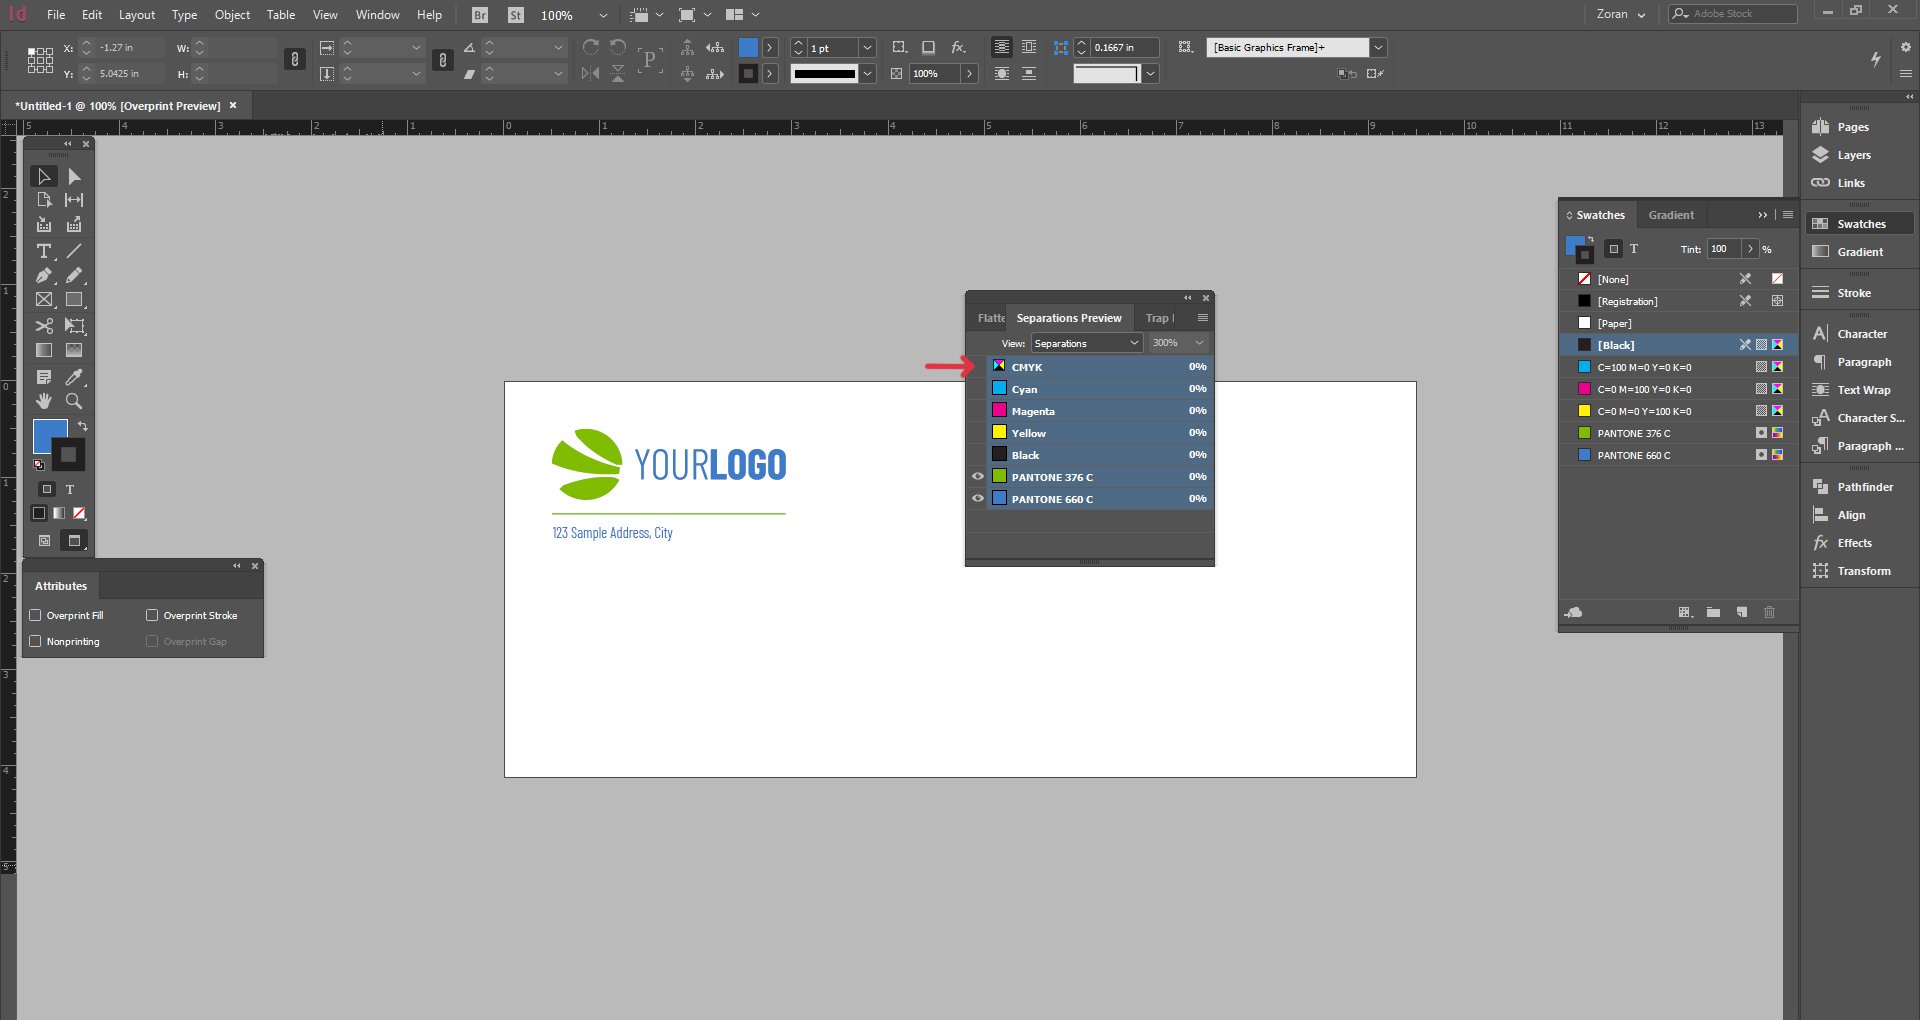
You can double-check if your artwork only consists of Pantone colours by doing the following:
1. Go to Window / Output / Separations Preview
2. Under the View drop-down menu, choose Separations.

3. Turn off the visibility of CMYK colours so only the Pantone colours are visible. If nothing changes in your design once you turn off the visibility of CMYK colours, that means only Pantone colours are used in your design.
You can browse Newprint’s Pantone printed stationeries catalogue by visiting this page.
Login and Registration Form
Get Started And Become the Next "Newprint's Best Customer"
For printing professionals looking for a wide selection of paper, printing, and related products, you have arrived at the perfect place. Sign up to explore all the options and be informed of all our offers.
If you are a printing broker reseller or purchasing agent, reach out to us to become a Certified Print Specialist.