Language
 United States
Print-Ready 2025 Calendar Templates Are Here!
Explore Now
Add your logo and insert custom date information to create your perfect calendar today!
How to Apply Your Design to the Inside of a Packaging Dieline for Two Sided Printing?
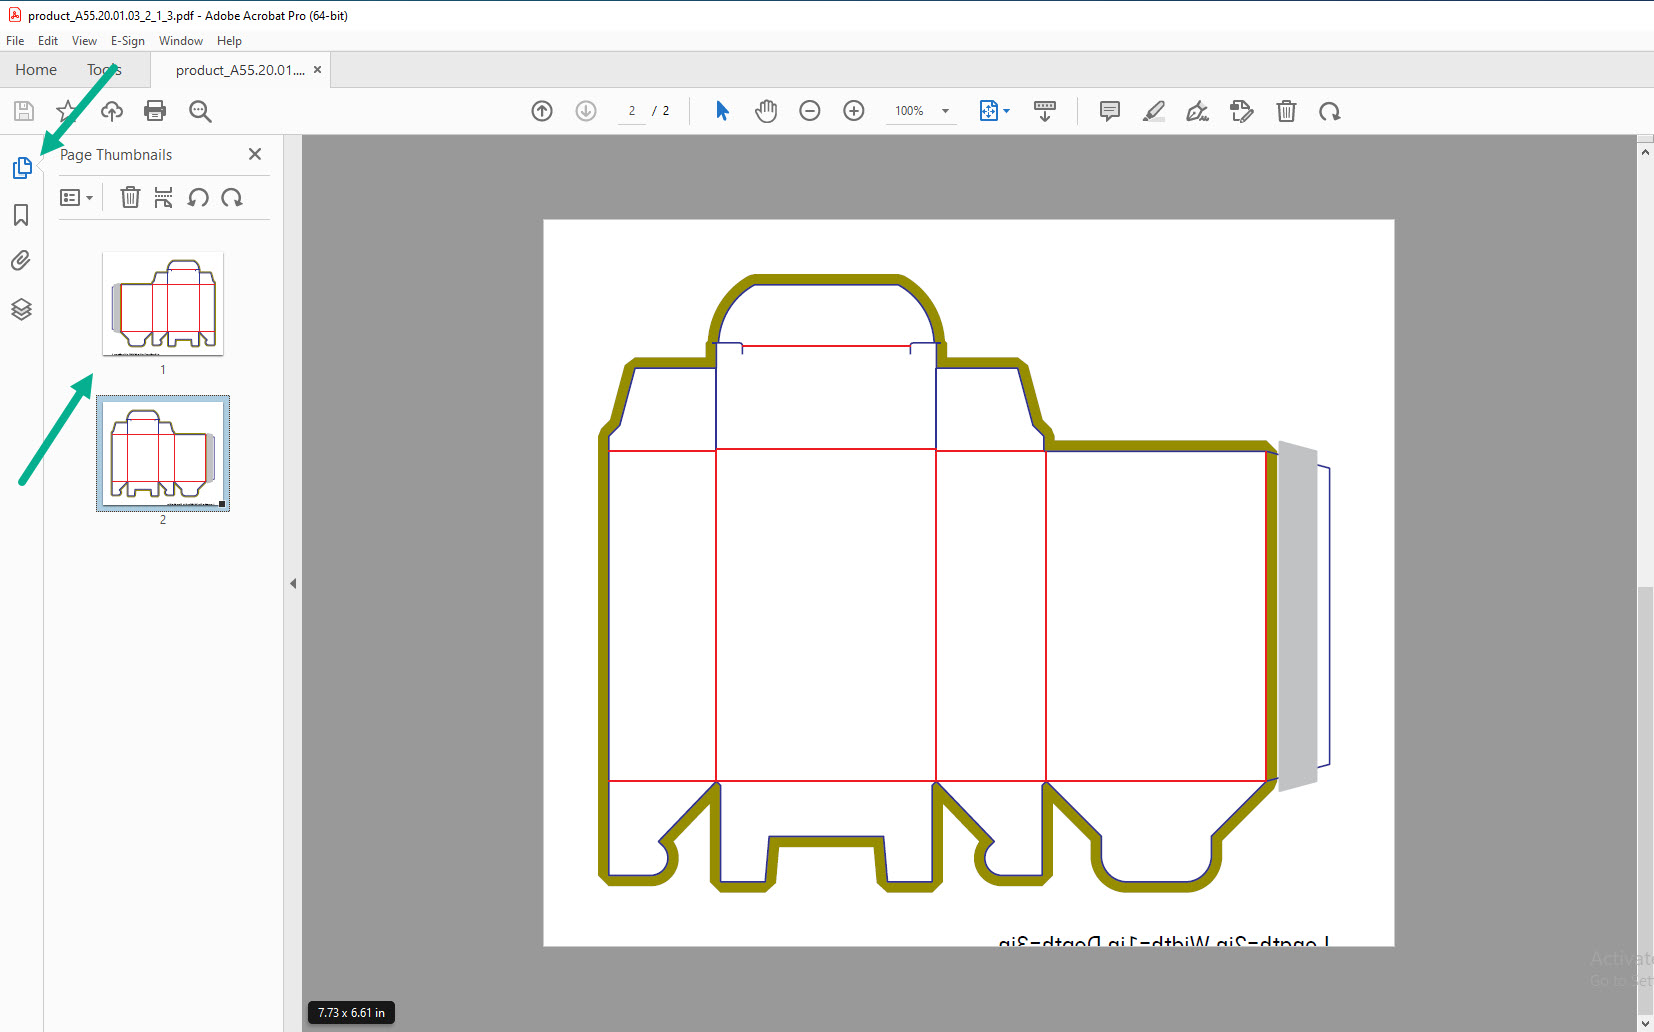
To start your packaging design, first you will need a dieline file. In case you don't have a dieline file for your packaging project, you can generate and download a dielie file on our website.
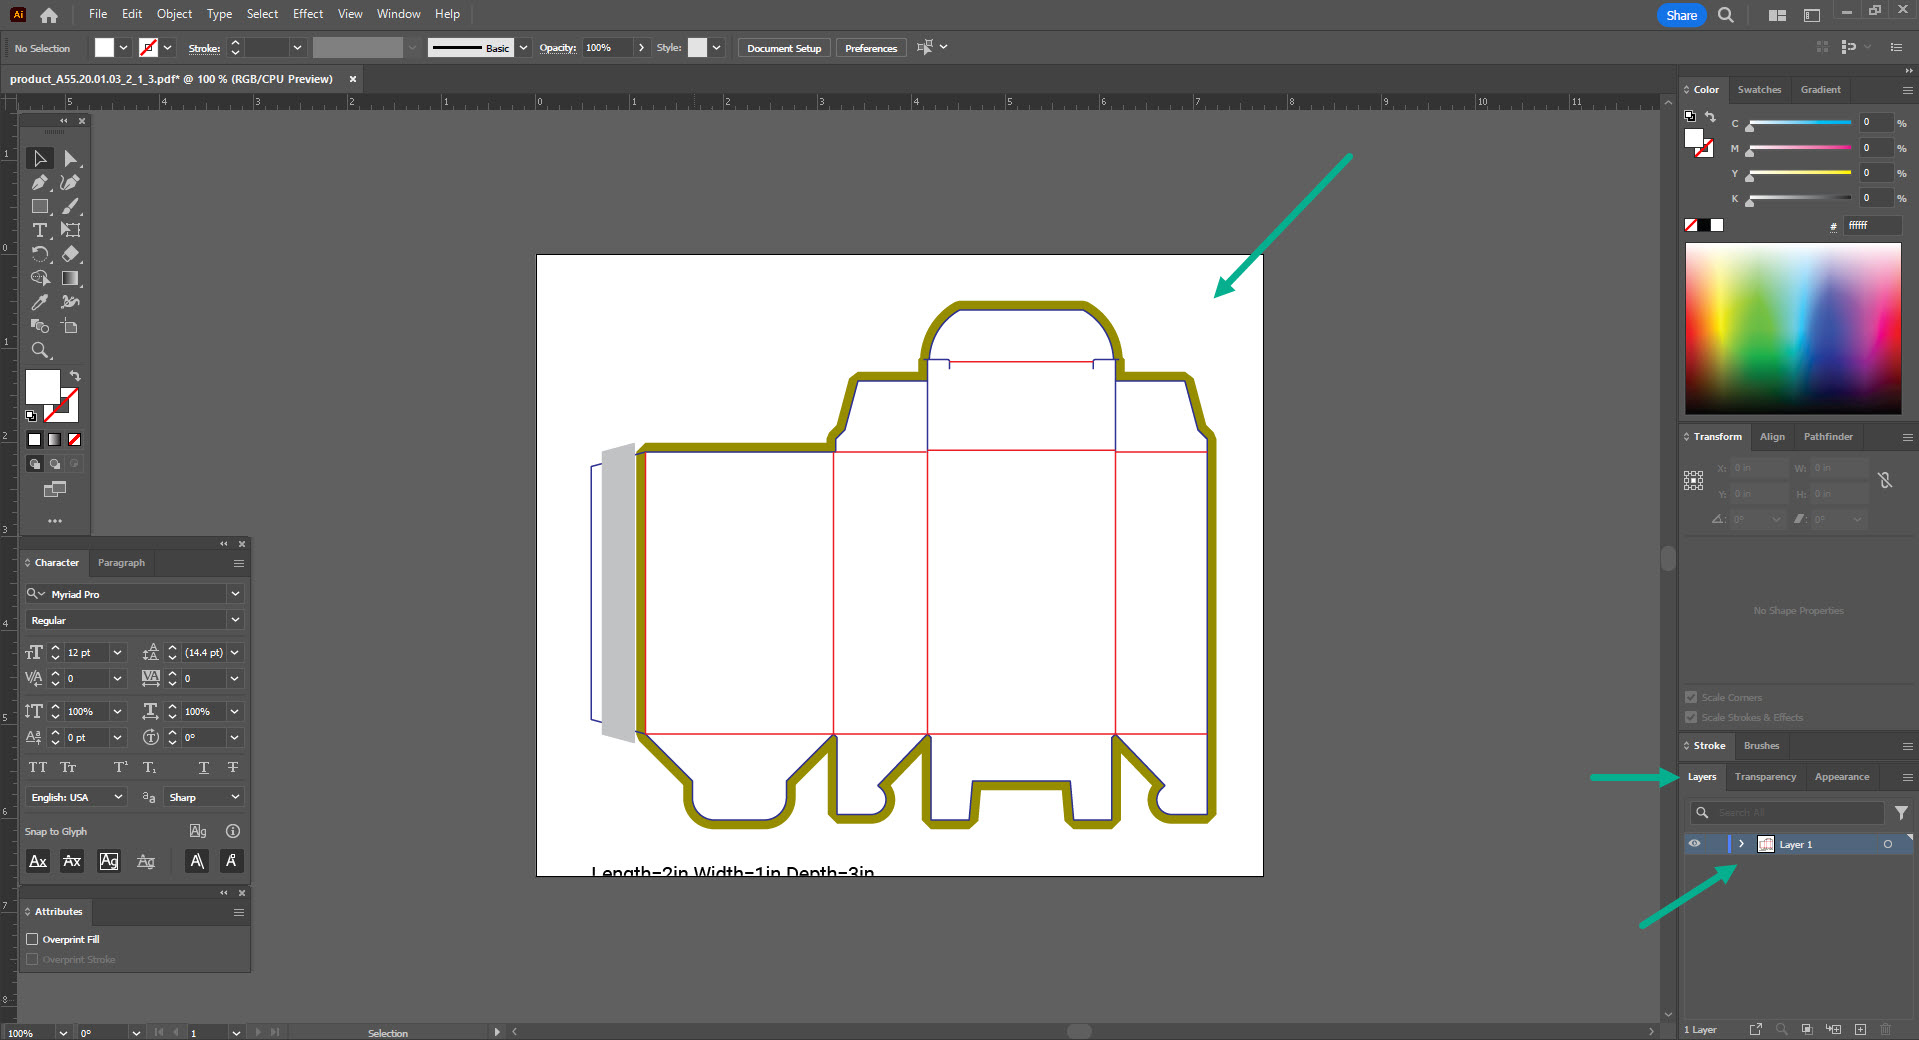
Step 1: Open the dieline file in Adobe Illustrator
By default, the dieline file generated on our website has one artboard and one layer.
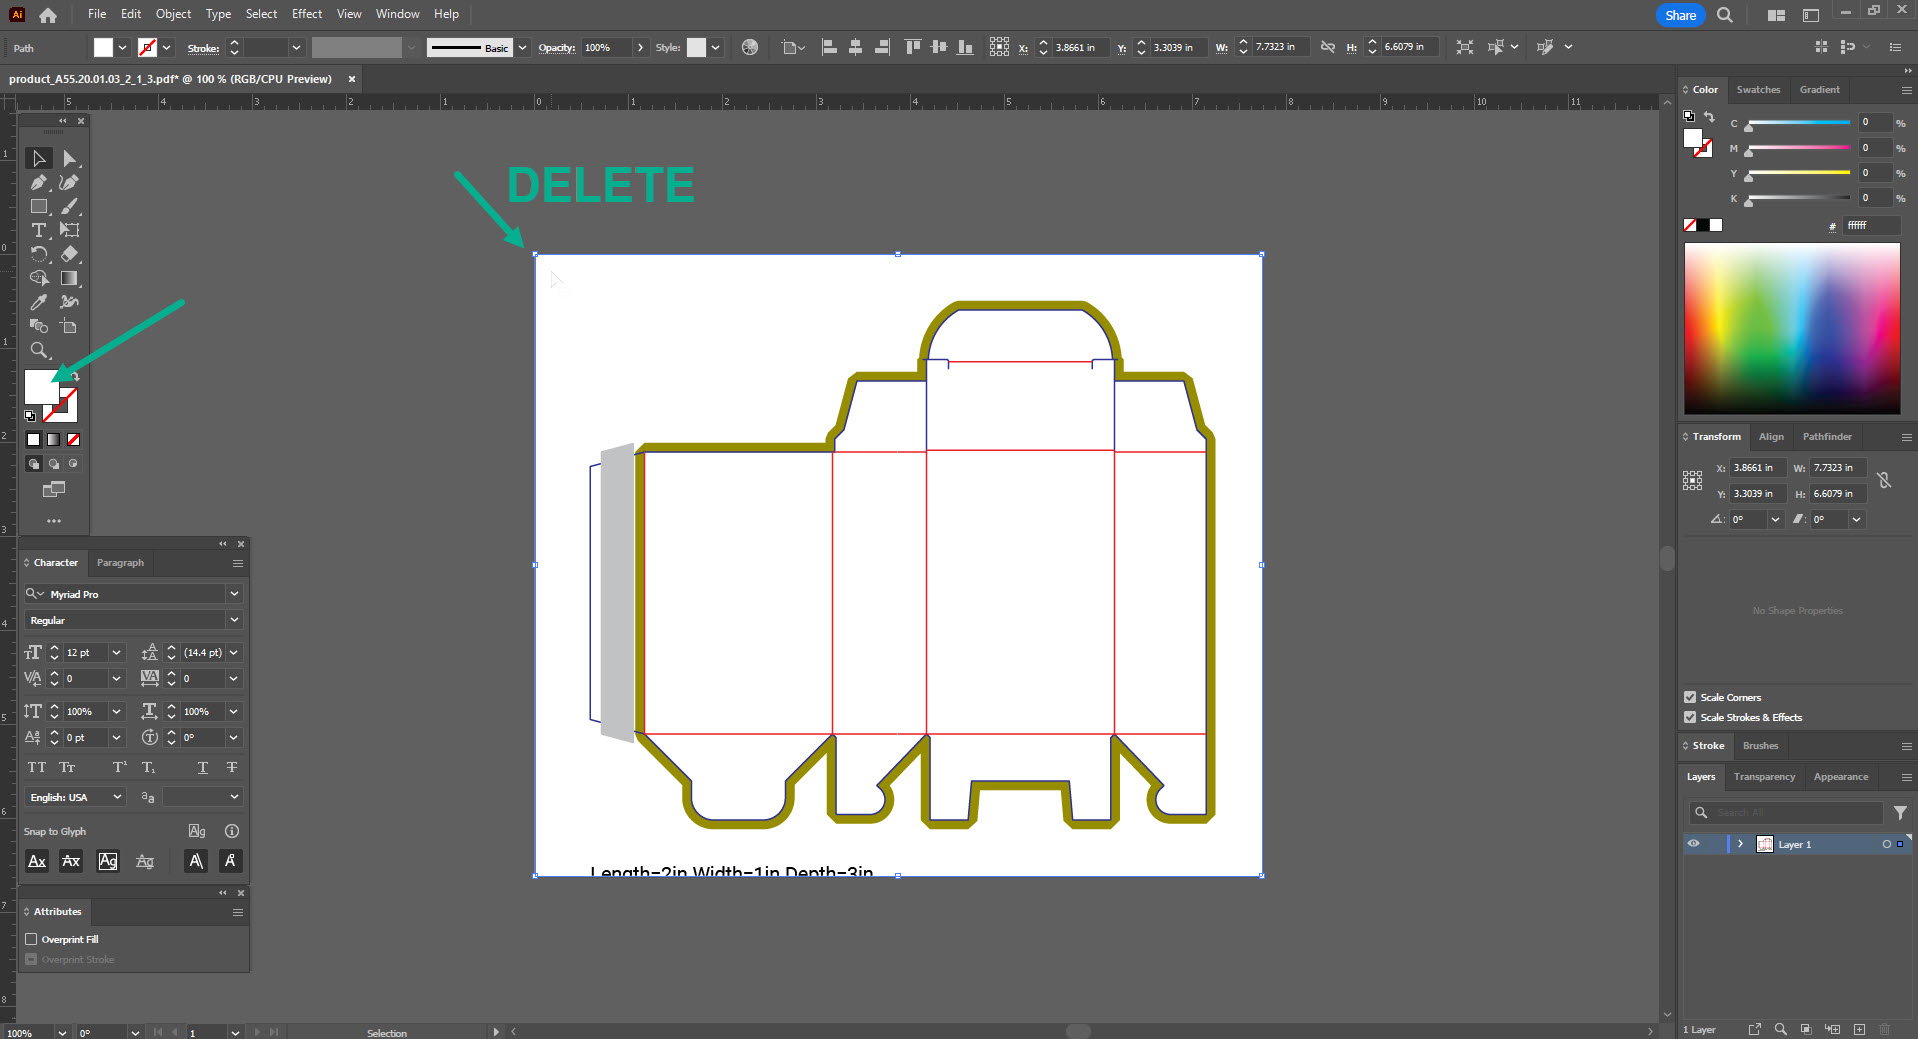
The dieline file is also generated with a white rectangle background object. Click anywhere on the white background to select the white object and then press 'Delete' on the keyboard to delete the background object. In case you are using a dieline file not generated on our website, you can skip this step.
Step 2: Add three more layers
Press the 'Create New Layer' button three times. You should now have a total of four layers in the Layers Palette.
The goal is to have design elements for the outside of the box, the inside of the box, the dieline for the outside, and the dieline for the inside each on their own layer.

Double-click on the layer name to rename the layers. Starting from the bottom layer to the top, the layers should be renamed as follows:
1. Artwork Front
2. Dieline Front
3. Artwork Back
4. Dieline Back
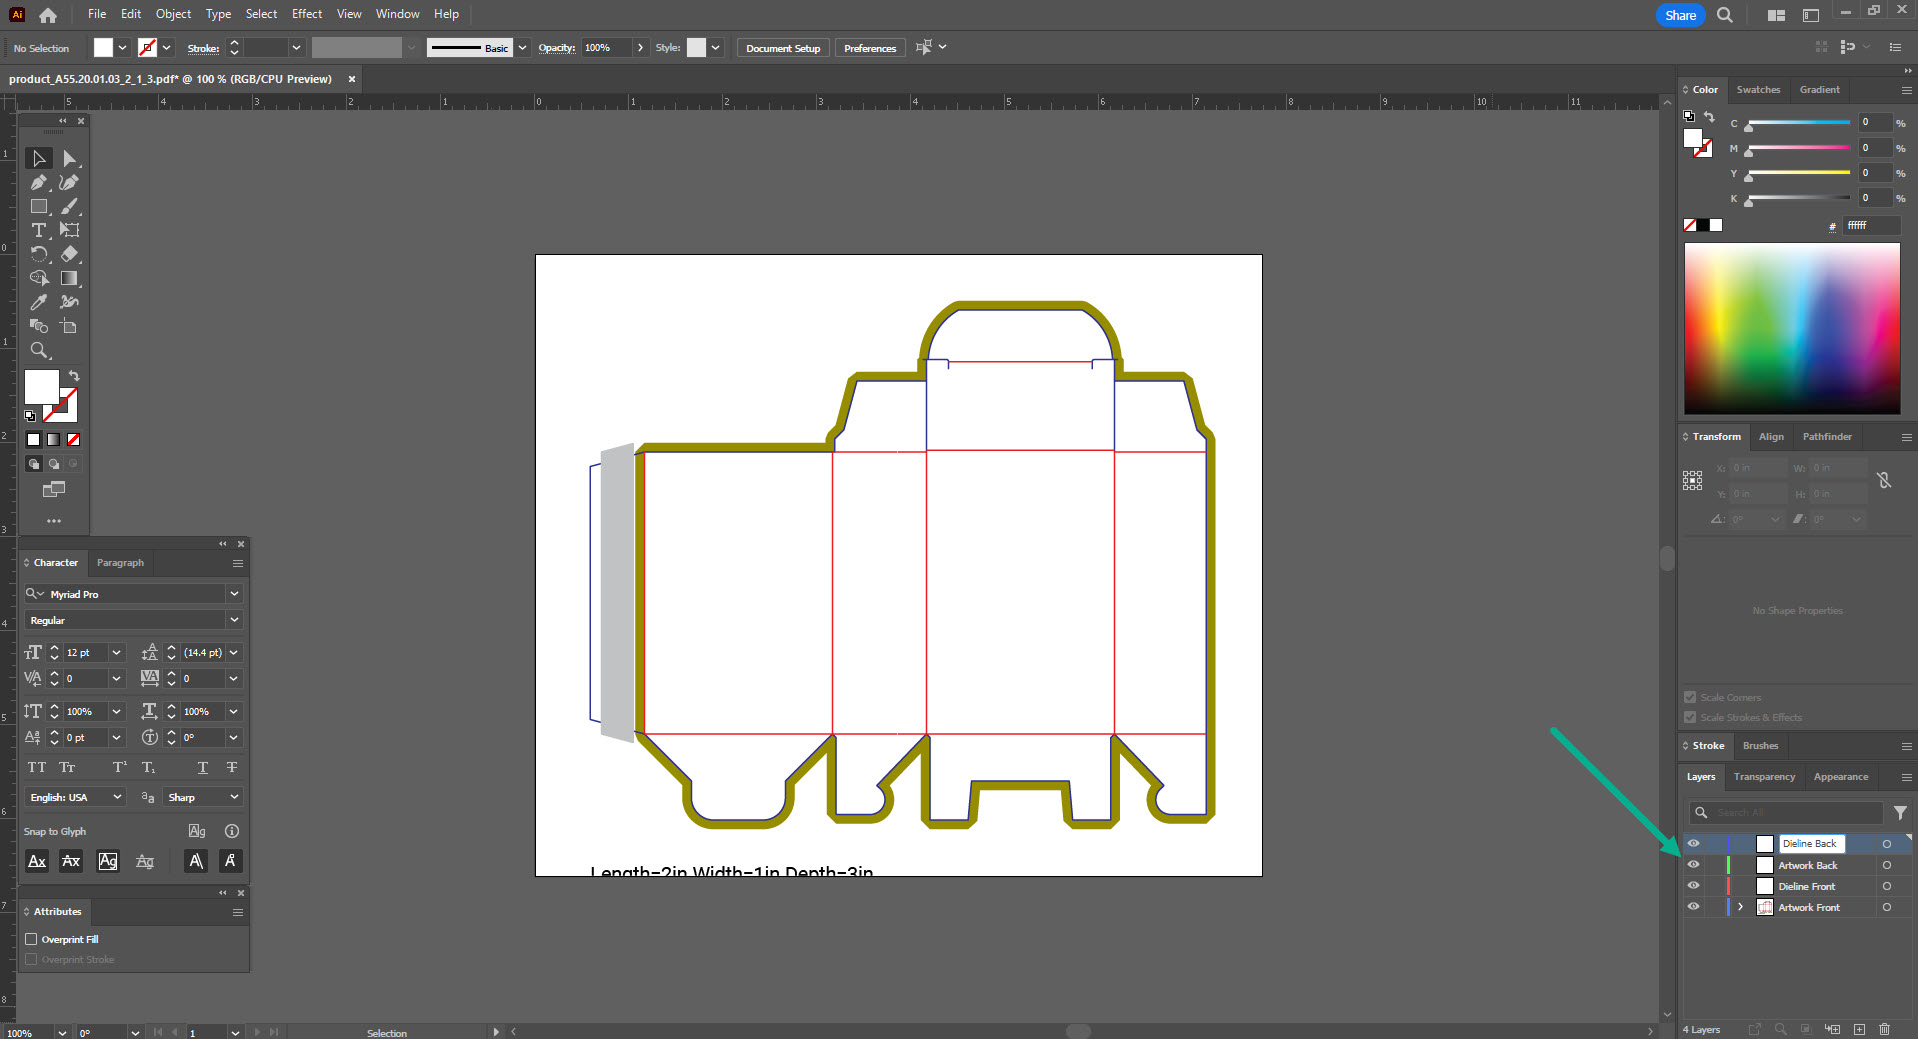
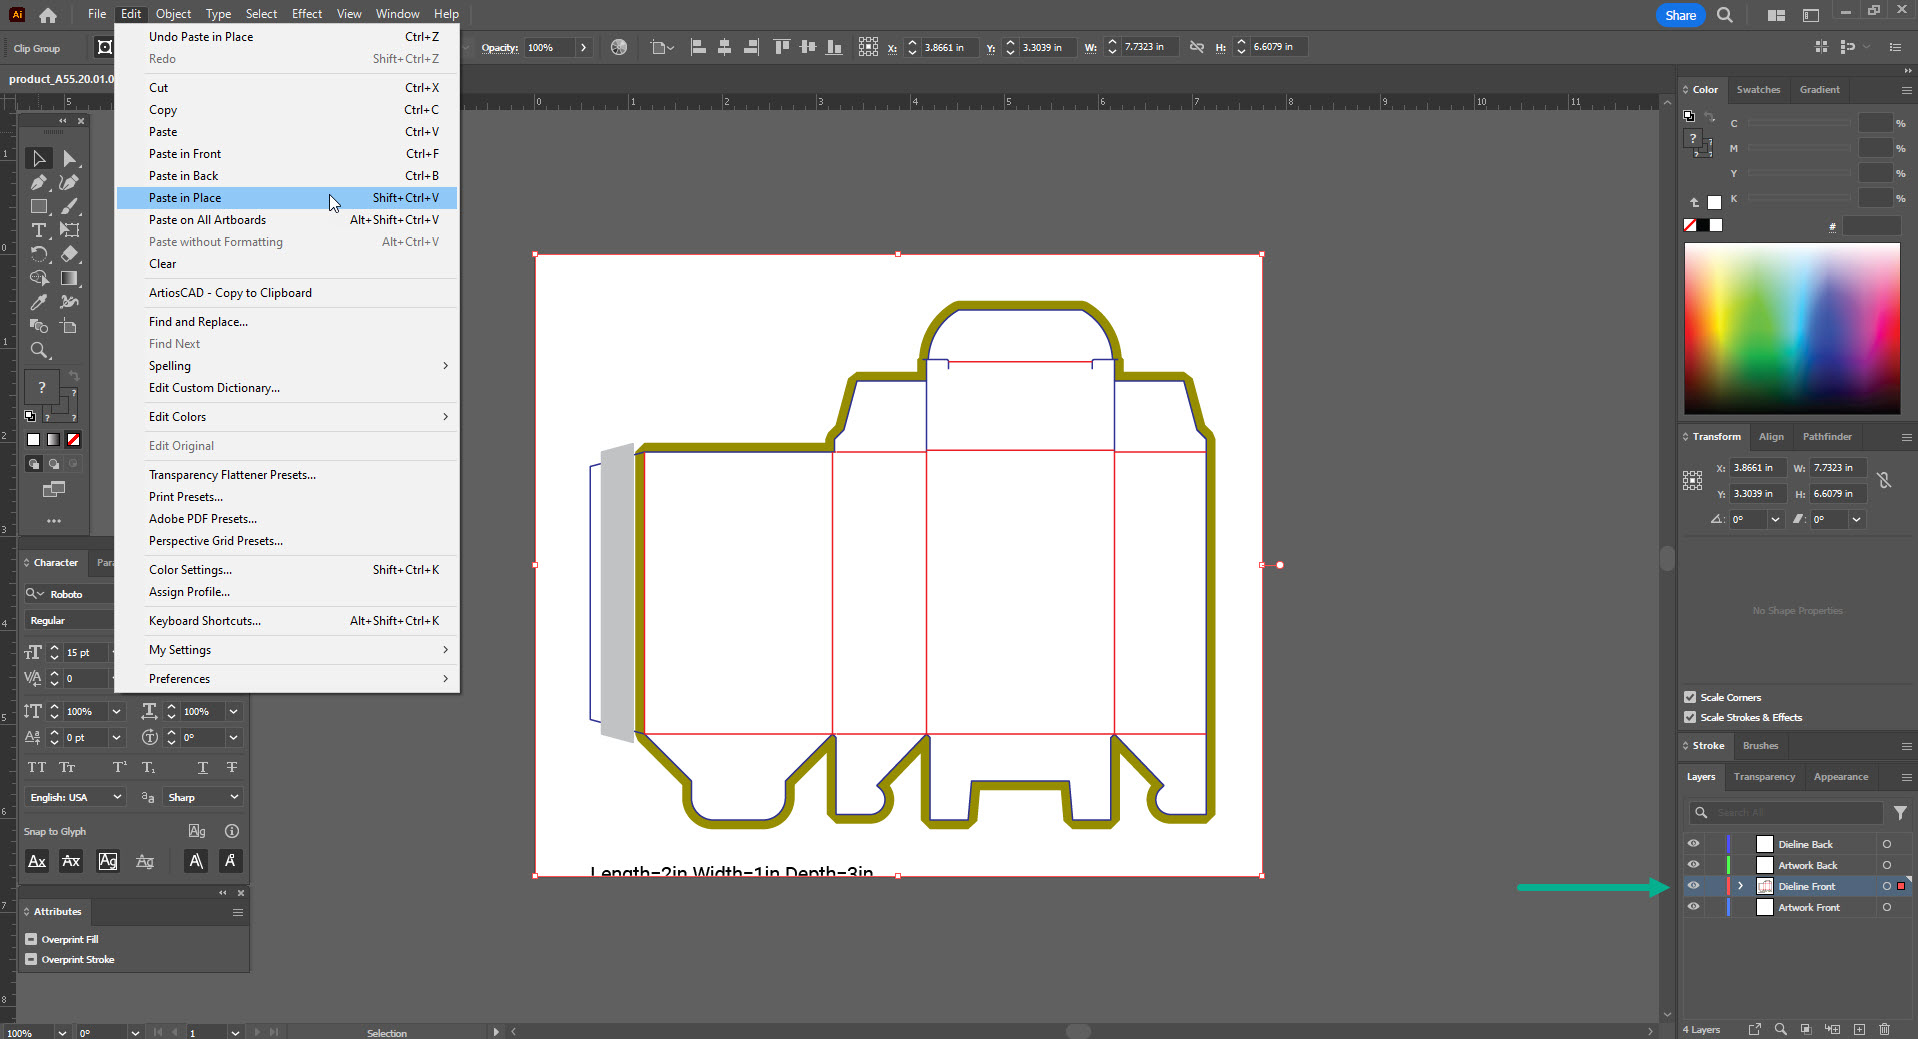
Since the dieline was originally on Layer 1 (which is now renamed to Artwork Front), you need to select all objects and move them to the Dieline Front layer:
1. Drag the mouse over the entire artboard to select all objects
2. In the main menu, go to Edit / Cut
3. Click on the Dieline Front layer in the Layers Palette in order to make it active
4. In the main menu, go to Edit / Paste in Place
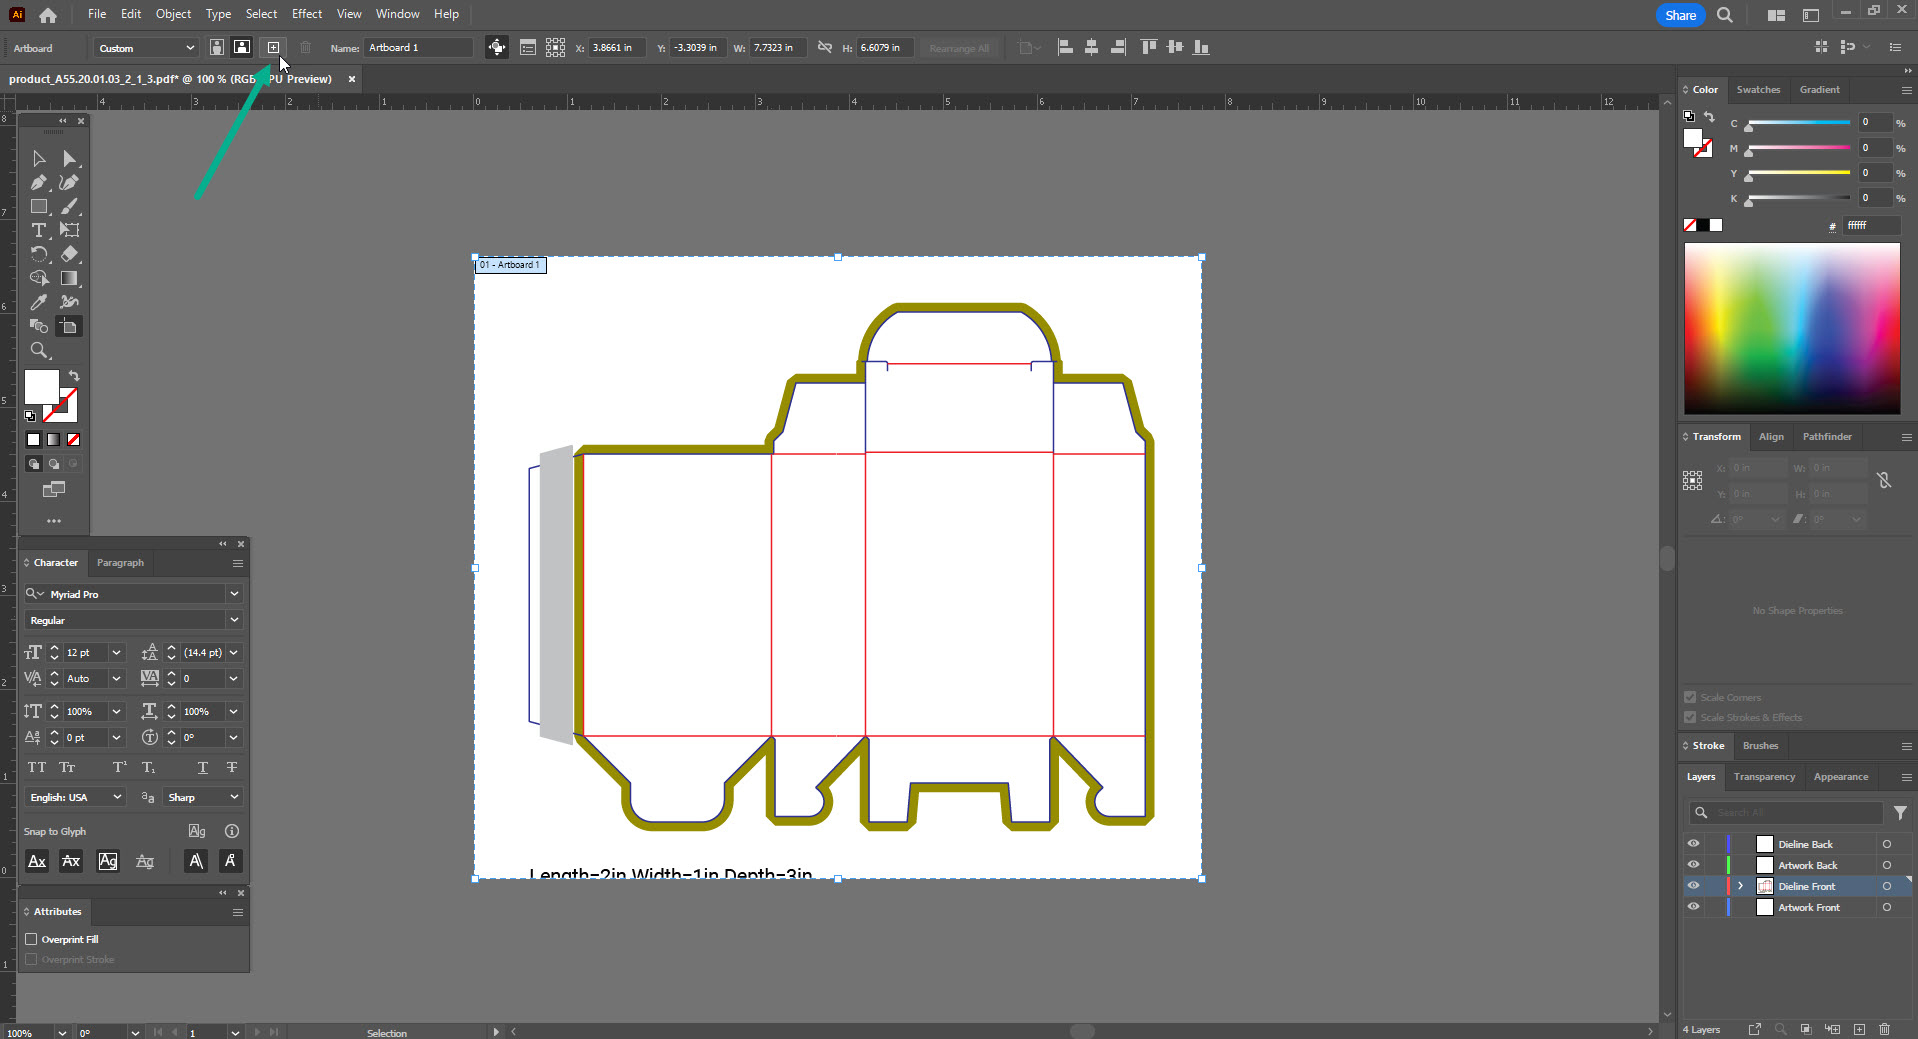
Step 3: Add a new artboard
The existing artboard and dieline will be used for the design of the front side of the box. You will need one more artboard for the back side design elements.
In the main menu, go to File / Document Setup, then click 'Edit Artboards'.
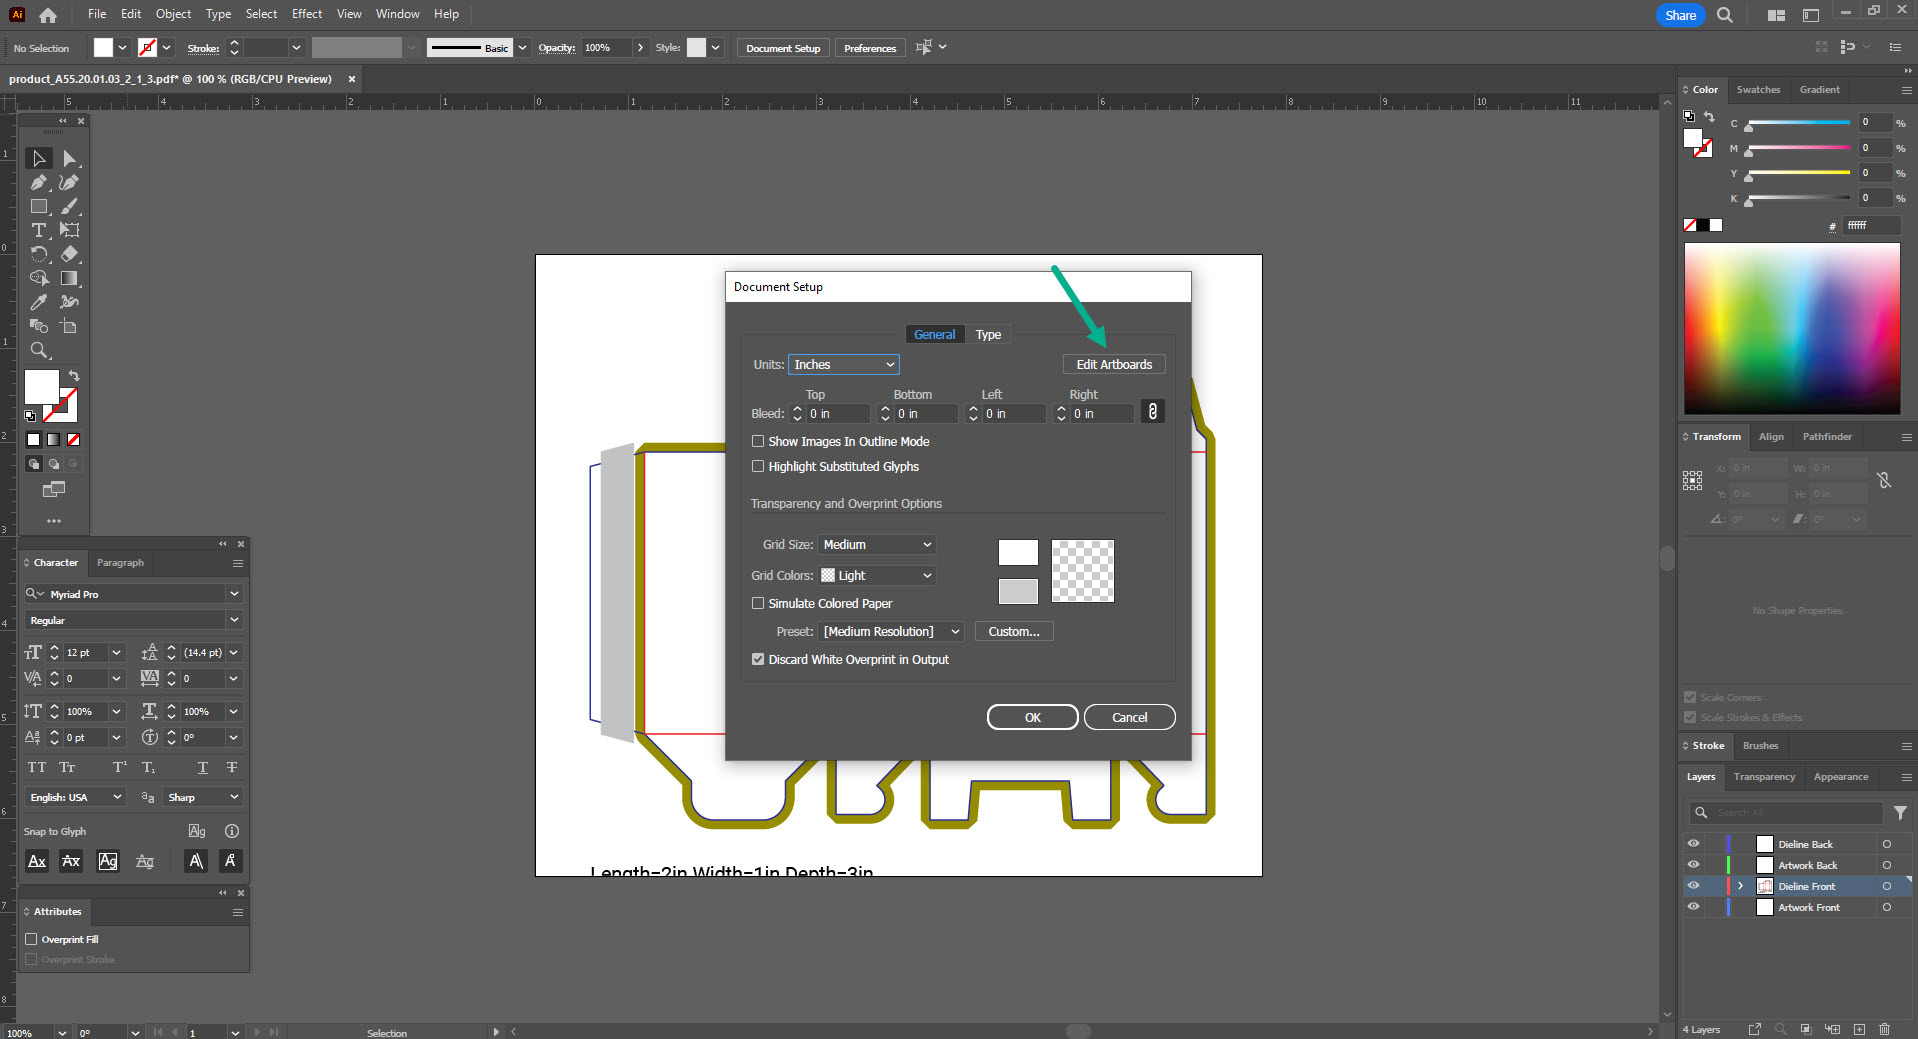
Click the 'New Artboard' button to add another artboard.
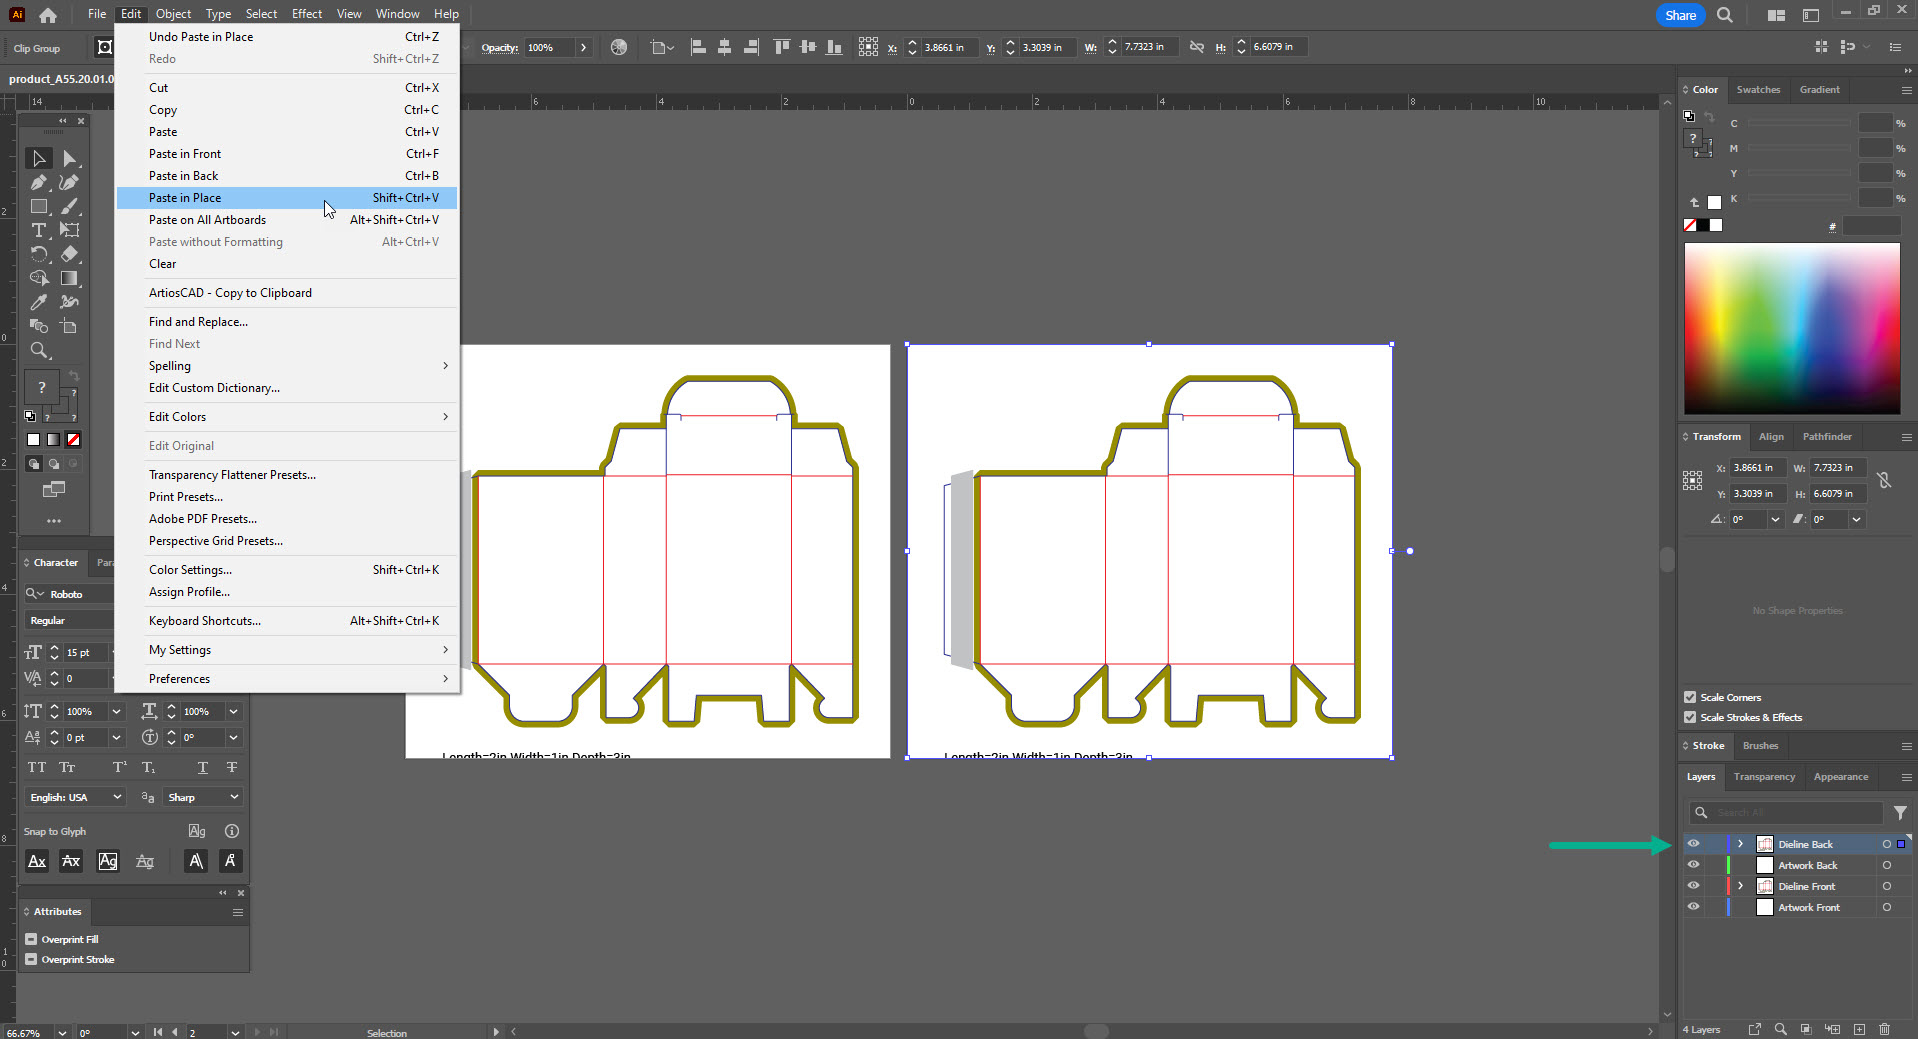
Step 4: Copy the dieline to the new artboard
You need a dieline for the back side of the box also, so you need to copy the existing dieline to the new artboard and place it on the Dieline Back layer.
1. Drag the mouse over the first artboard to select the entire dieline.
2. In the main menu, go to Edit / Copy.
3. Click on the Dieline Back layer to make it active, and also click anywhere on the second artboard to make it active as well.
4. In the main menu, go to Edit / Paste in Place.
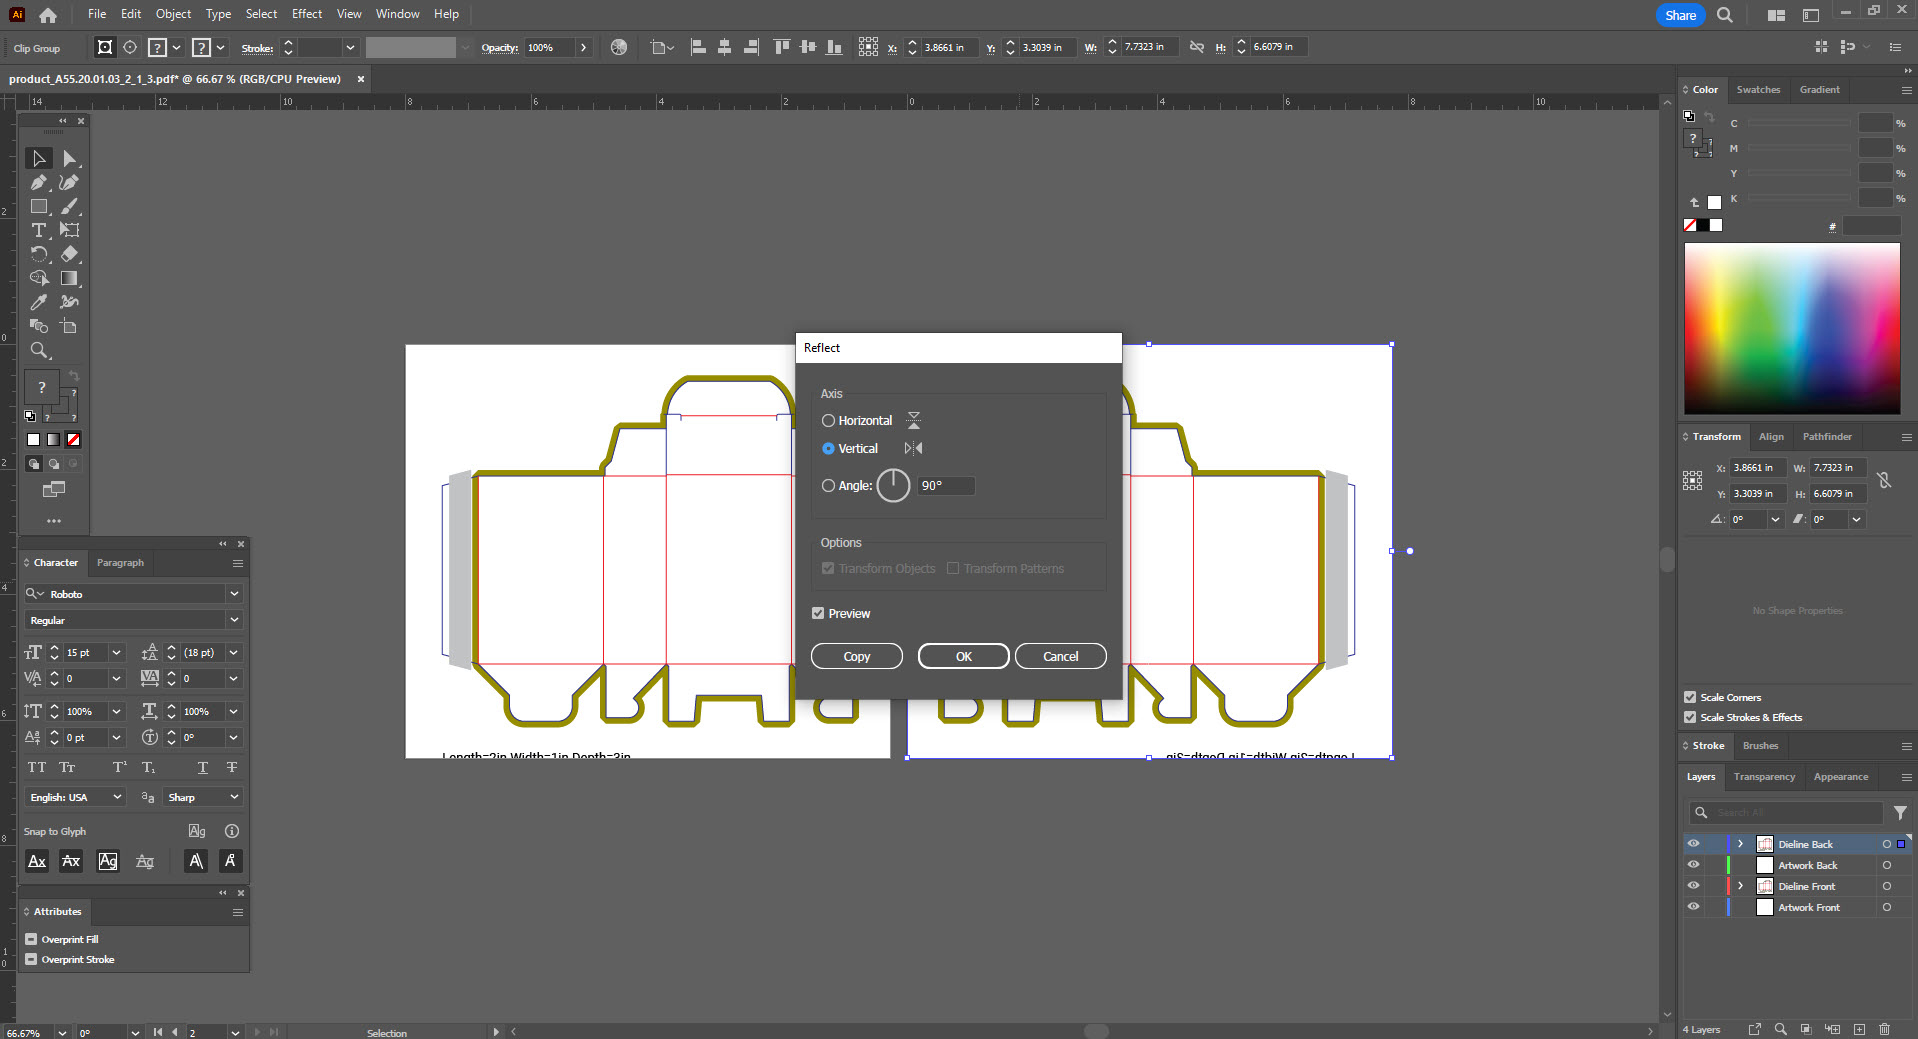
With the second dieline still selected, right-click and choose Transform / Reflect.
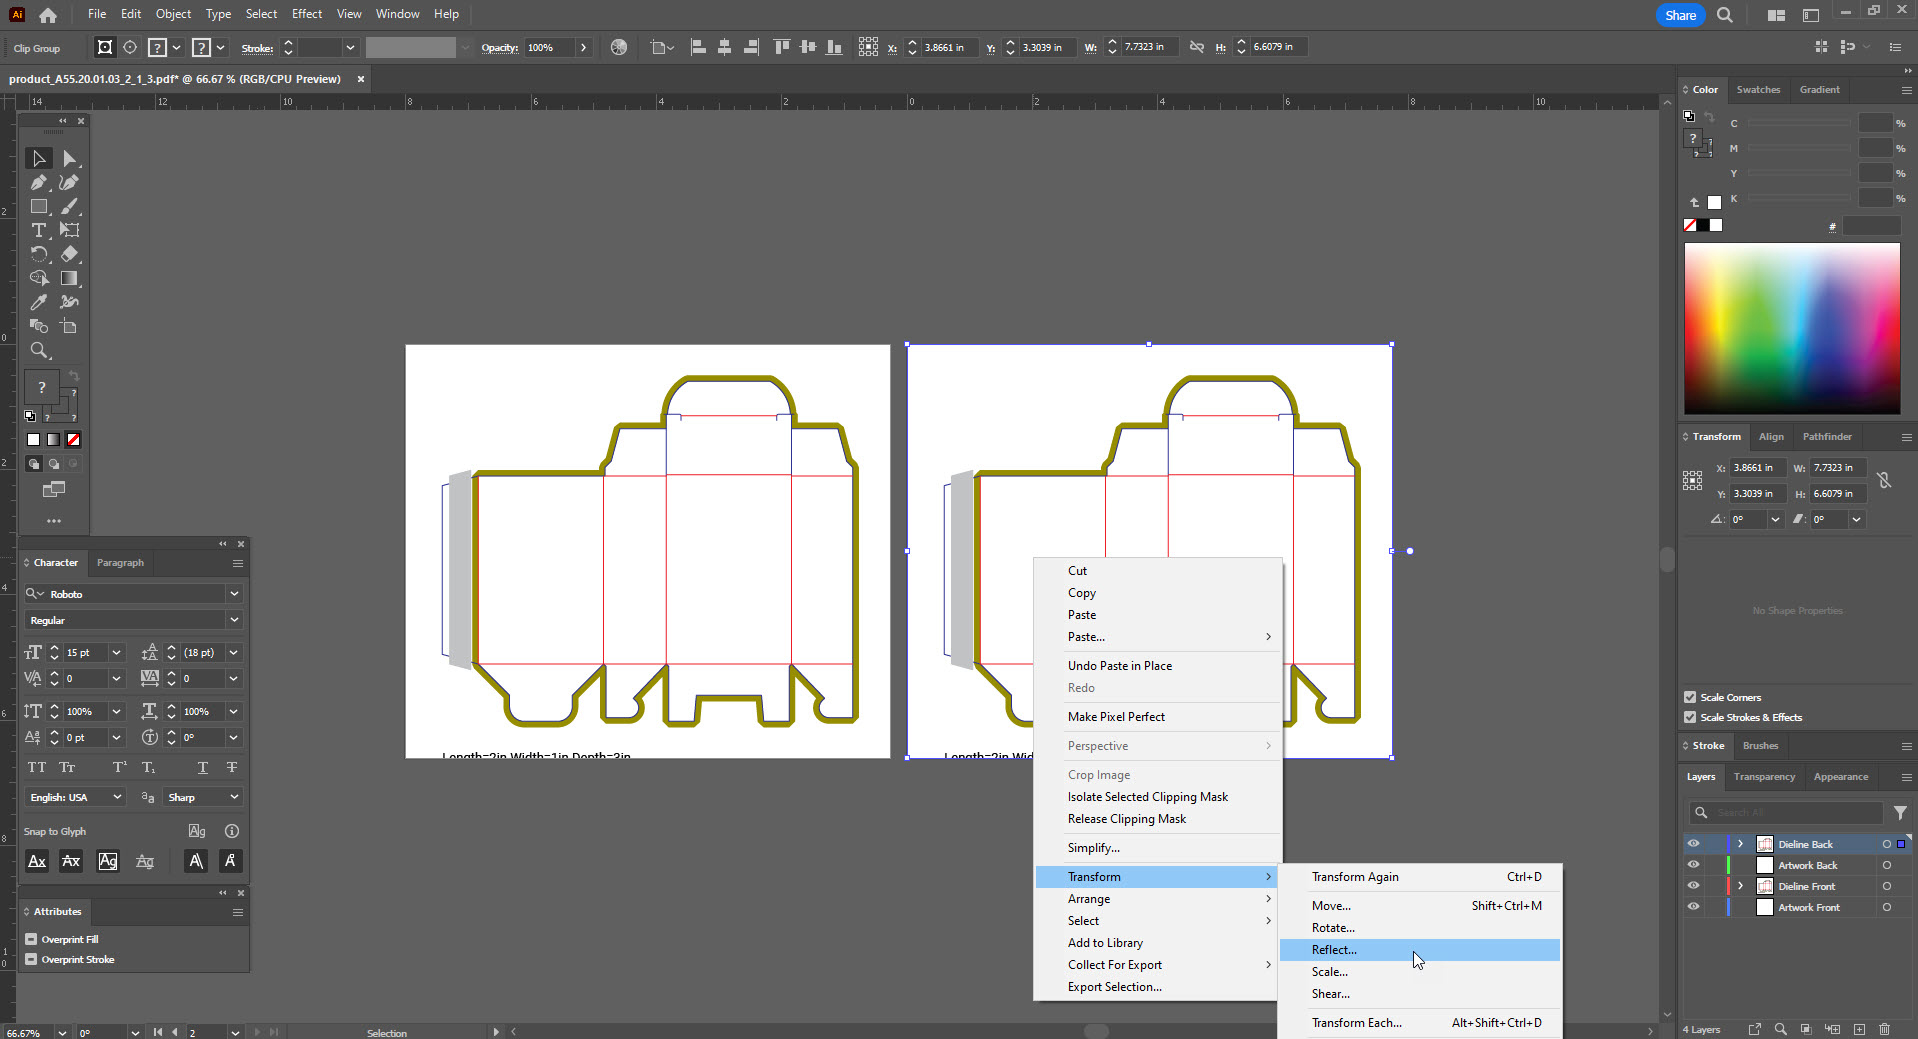
Choose 'Vertical' and click OK.
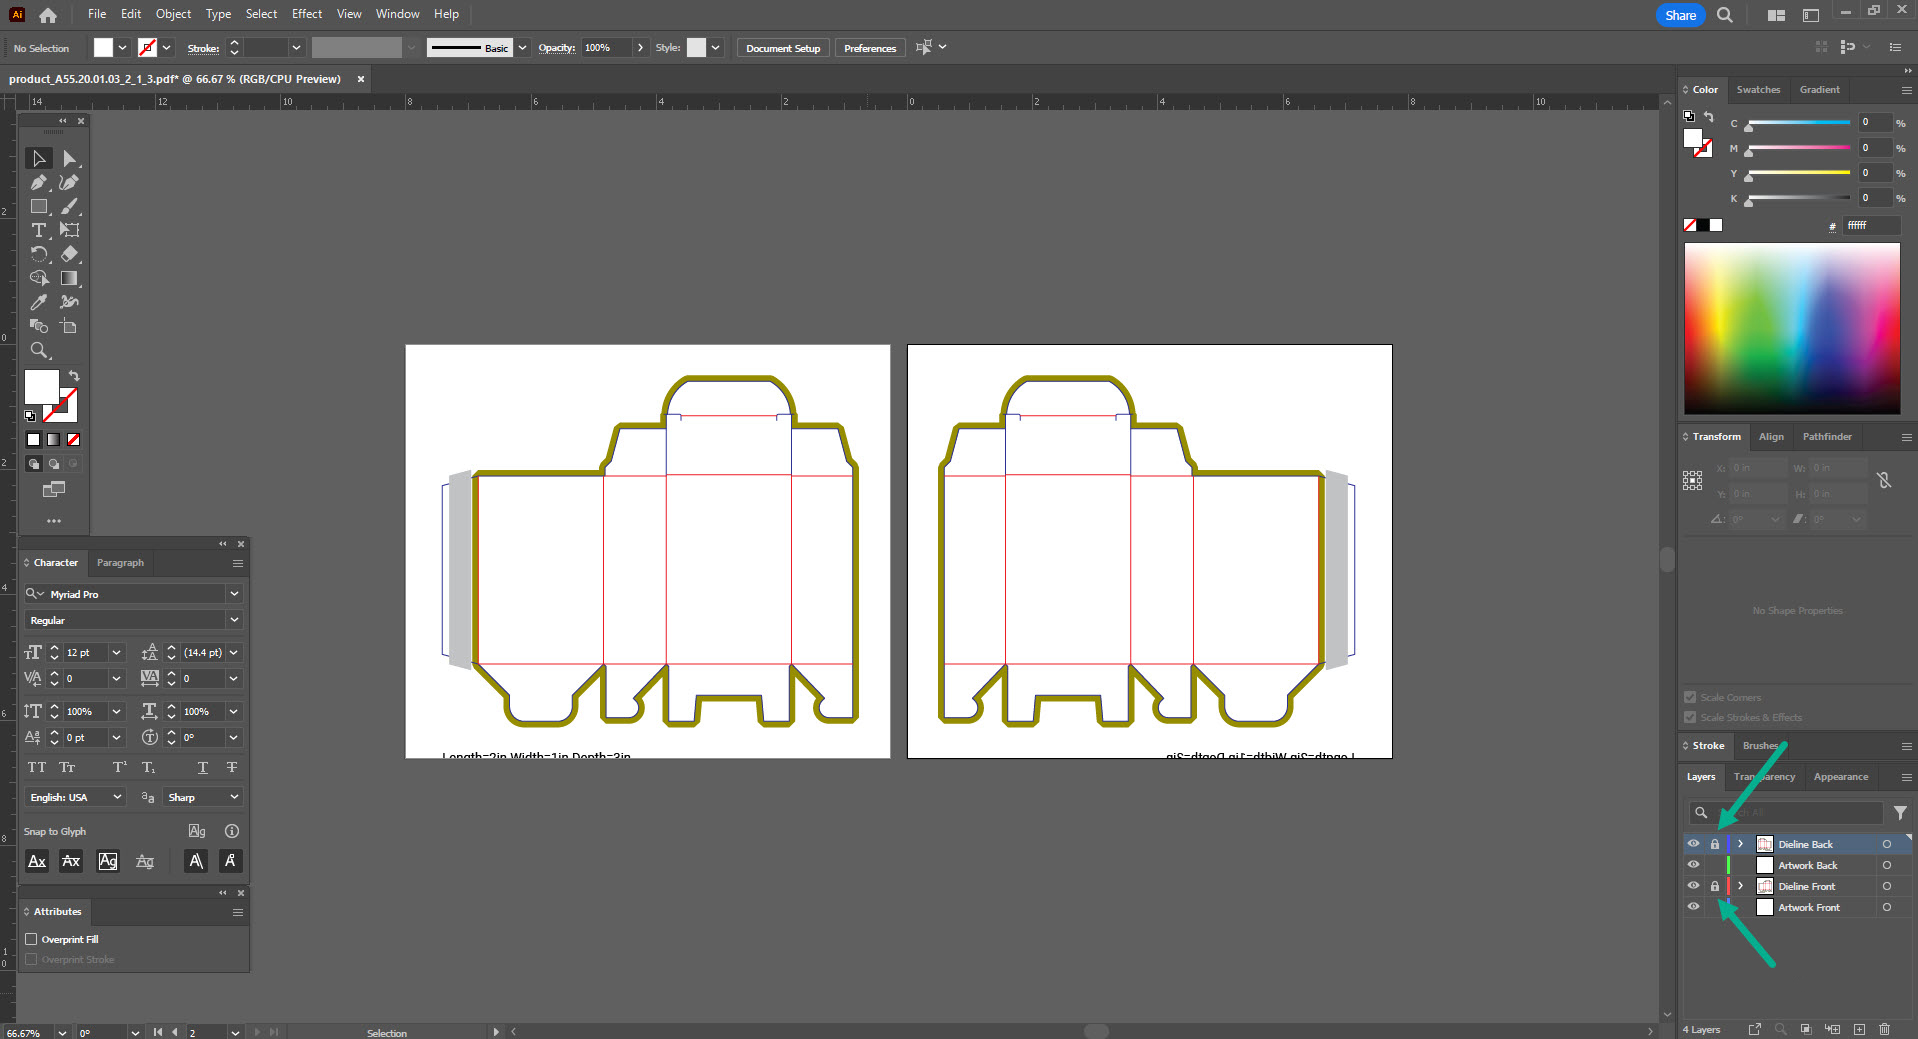
Make sure your front-side design and back-side design are on their designated layers.
You can lock the dieline layers so they don't get moved by accident.
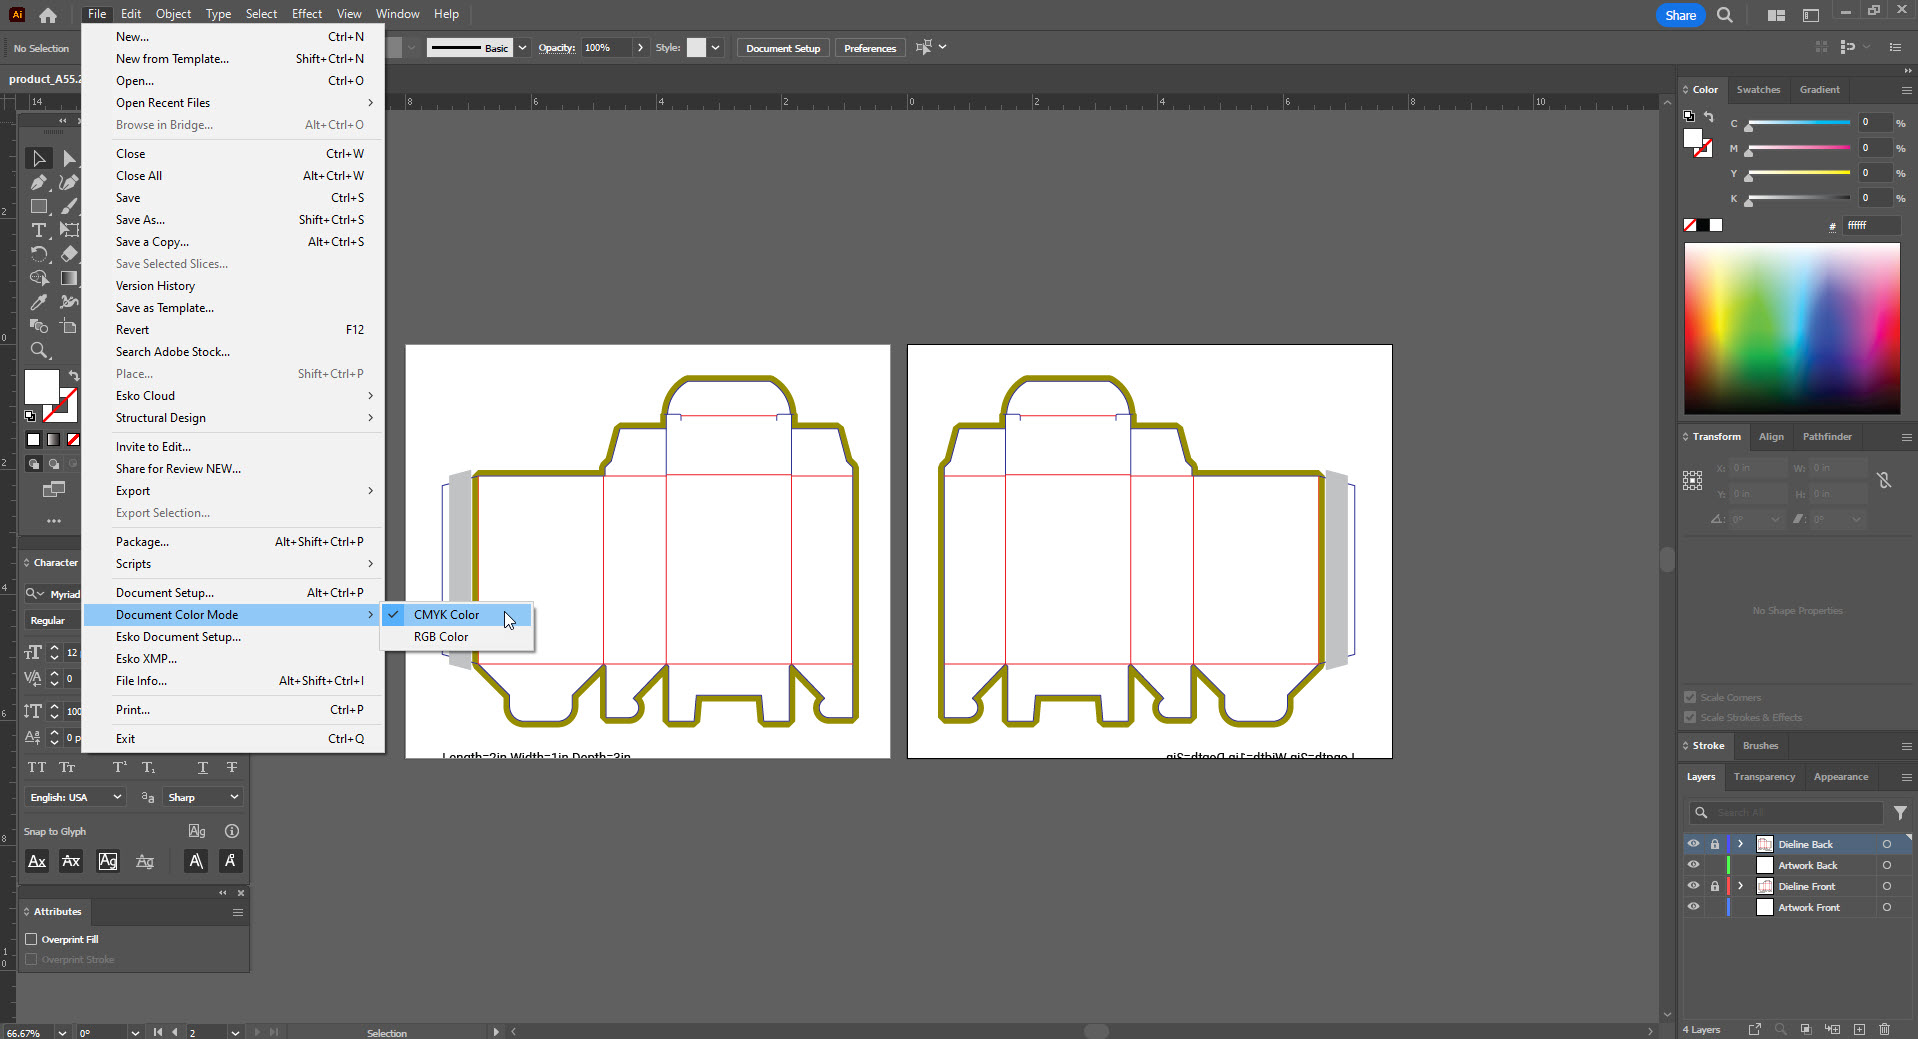
Before you start your design, make sure the color mode is set to CMYK.
In the main menu, go to File / Document Color Mode / CMYK Color.
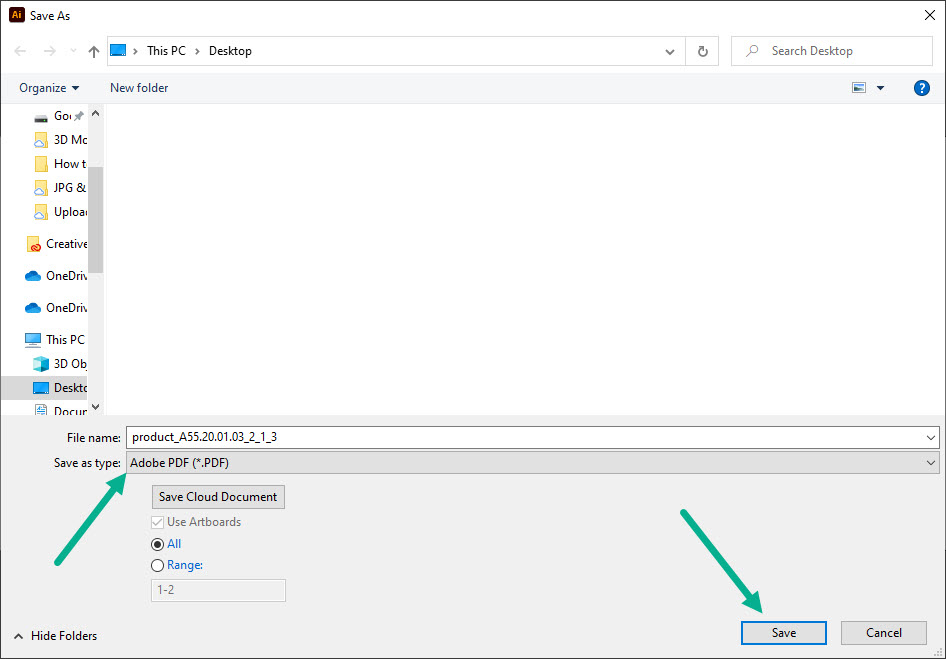
Step 5: How to save a print-ready PDF file
Once your design is finished, you need to export a print-ready PDF file:
1. In the main menu, go to File / Save As and choose 'Adobe PDF'. Then click 'Save'.
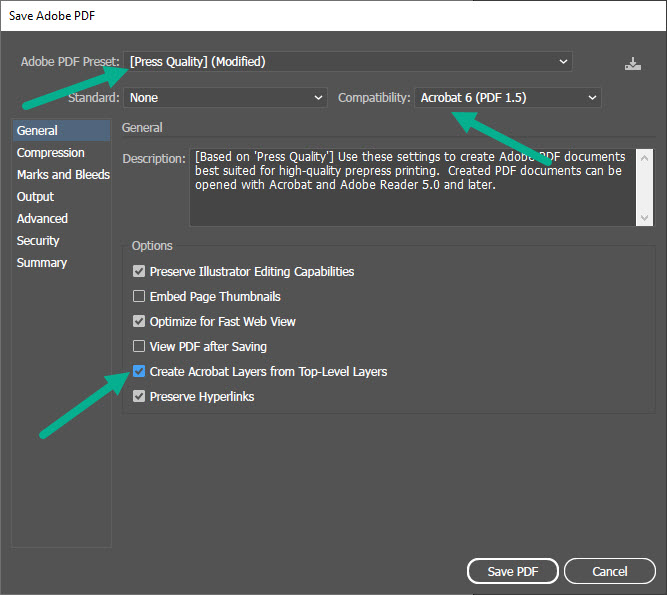
2. In the new dialog box, choose Press Quality PDF preset, set the Compatability to Acrobat 6, and then check Create Acrobat Layers from Top-Level Layers.
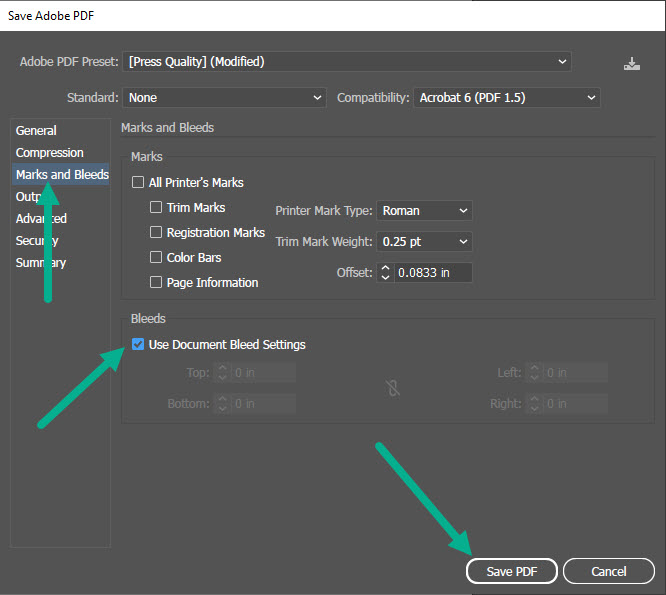
3. Click the Marks and Bleeds tab on the left side. Check Use Document Bleed Settings (make sure your design extends into the bleed area). Finally, click Save PDF.
Step 6: Review exported PDF
Open the exported PDF in Adobe Acrobat or Reader. Check both pages to make sure they are going as inverted / mirrored.