Language
 United States
Print-Ready 2025 Calendar Templates Are Here!
Explore Now
Add your logo and insert custom date information to create your perfect calendar today!
Artwork Dimensions and Margins
One of the first steps to properly creating a print-ready file is ensuring that the format of the file is correct. In this case “format” means making sure that the file has the correct width and height, as well as the correct bleed and safe margin allowances. Each of these will be explained in detail below.
Width and Height
Though it may seem simple, it can be difficult to determine what the proper width and height of the document should be. There are also several terms that get used to describe the width and height, which are defined below:
- Flat Size: This refers to the dimensions of a document after it has been printed and received any necessary trimming, but before it has been subject to any operations that further affect its size, such as folding. Flat Size is often used interchangeably with Trim Size. For documents that are not folded, the Flat Size is also the same as the Finished Size.
- Trim Size: This refers to the dimensions of a document after it has been printed and cut down to its desired width and height from a larger sheet, prior to any folding. Paper is trimmed to remove any excess around its perimeter or to separate pieces that have been printed as multiple images per sheet. Trim Size is the same as Flat Size. For documents that are not folded, the Trim Size is also the same as the Finished Size.
- Finished Size: This term refers to the dimensions of a printed document in its final form. It is equal to the Flat Size or Trim Size of an unfolded document and the Folded Size of a folded document.
- Folded Size: This refers to the dimensions of a document after it has been folded.
- Page Size: This refers to the dimensions of the pages in a book or other bound document when complete, folded, and closed. In fact, the size of most books is conveyed by the page size.
When designing a file for print, there are a few rules of thumb that can be helpful in deciding the size that the design document should be set up as.
- Folded Pieces: This includes brochures, greeting cards, and presentation folders. These items should be designed using the FLAT/TRIM (Unfolded) size. For example, the flat size of a standard 9”x12” presentation folder with 4” pockets would be 18” by 16”, (9x2=18 by 12+4=16).
- Flat Pieces: This applies to any piece that will not be folded or bound in any way, and includes postcards, posters, flyers, business cards, and door hangers, to name a few. These items should be set up using the FLAT/TRIM size.
- Multipage/Bound Pieces: Saddle stitch books, Wiro books, Spiral books, and Perfect-Bound books all use the same PAGE/FOLDED size as the proper size to set up the design file.
See the “Document Set-Up” page for more information on how to set the document size in InDesign, Illustrator, or Photoshop.
Bleed
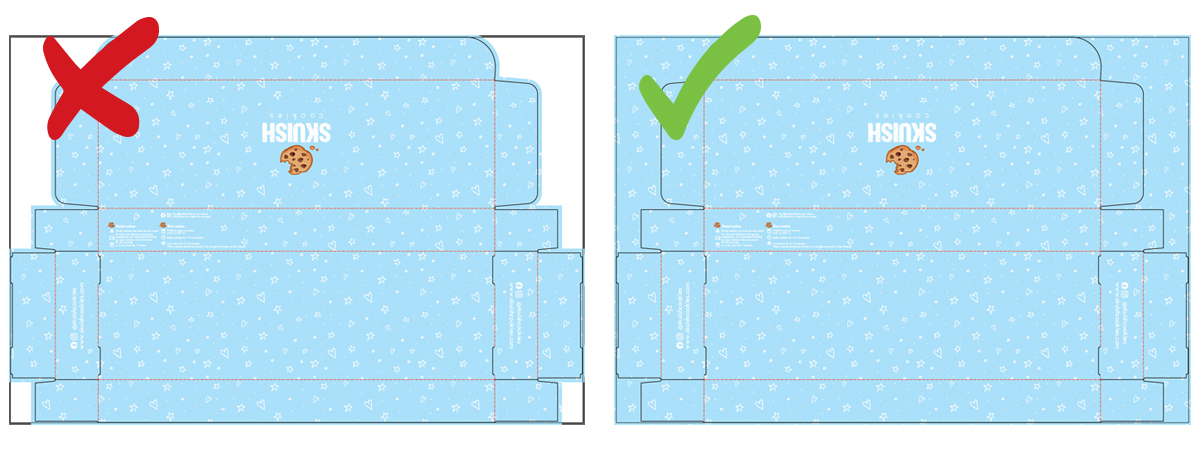
It is very difficult to print exactly to the edge of a sheet of paper/card, so to achieve this, it is necessary to print a slightly larger area than is needed and then trim the paper/card down to the required finished size. Images, background images and fills that are intended to extend to the edge of the page must be extended beyond the trim line to give what is referred to as bleed.
Bleed is printing that goes beyond the edge of where the sheet will be trimmed and gives the cutter operator a small amount of space to account for movement of the paper and design inconsistencies. Artwork and background colours must extend into the bleed area if the intent is for these elements to go right to the edge of the final printed, trimmed piece. After trimming, the bleed ensures that no white unprinted edges occur in the final trimmed document.
The bleed guidelines are as follows:
- Flat Products, Folded Products, Multipage/Bound Products: These items require a minimum of .125” (⅛”) on each edge
- Large Format Products, Banner Products, Signage: These items require a minimum of .5” (½”) on each edge
See the “Document Set-Up” page for more information on how to set the document bleed in InDesign, Illustrator, or Photoshop.
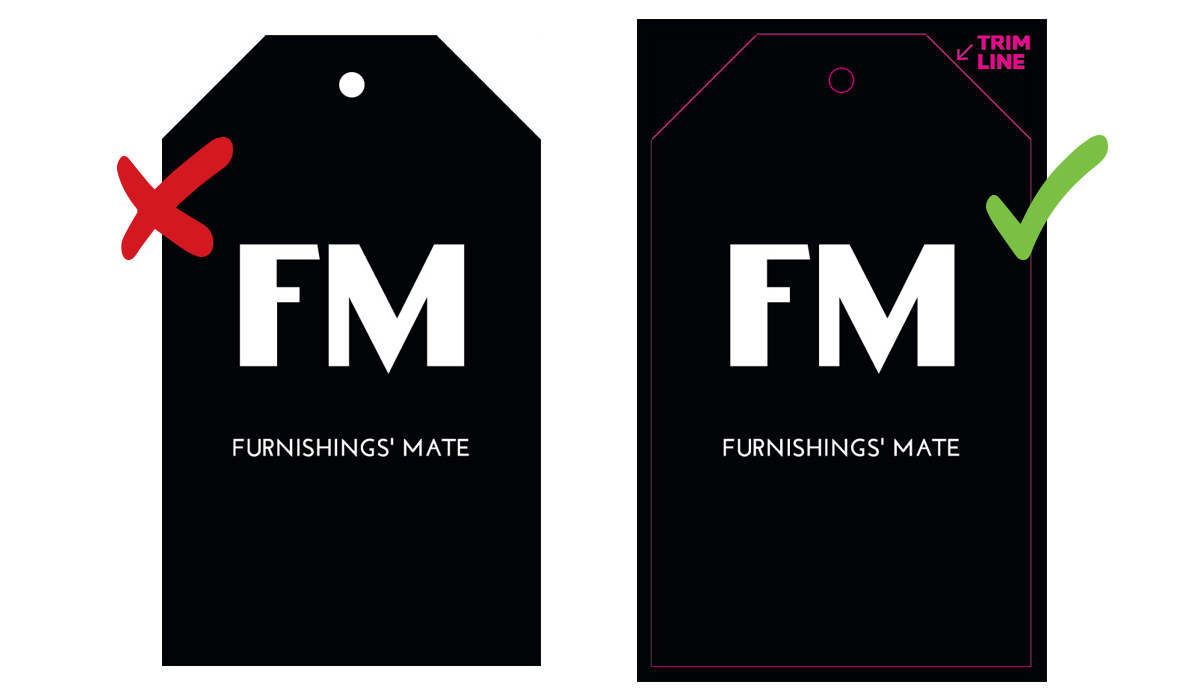
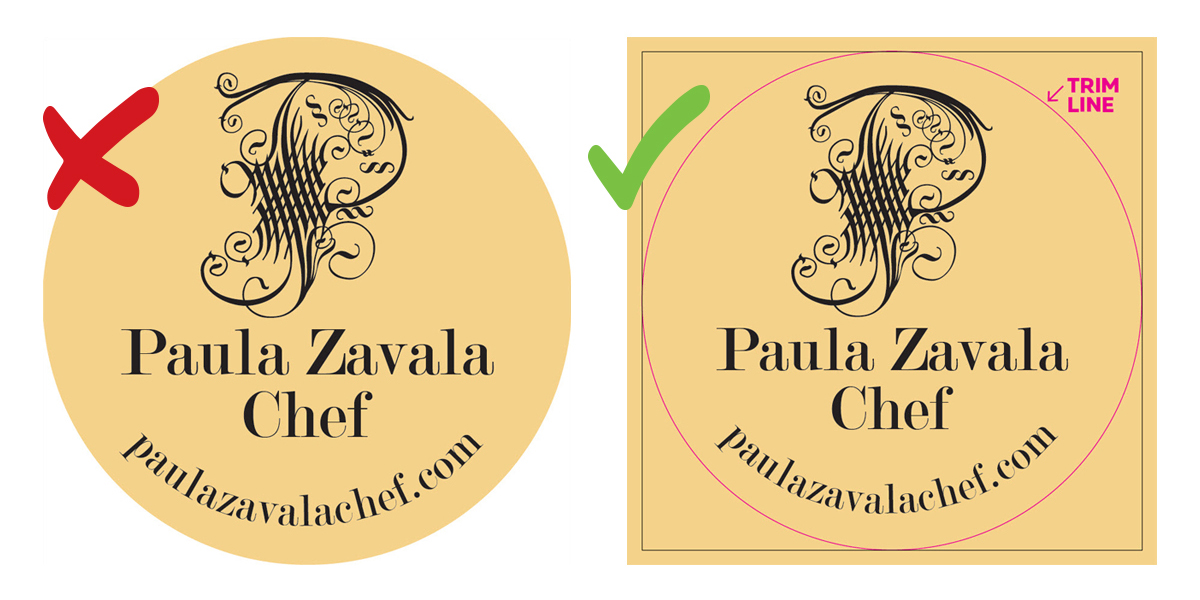
Bleed for Custom-Shaped Products
When creating print-ready files for custom-shaped products, such as boxes, hang tags, labels etc., it is important to extend the background elements across the entire artboard. Do not trim the bleed to the final product shape.
Safe Margin
A safe margin can be considered in some respects to be the opposite of bleed. WIth bleed, elements must extend a proscribed distance past the cut. With a safe margin, elements must be placed a minimum distance away from the trim. This is to ensure that any important elements such as text, titles, images, or logos do not get cut off when the final piece is trimmed. This safe margin also serves a design function, as it ensures that there is a pleasing amount of space between the edge and any elements.
As with the other topics of this article, the recommended safe margin varies depending on the product ordered:
- Flat Pieces: Items that will not be folded or bound should have a safe margin of .125” (⅛”) from the edge of the piece for sizes below 11”x17”, and .25” (¼”) for sizes over 11”x17”
- Folded Pieces: Bound or folded pieces should also have a safe margin of .125” (⅛”) from the edge, and .25” (¼”) for sizes over 11”x17”, but in addition should allow the same amount of margin from any folds
- Large Format, Banner, Signage Pieces: These items, in general, should allow a minimum of .5” (½”) of safe margin from the edge. These products need more margin than other items as large format substrates tend to stretch more when being cut. In addition, there are some considerations for specific products and/or finishing operations:
- Roll-Up Banner Stands: A minimum of 6” of margin should be left from the bottom of the banner. This is to ensure that no important elements become obscured by the bottom of the stand. As well, it is more aesthetically pleasing if important elements are not set too low on the banner, which can be difficult to read.
- Pole Pockets: A minimum of the size of the pole pocket + 2” should be allowed on any edge that will have the pockets, to ensure that no important elements end up wrapped around the pole.
- Hems/Grommets: A minimum of 2” should be allowed on all edges to make sure no elements are impacted by either the hems or the grommets
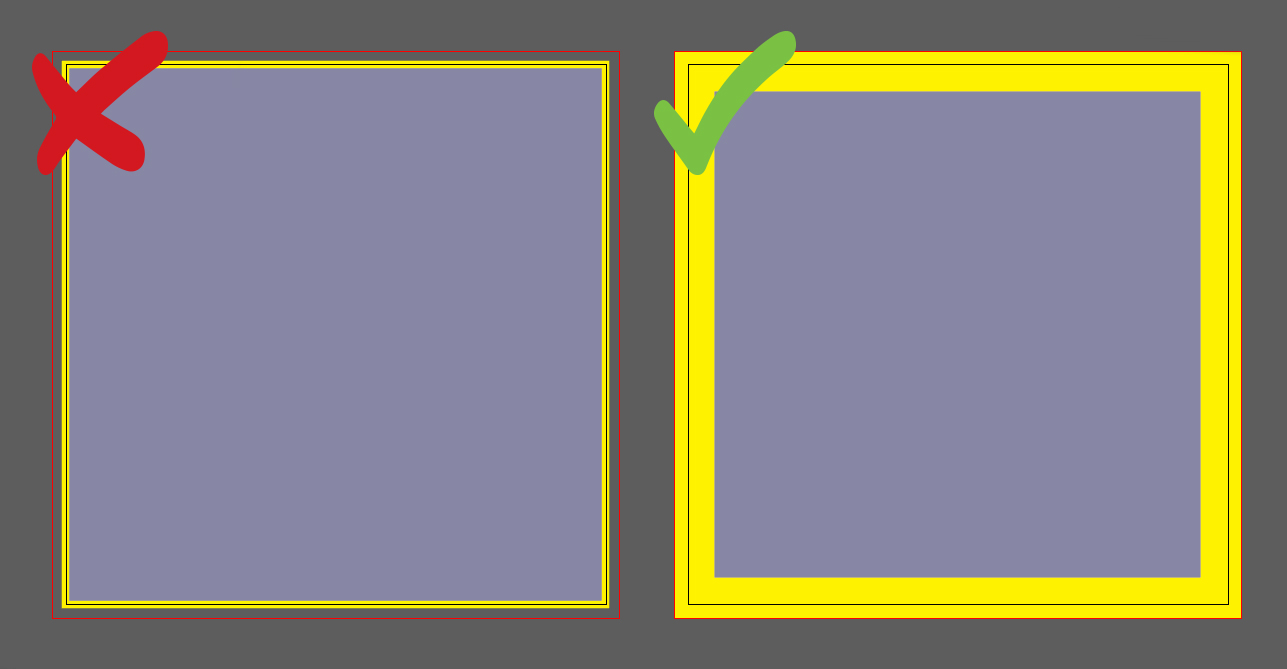
Borders
When designing a piece that will have a border, similar considerations to the concept of a safe margin should be taken into account. As mentioned in the discussion of bleed, the cutting process requires a margin as it is very difficult to cut in exactly the same place every single time. This could lead to a border being uneven or getting cut off completely if it is very thin.
Therefore, it is recommended to avoid designs with borders that go right to the edge (borders that do not go to the edge would be subject to the Safe Margin guidelines). However, if the design must have a border, the following values should be observed:
- Flat Items: Borders should be a minimum of .125” (⅛”) thick for sizes below 11”x17” and .25” (¼”) for sizes over 11”x17”
- Folded Items: Borders should be a minimum of .125” (⅛”) thick for sizes below 11”x17” and .25” (¼”) for sizes over 11”x17”. If there are borders around each panel of the folded piece, then the same amount of margin should be allowed from any folds
Large Format, Banner, Signage Products: Due to the stretchability of the various large format substrates, borders should be a minimum of 2” thick.